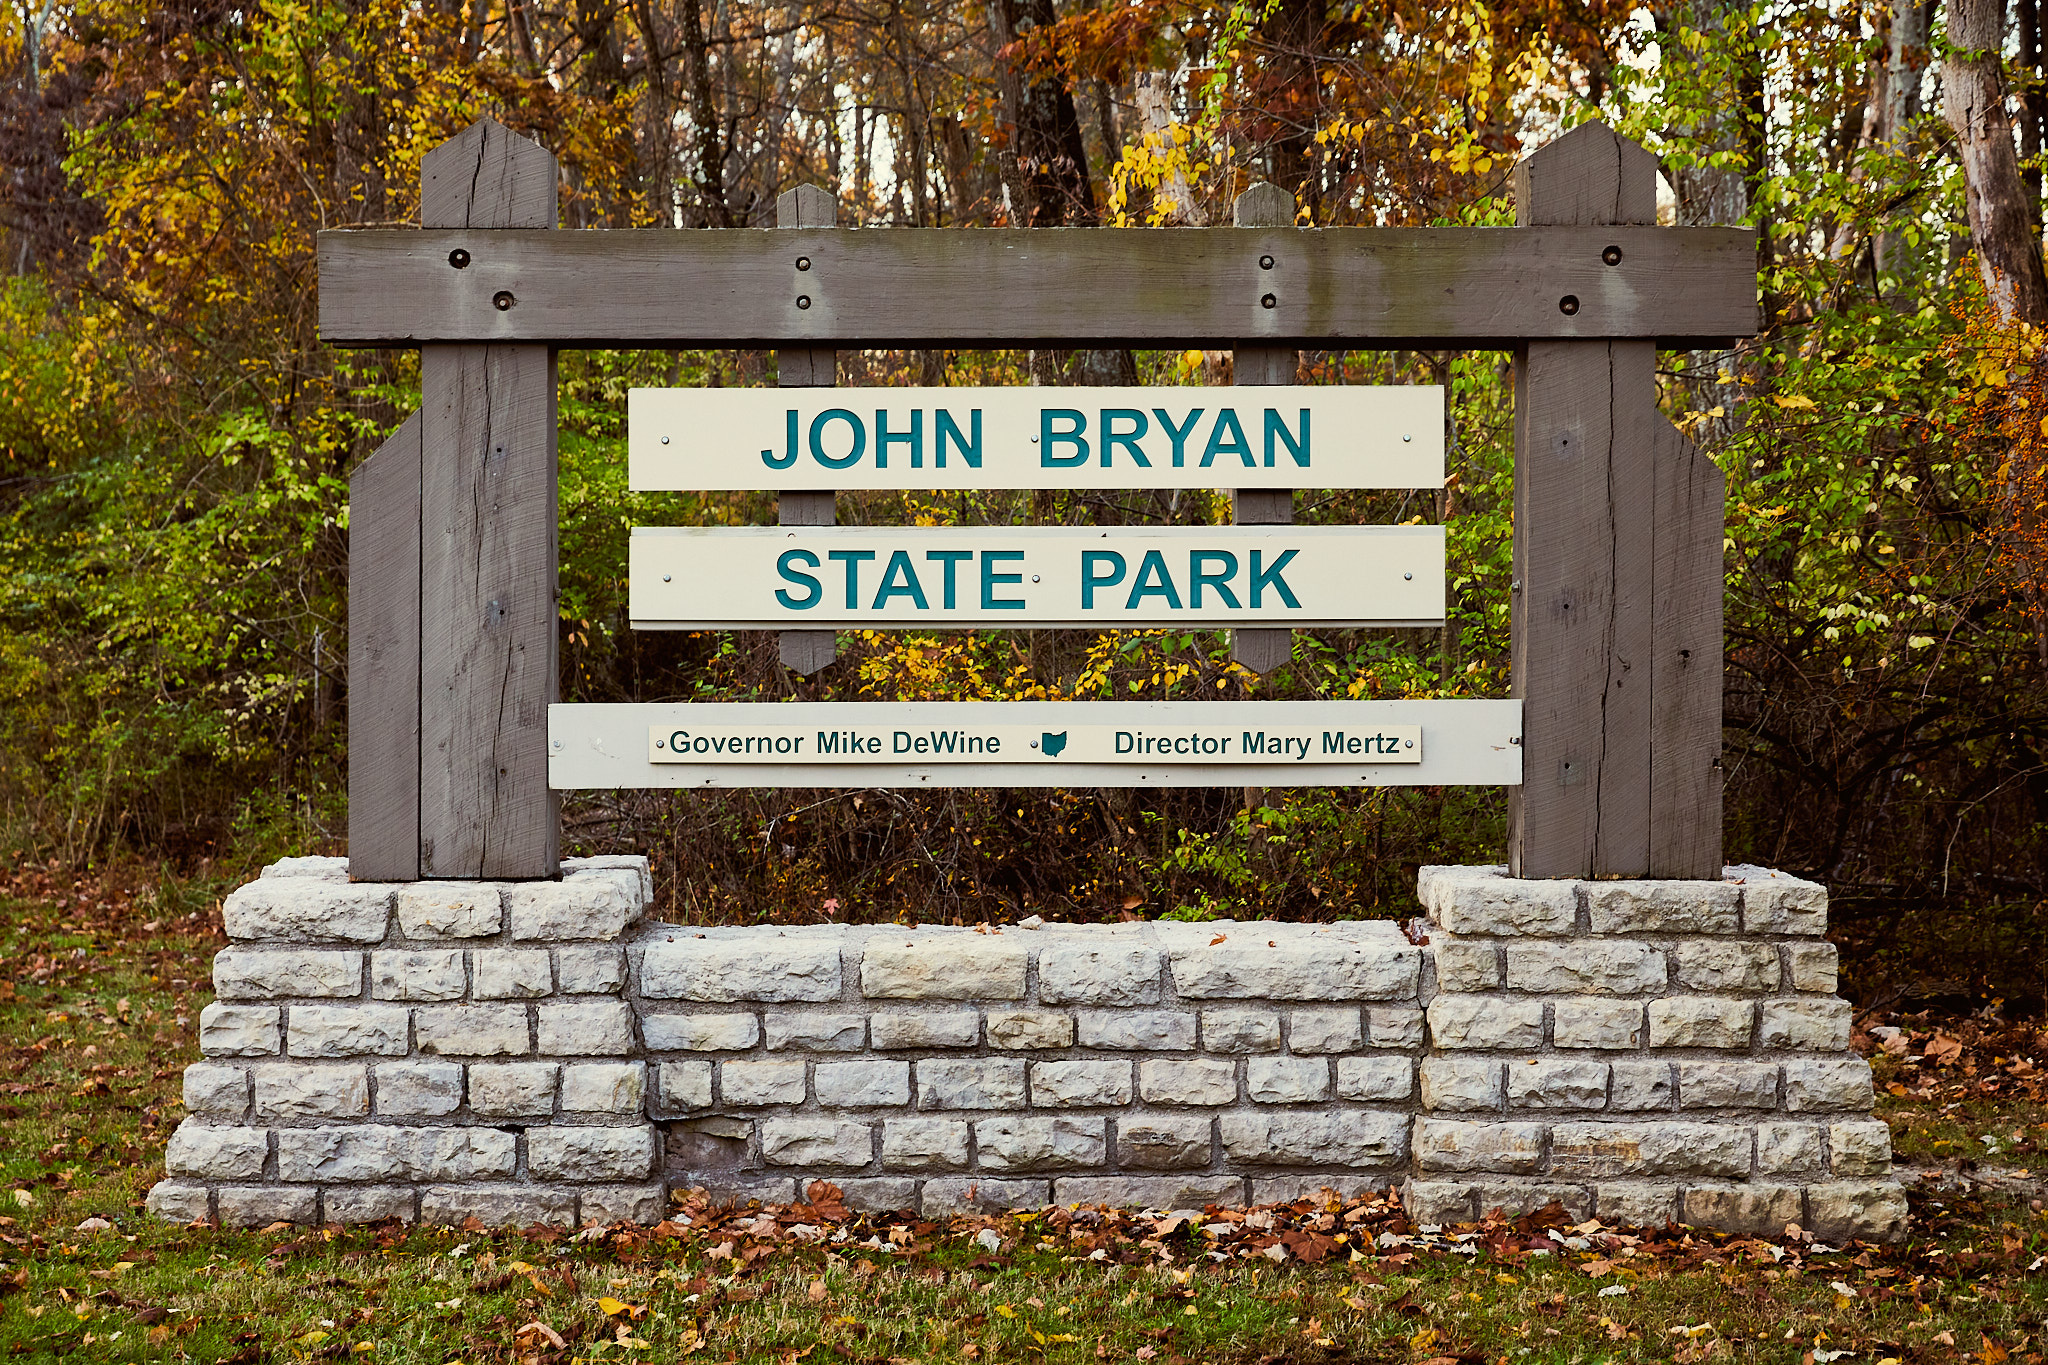
John Bryan State Park. Yellow Springs, Ohio – A Guide.


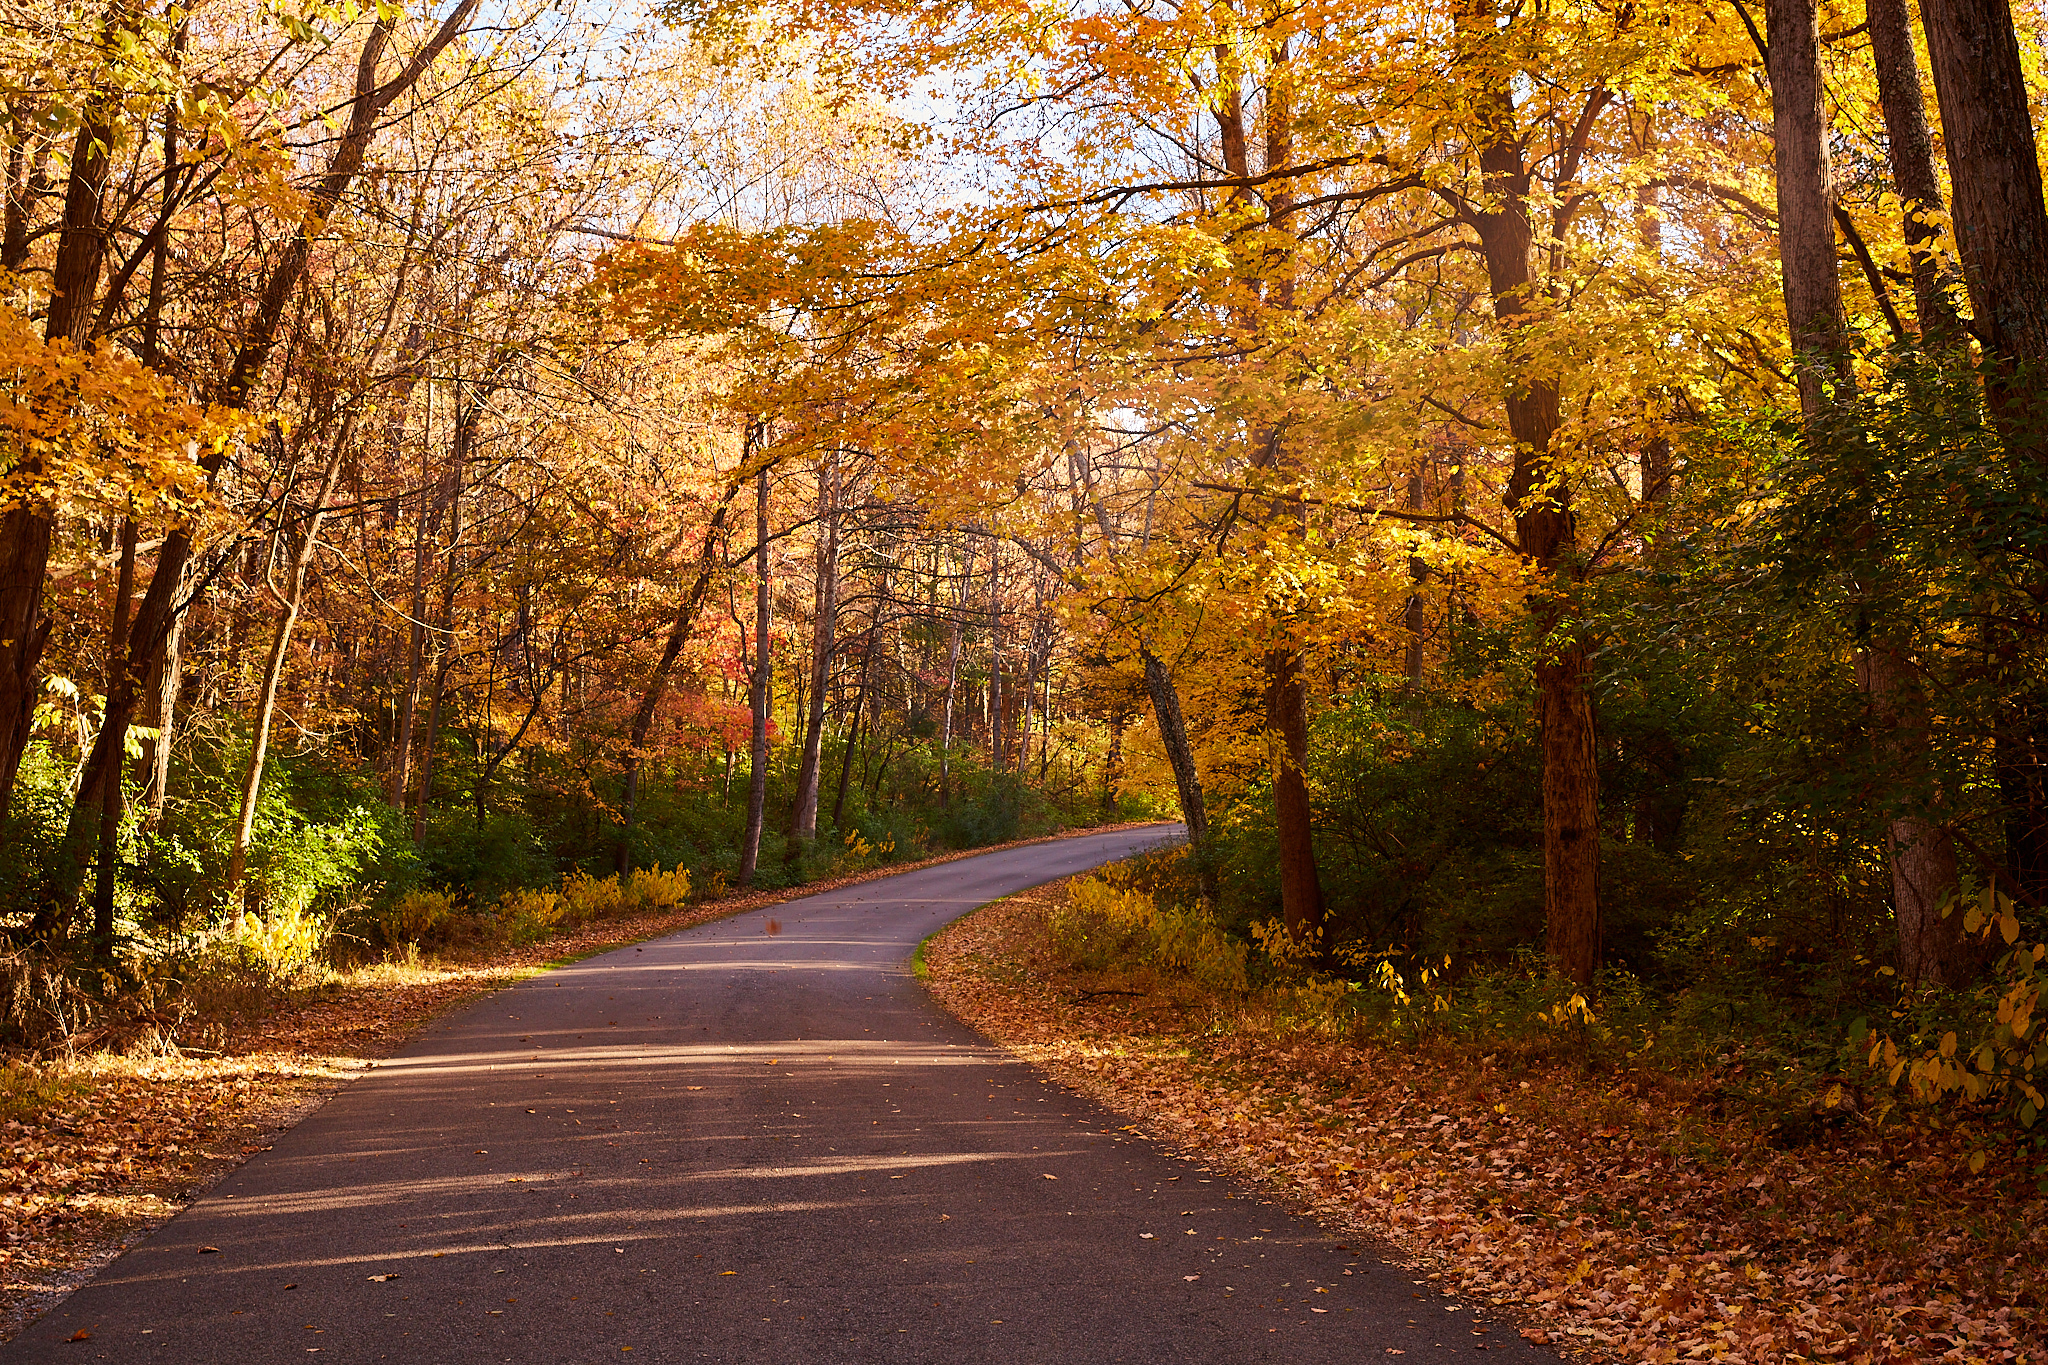
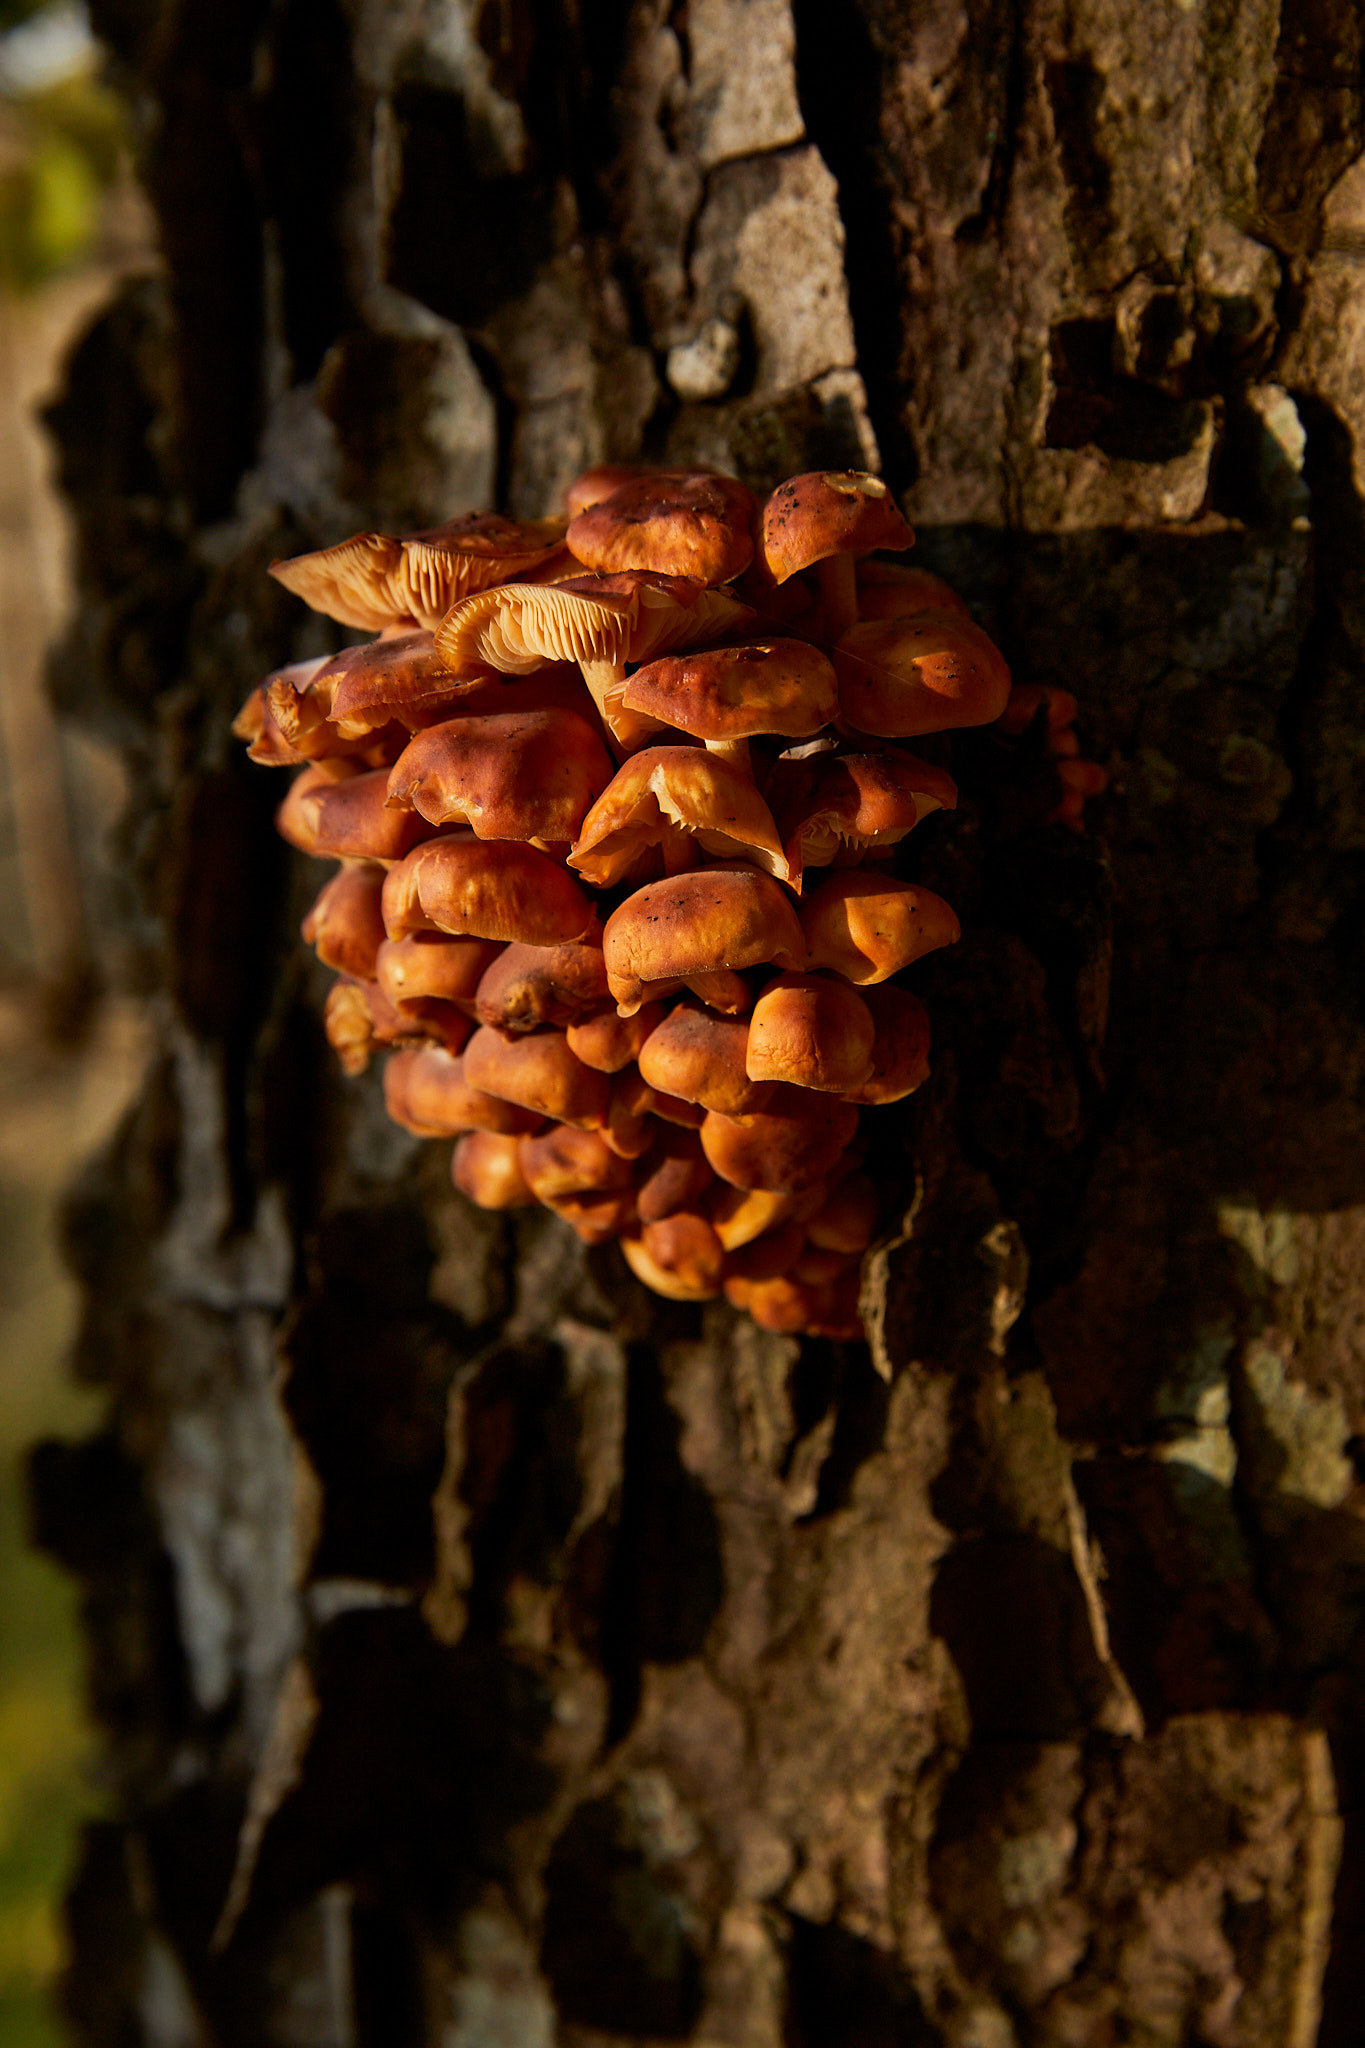
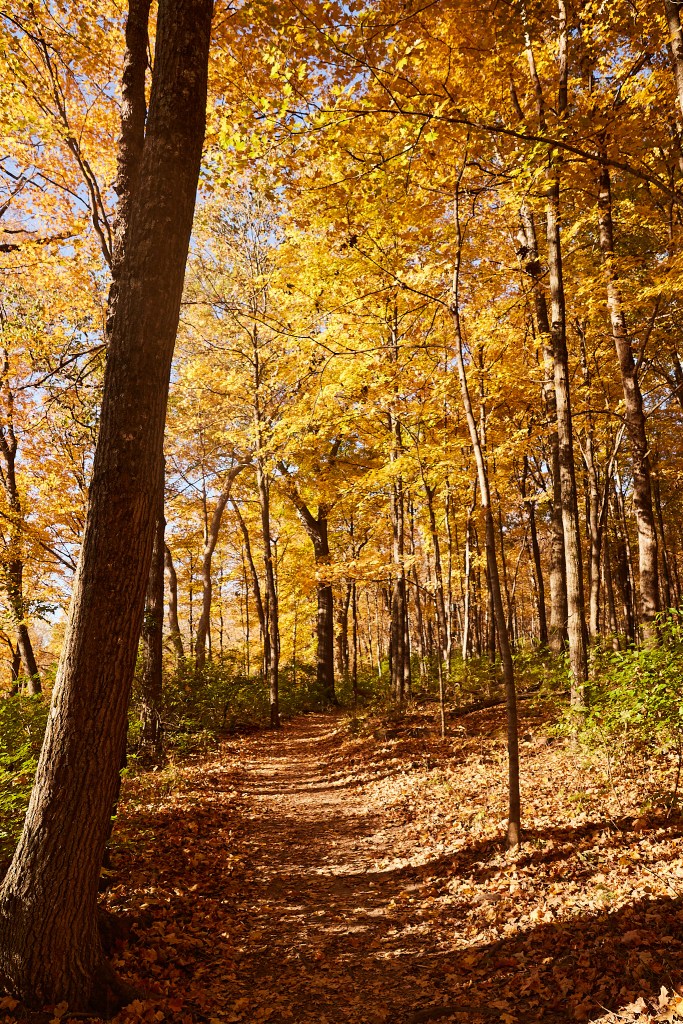
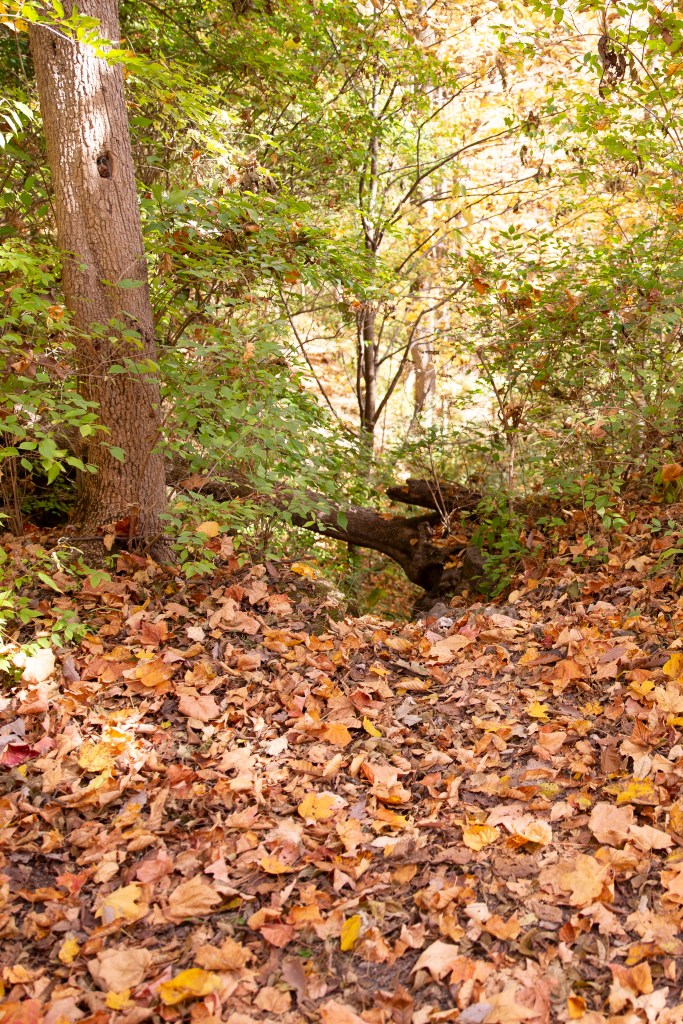
Crisp mornings peppered with the hues of autumn and ripe with the smell of black walnut. The primal, staccato call of the Pileated woodpecker echoing among the trees. This is the season of foraging mushrooms and giant puffballs. Leaves underfoot announcing my arrival along the short approach to the crag. White-tail deer cross the trail having been alerted by my footsteps. My bag is heavy with gear, food, first aid, and water, as it always seems to be on days of crag research and rope skills practice.

Although there is no lead climbing or bouldering currently allowed at John Bryan, I brought trad gear just in case there were some good cracks close to the ground where I could practice building gear anchors.
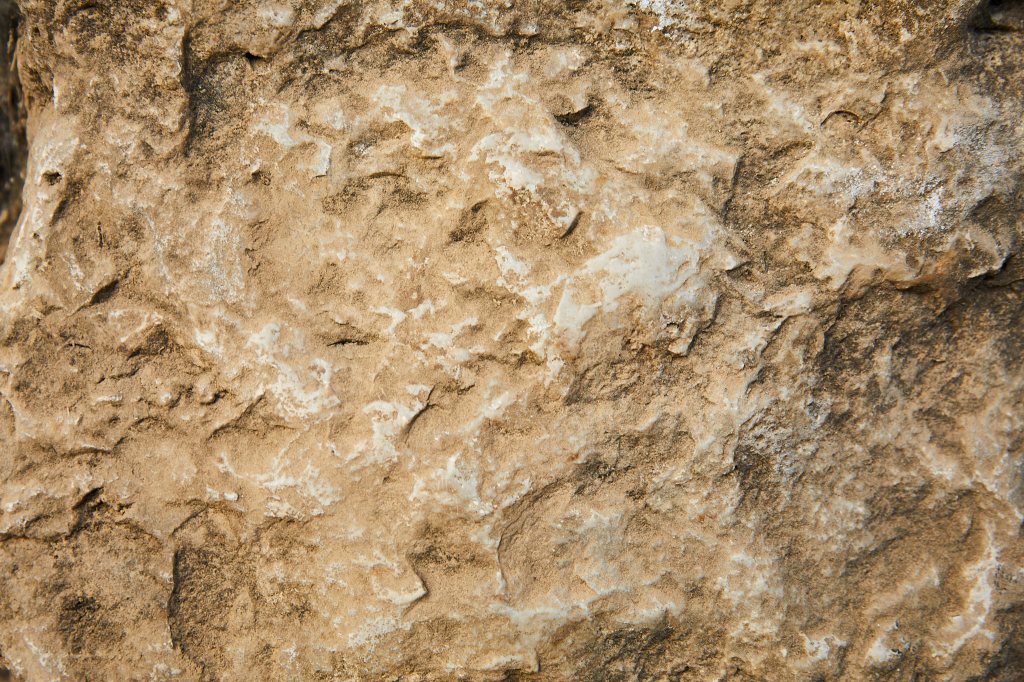
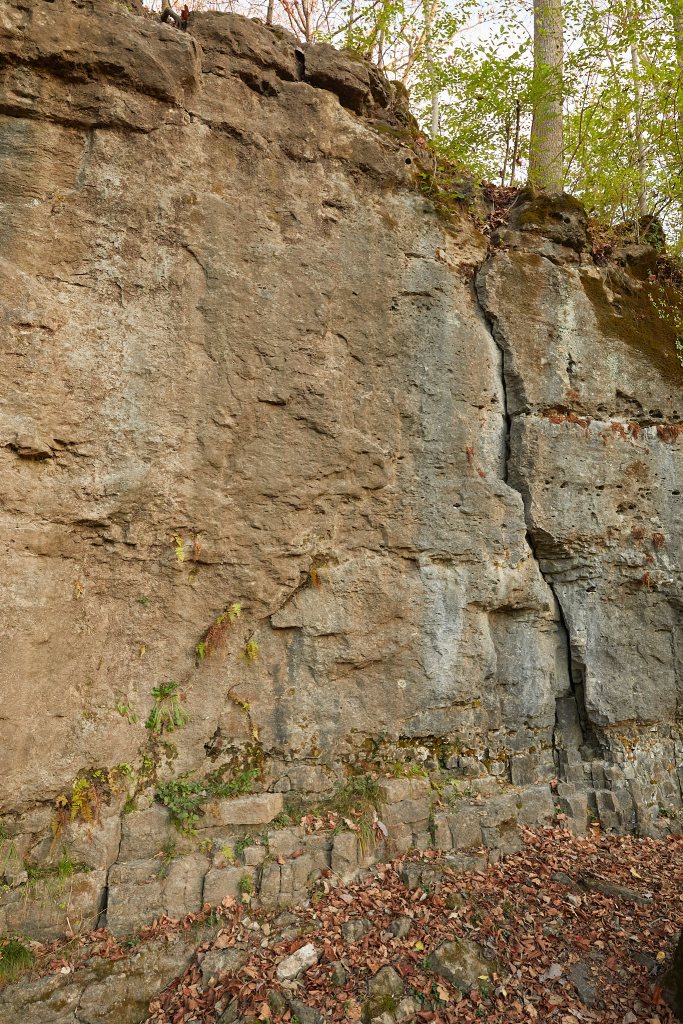
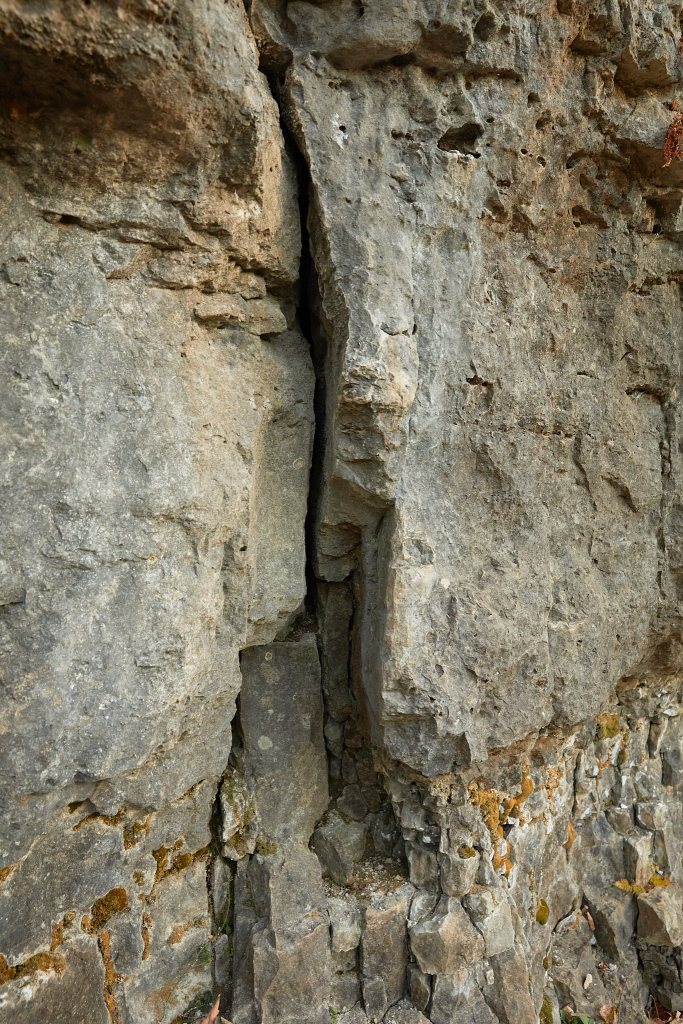
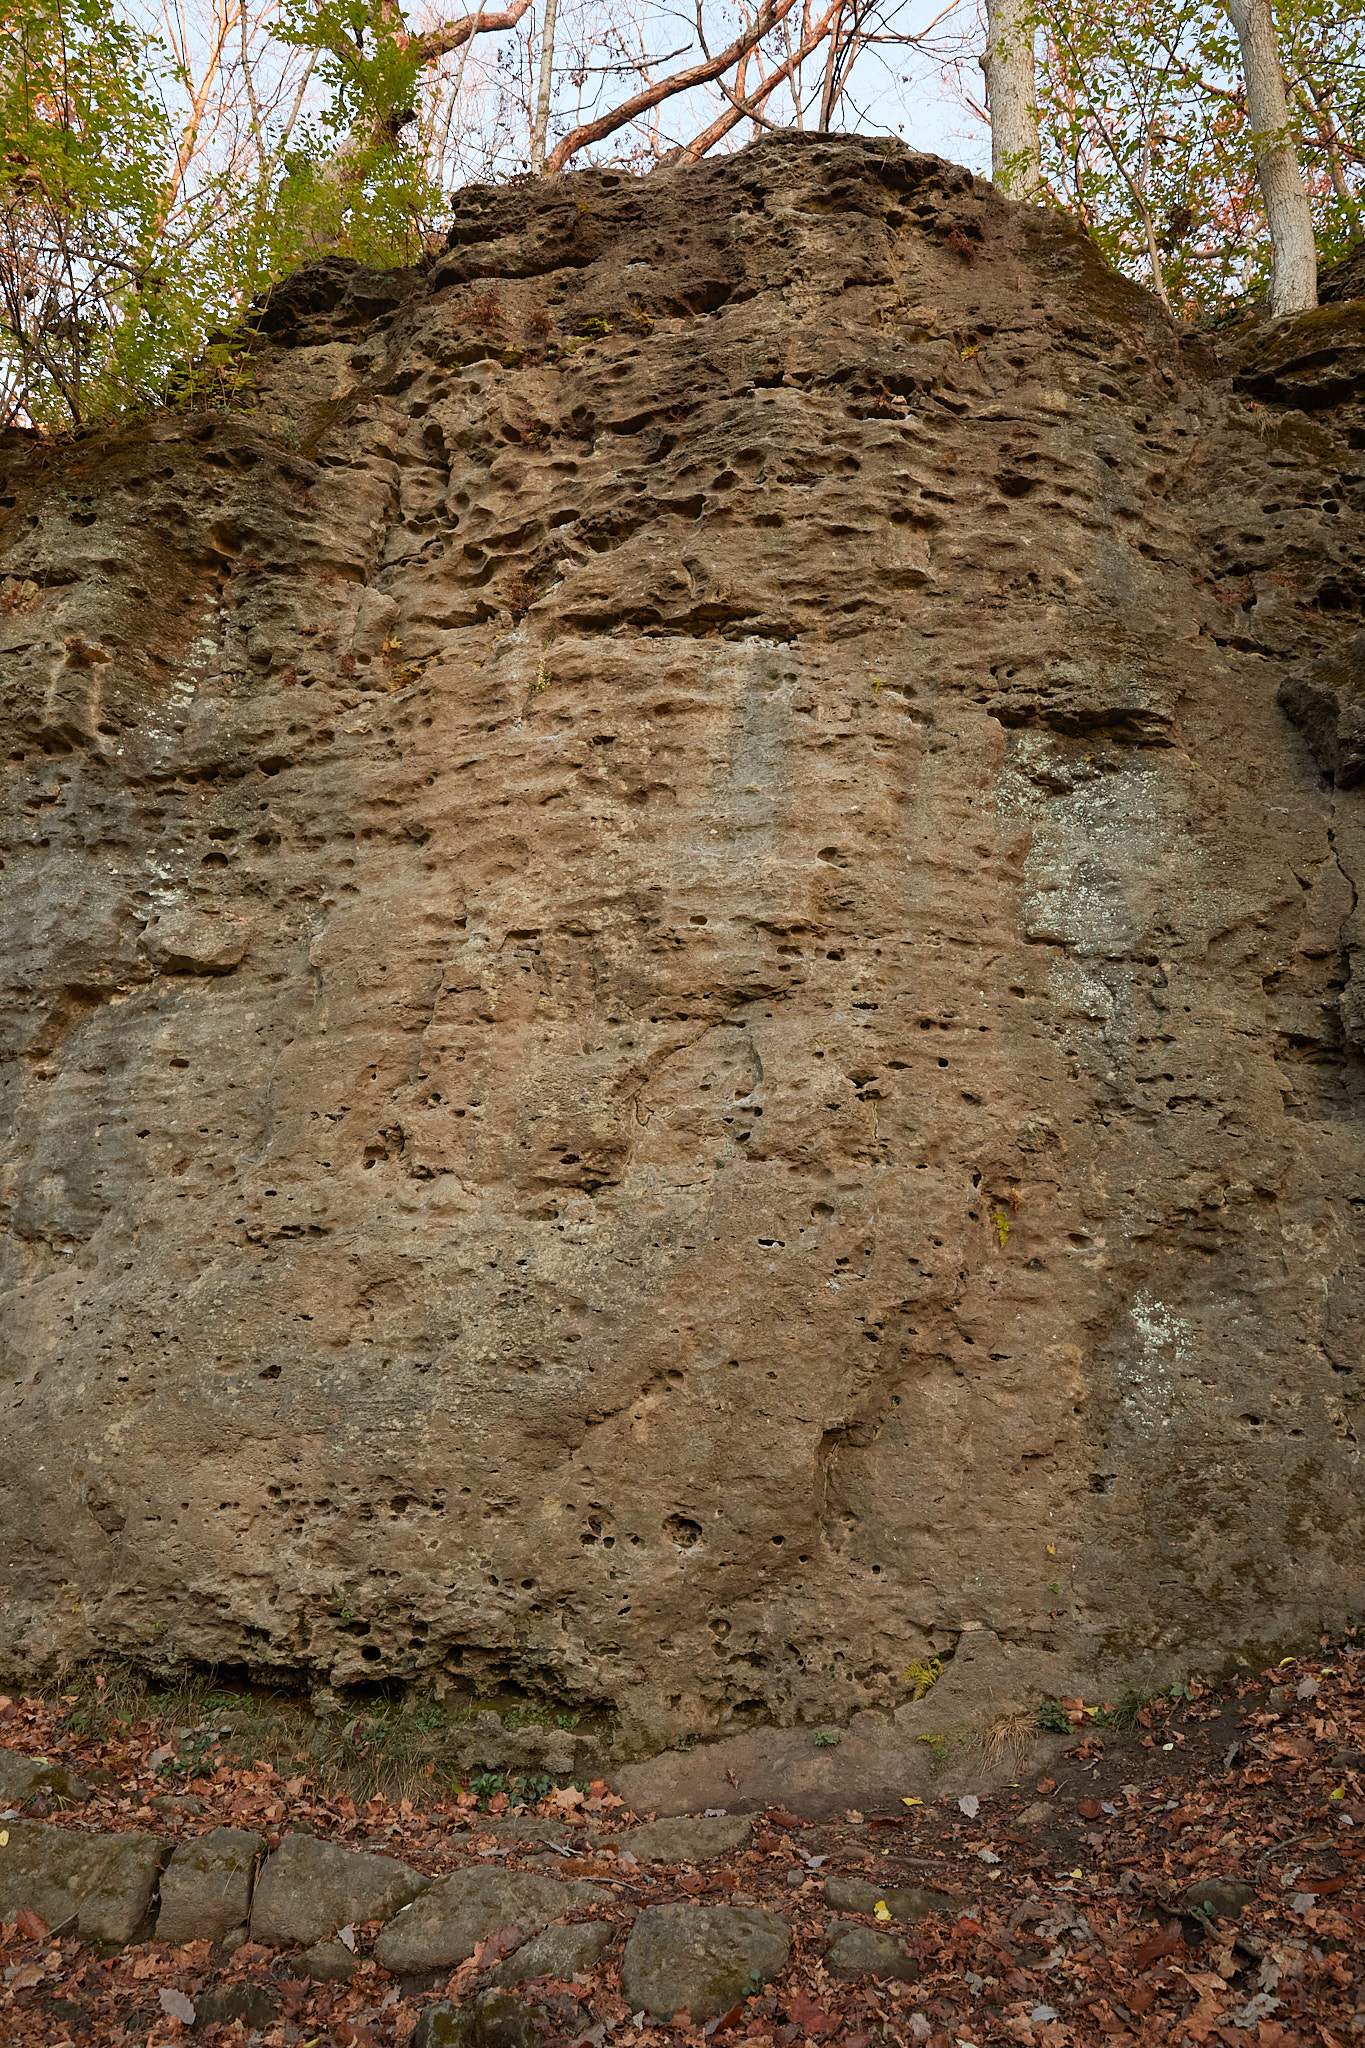
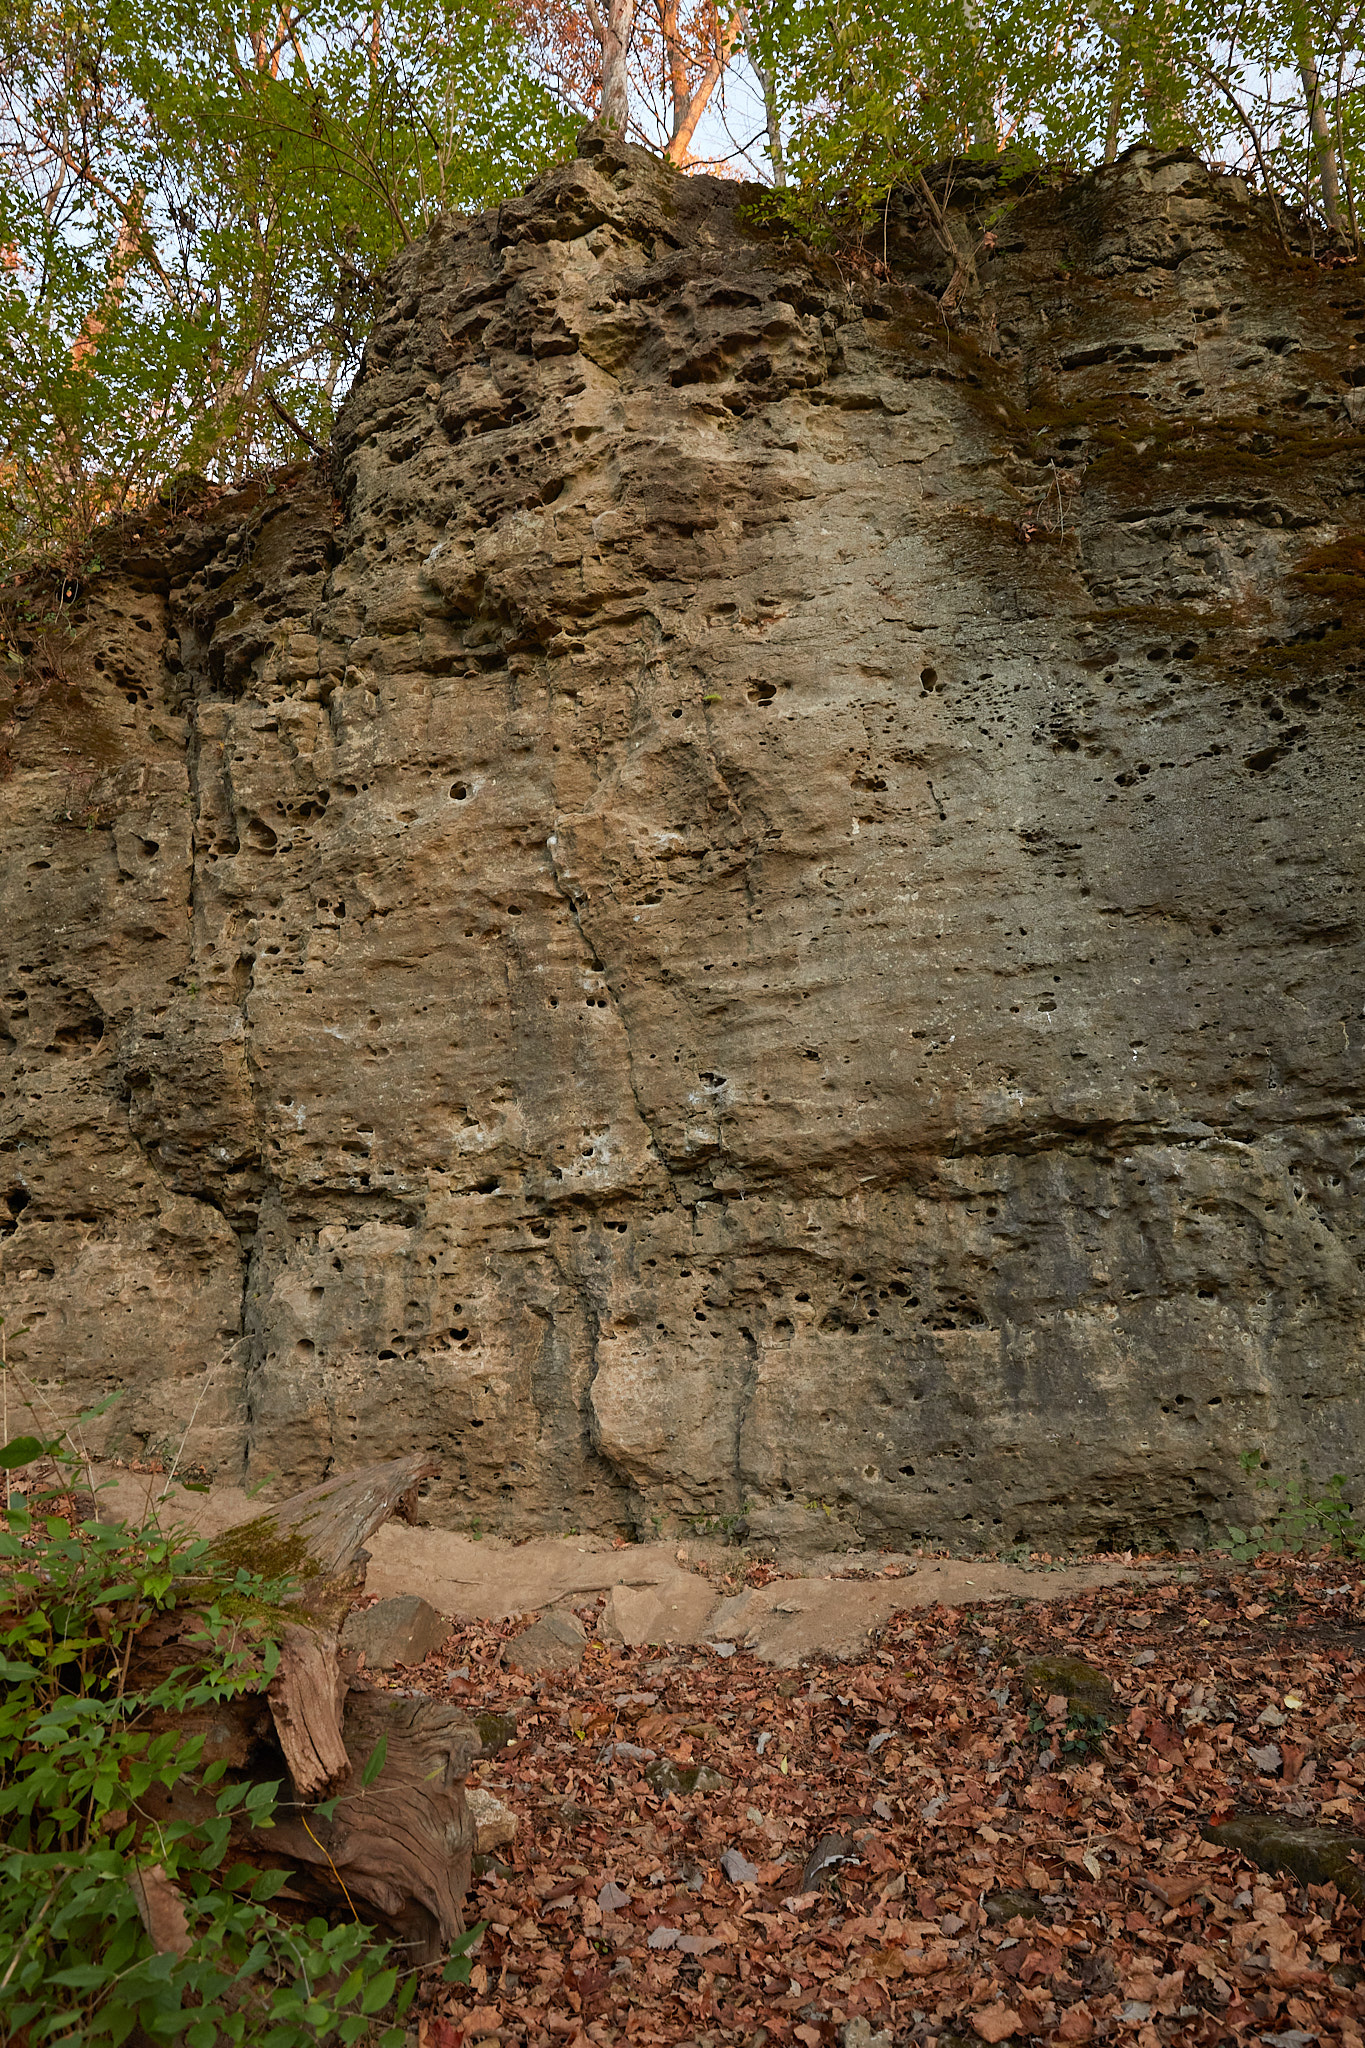
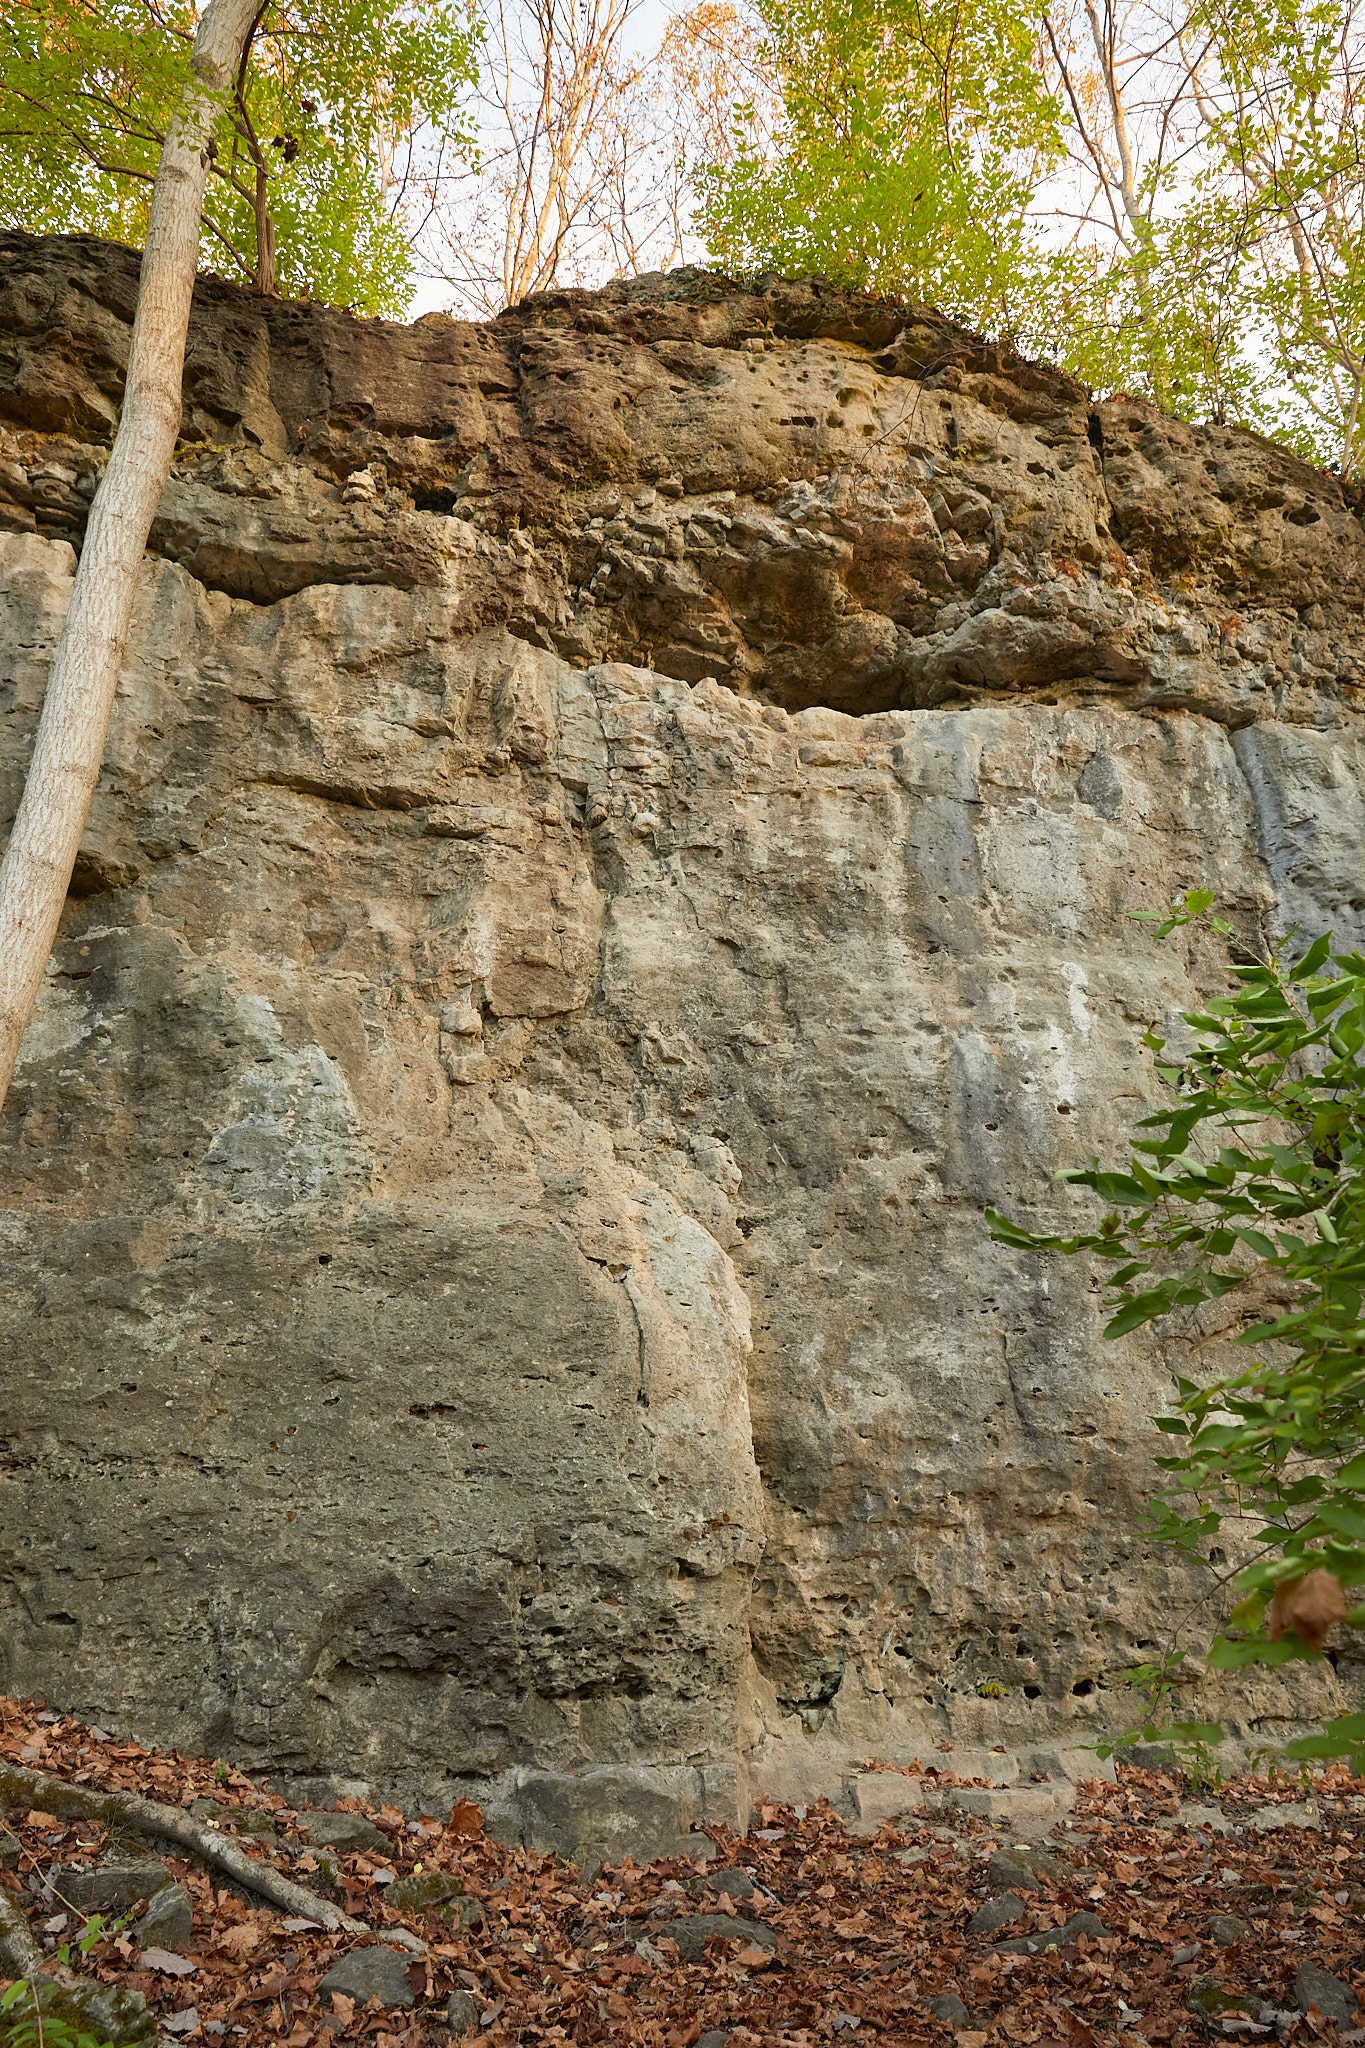
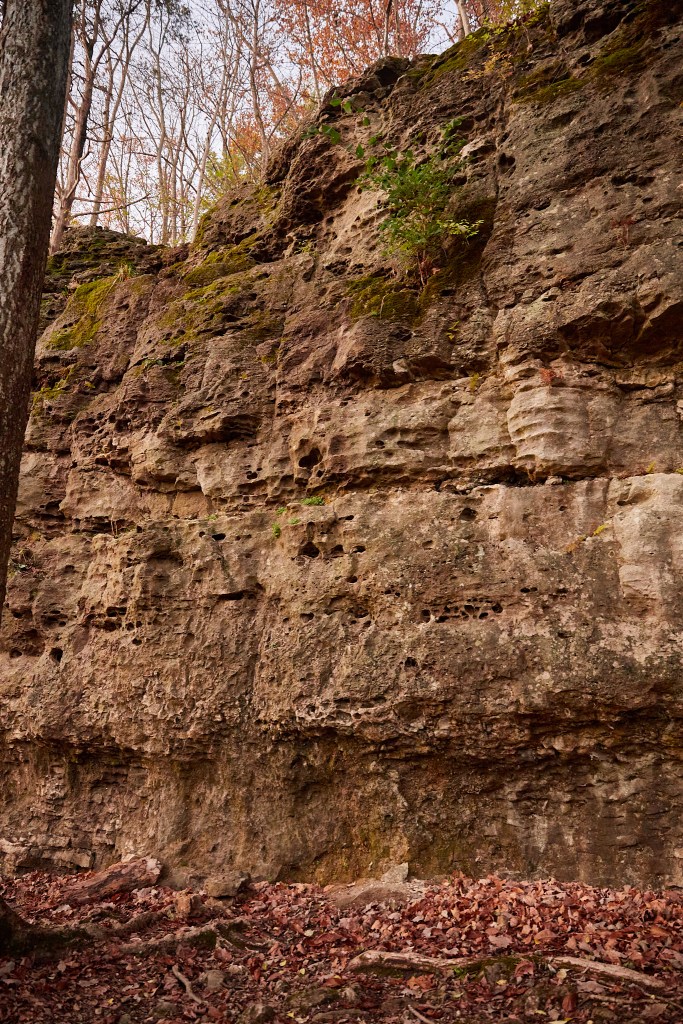
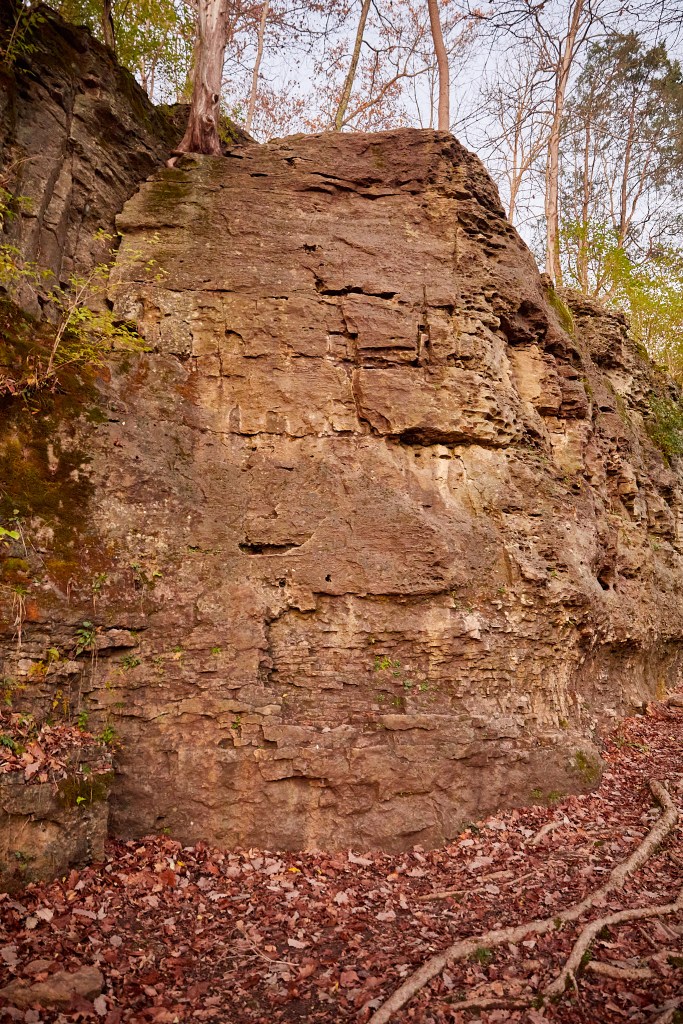
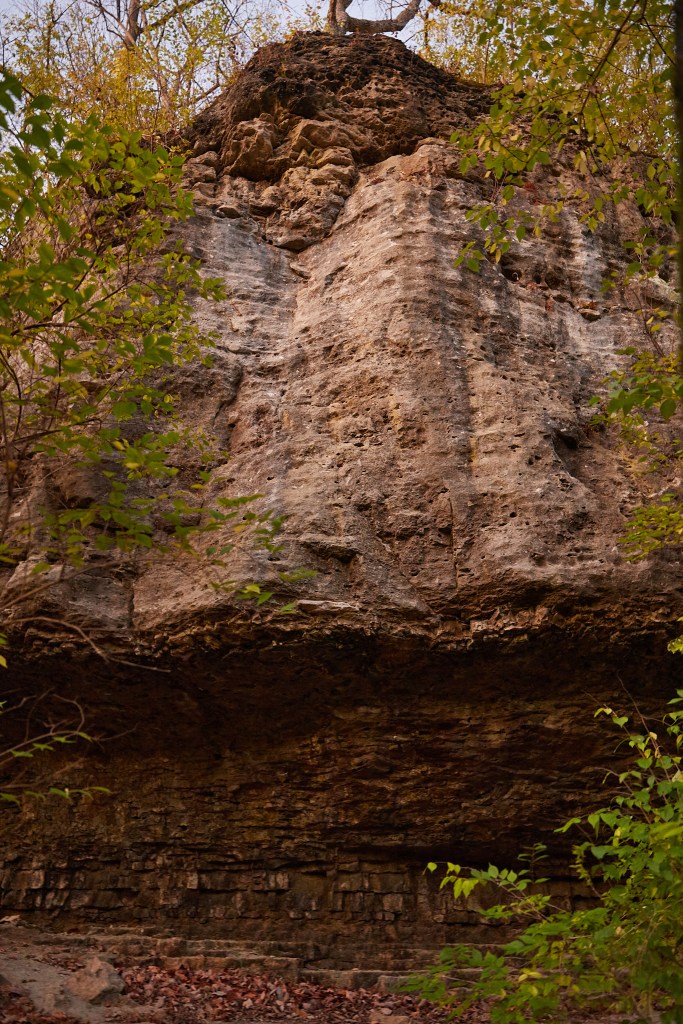
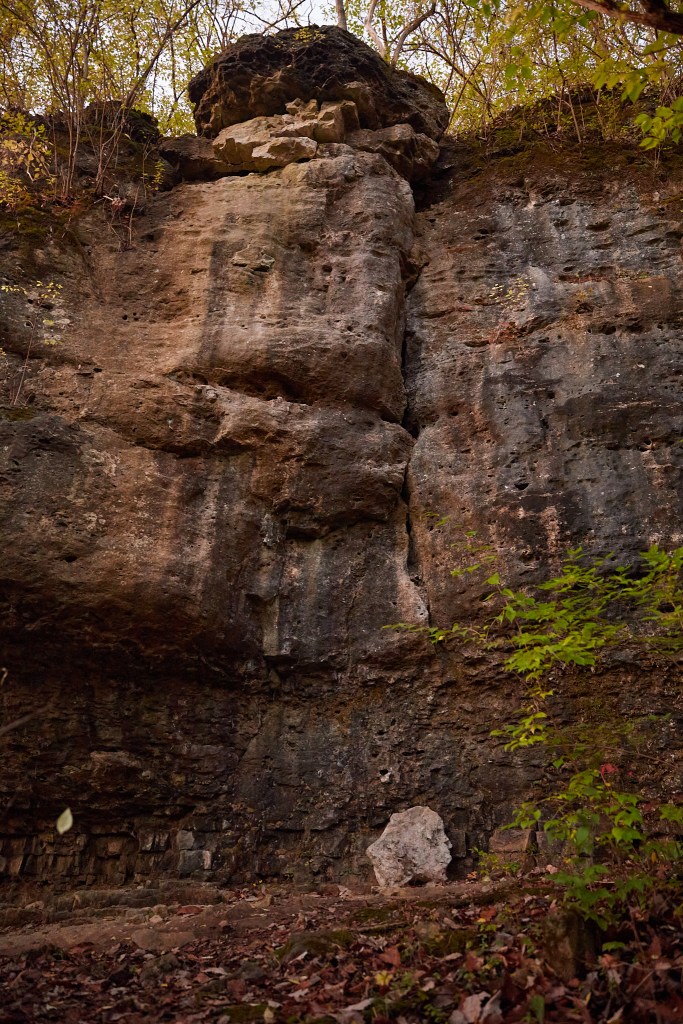
The cliffs at John Bryan are limestone. Specifically, a mix of Springfield and Cedarville dolomite. It is a sedimentary rock, formed in the early Silurian Period, when ancestral North America straddled the equator. In these tropical waters, the skeletal remains of mollusks, coral, and other brachiopods mixed with the sediment of the ocean floor. Over 430 million years, these remains piled up. Then, finally broke down, having been compressed by the weight of more sediment. They eventually recrystallized as limestone, and were transformed to dolomite by later interactions with magnesium rich groundwater.

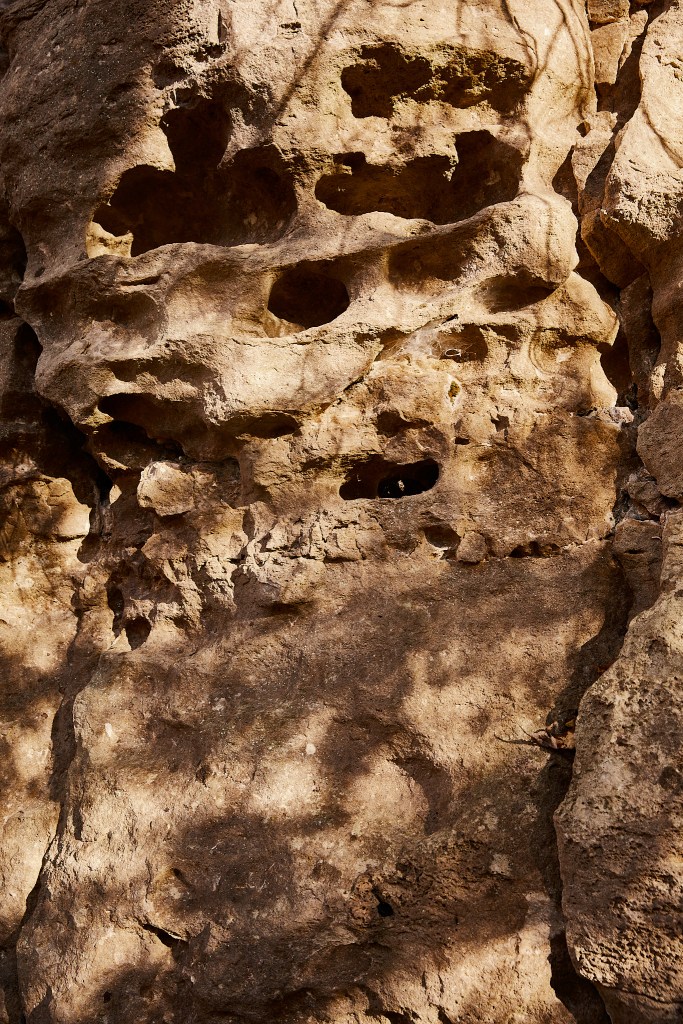
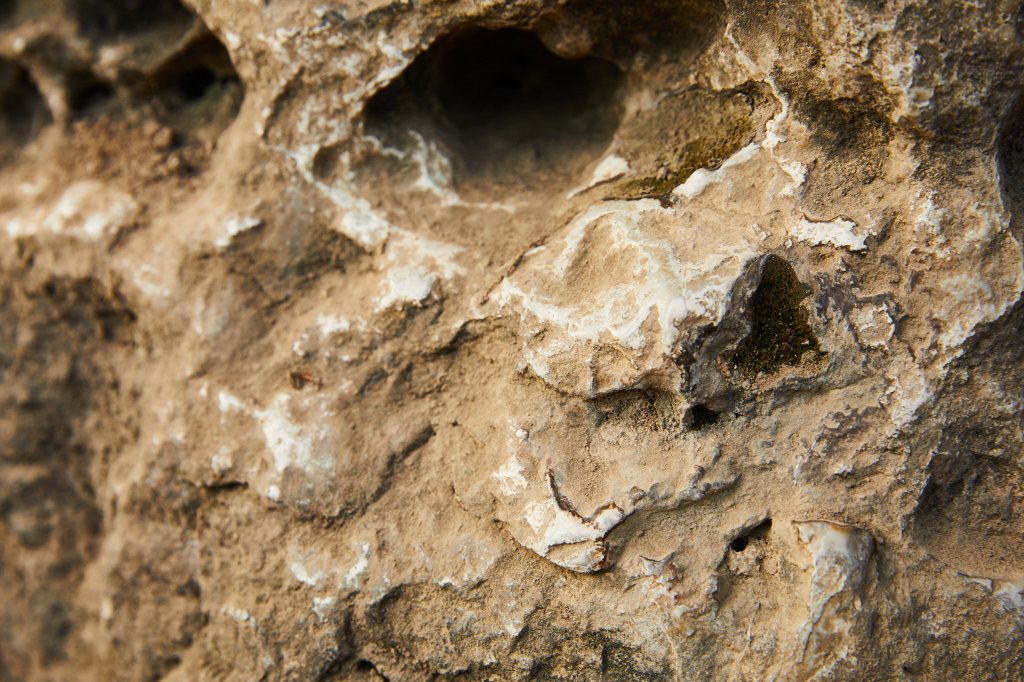
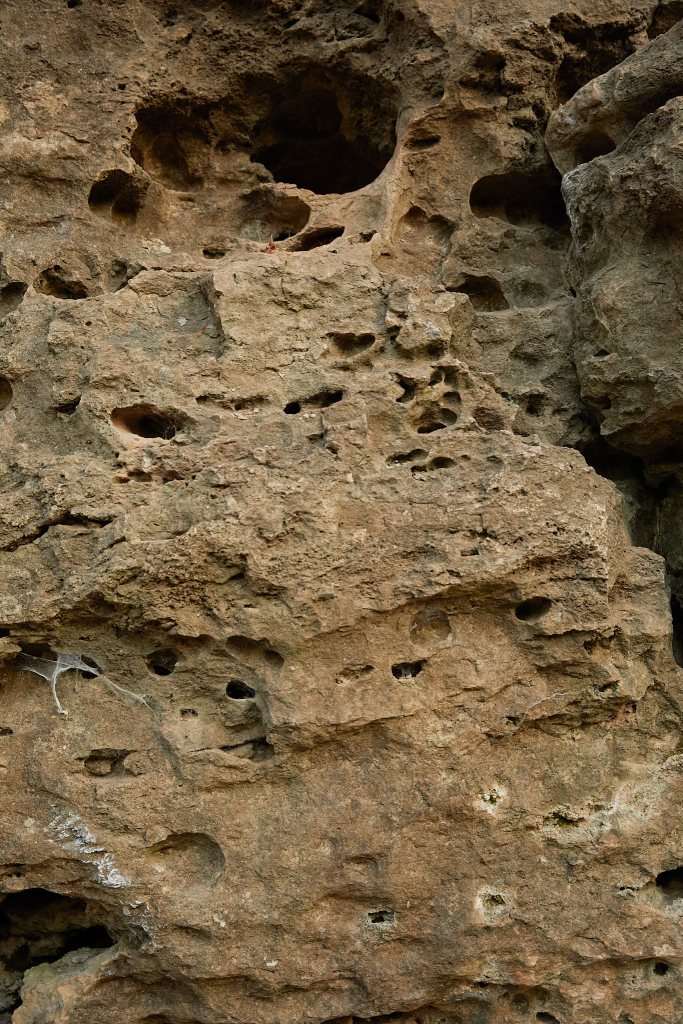
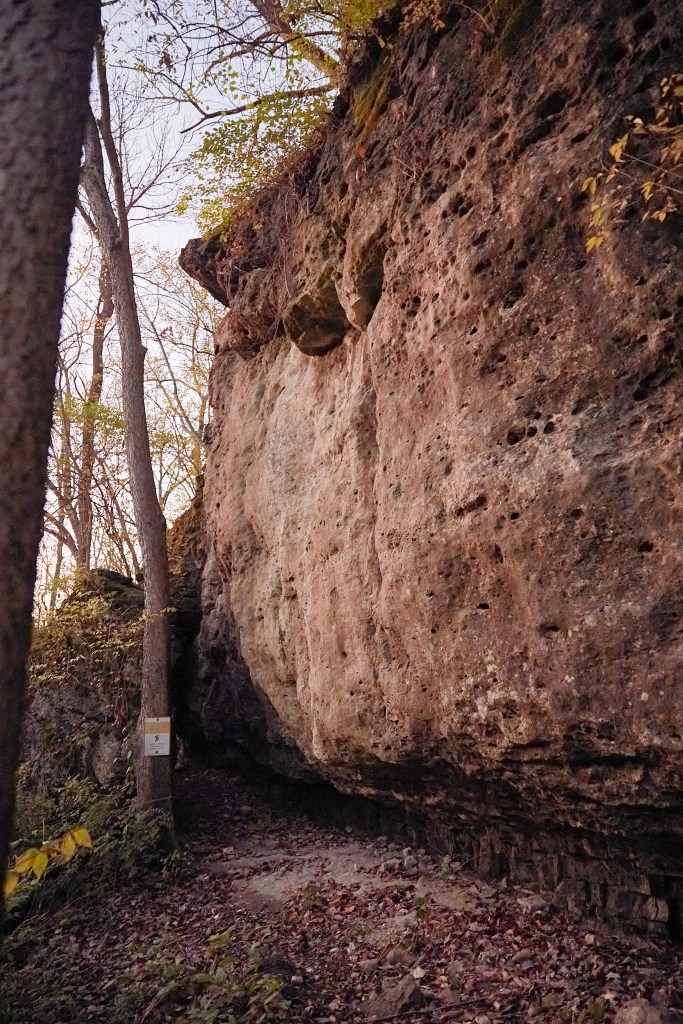
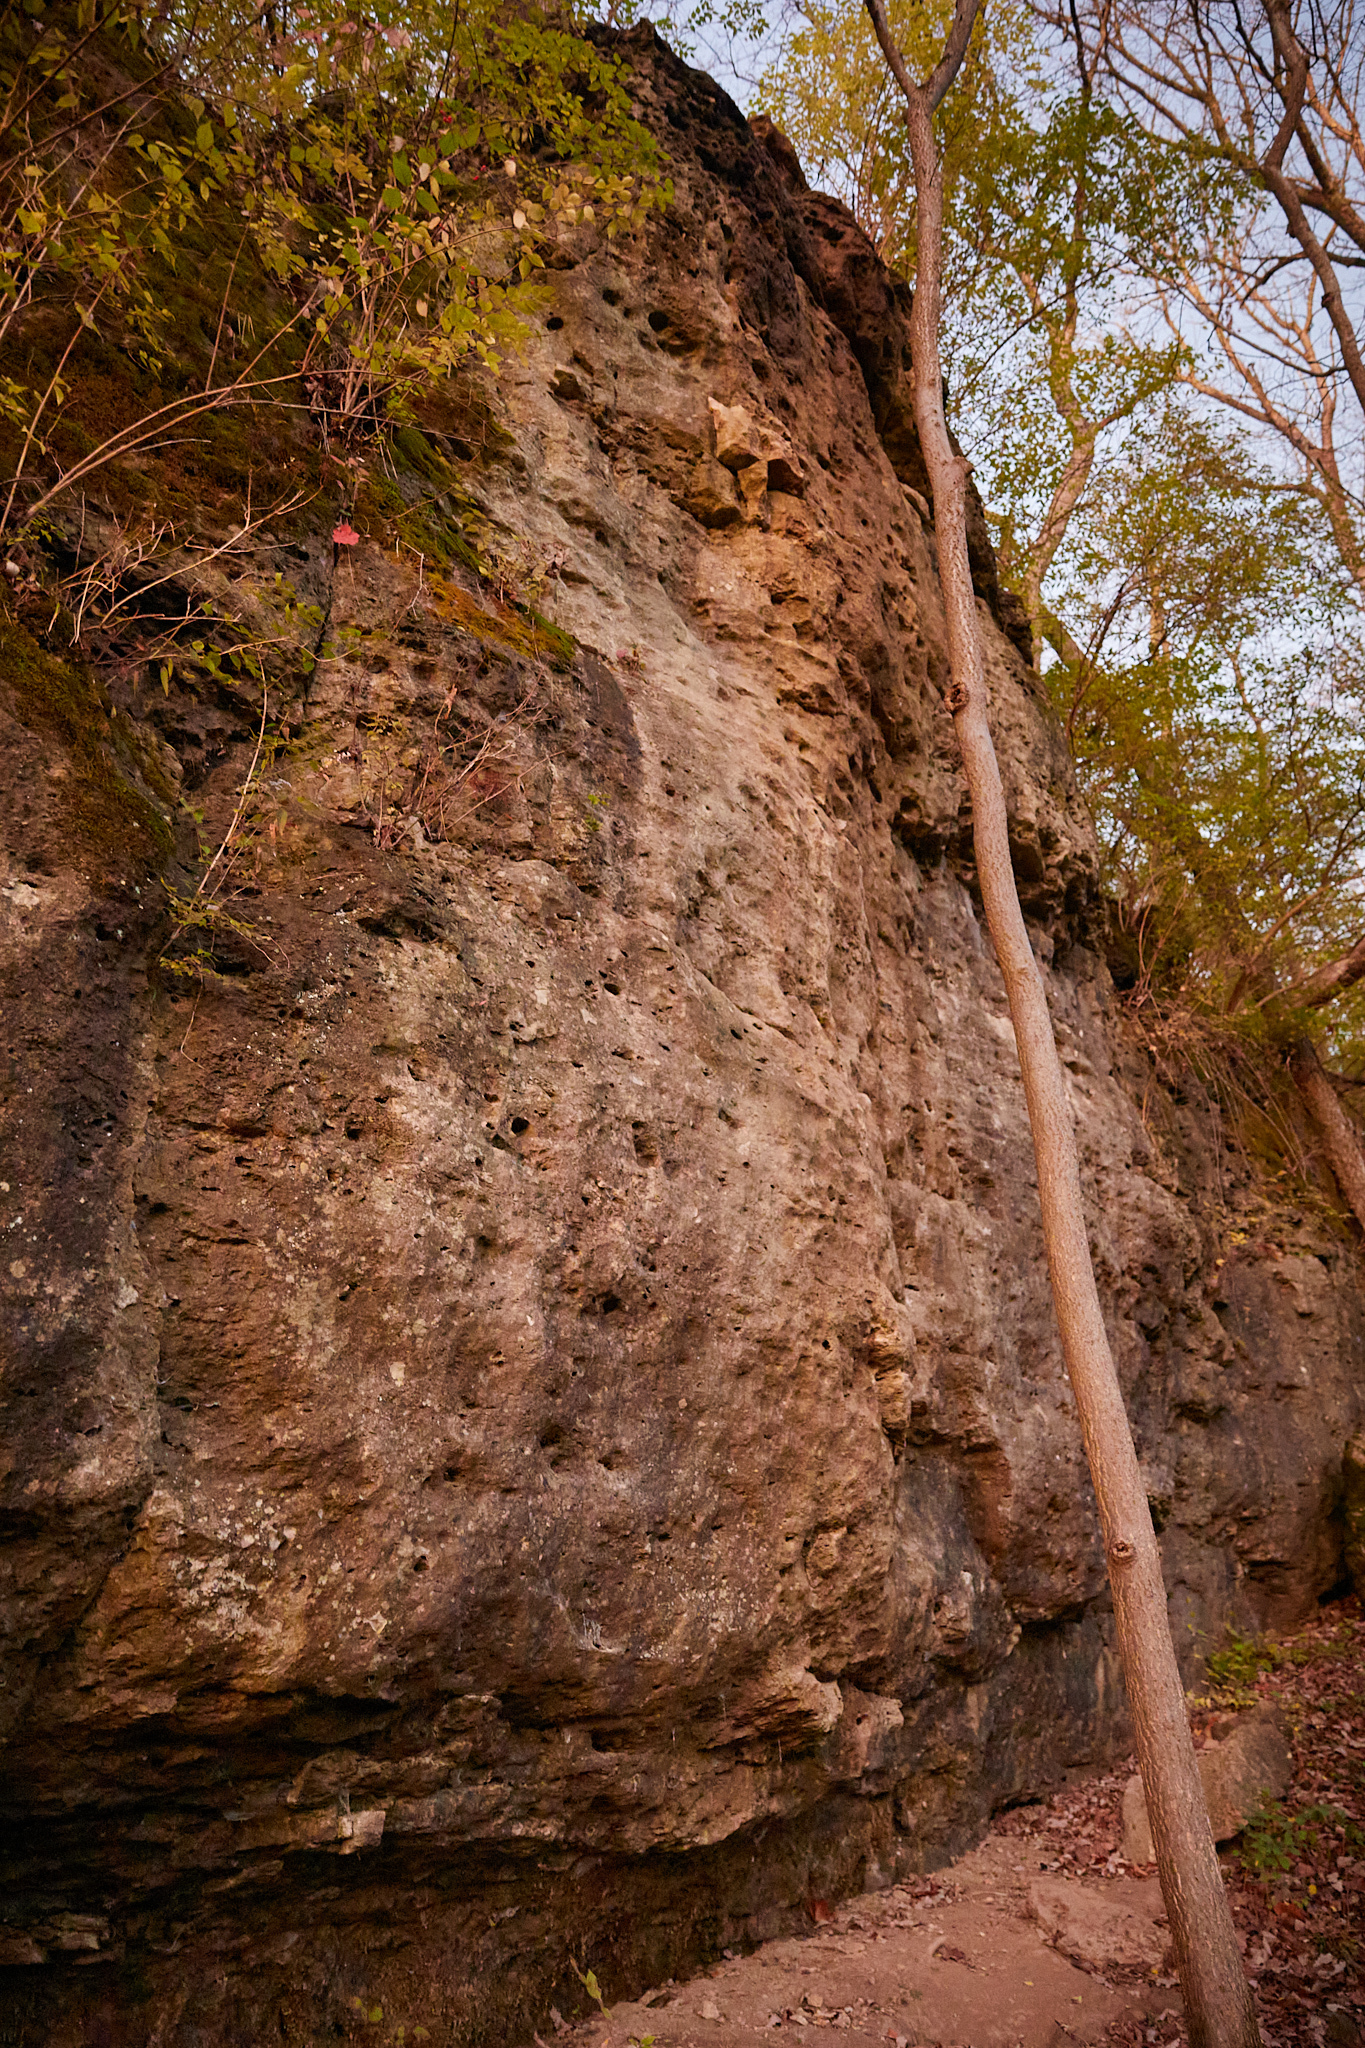
In Ohio, much of the limestone cliffs are exposed by rivers. At John Bryan, Ohio’s first scenic river, the Little Miami, carved its’ path through the sediment over millions of years. If you look closely, you will find fossils tucked in among the cliffs. In fact, many of the trademark pockets peppering the cliff-side were formed where fossils dissolved as the limestone formed.
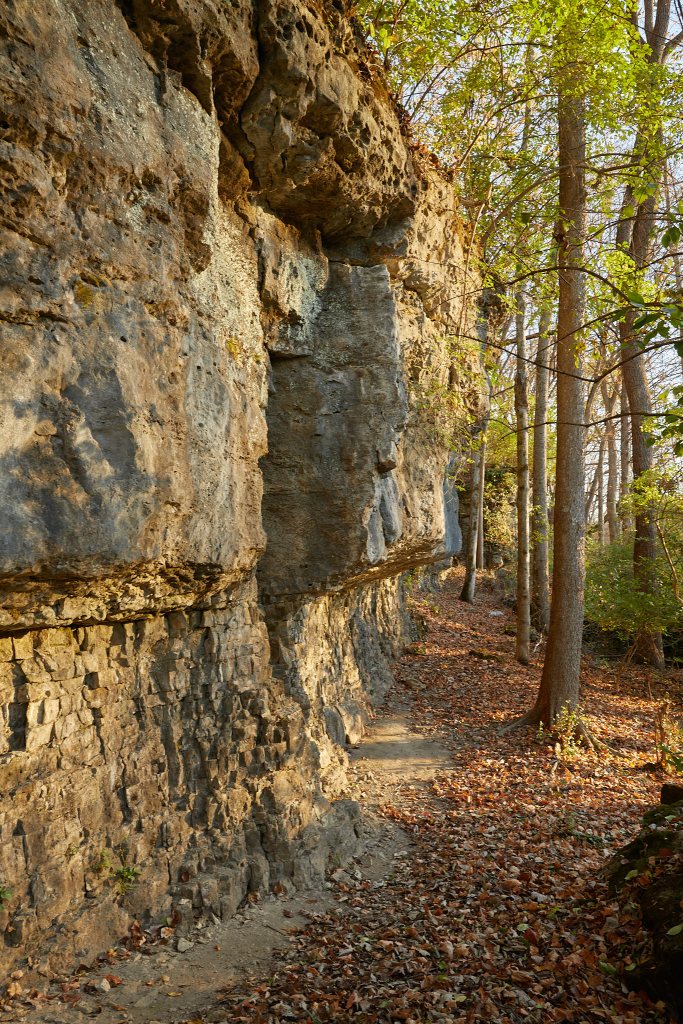
Limestone is a relatively soft stone, coming in at 3 to 4 on the Mohs hardness scale, where sandstone clocks in at 6 to 7, and granite lands between 6 and 8. Although dolomite tends to be on the softer end of the scale, dolomite is a very dense stone and tends to be less porous than other rocks, absorbing less liquid over time. Since dolomite can be dissolved by slightly acidic water, it is also important in the formation of karst topography, which is known for the formation of sinkholes and caves.
(As climbers we don’t often consider the Mohs hardness scale when determining the quality and “hardness or softness” of the rock we climb. It is a test for determining how well different rocks and mineral resist scratching, which is a good metric for how easily a route could become “polished.” Rock solidity is for a later post.)
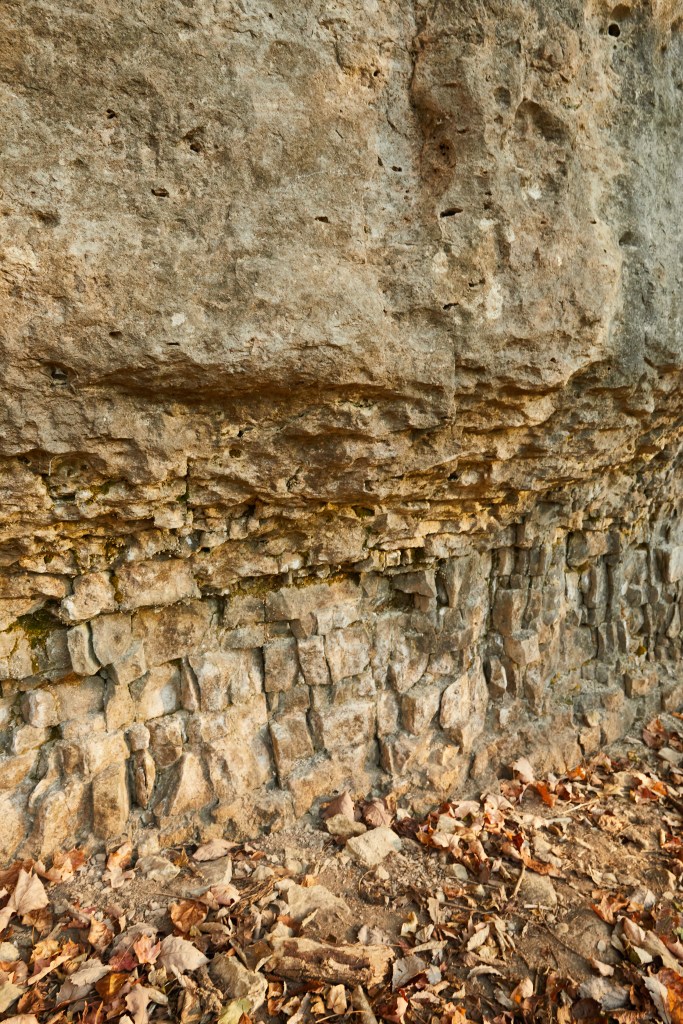
At John Bryan, parts of the Cedarville Dolomite rests atop an exposed band of softer, blockier Springfield Dolomite. It is what causes the overhanging and difficult starts to some of the routes.


Before climbing, there are two things worth noting: 1.) Climbers must register at the park office. Do so on your way in.
2.) John Bryan is not a sport climbing crag. Sport anchors will not work on these routes nor will typical anchor systems built with slings, like the quad, or pre-equalized. You must know how to build, equalize, adjust, and use an extended anchor system.
This is very specific anchoring scenario. If you don’t know these techniques, it is best to seek instruction from a guide. We offer a specific class and day rate for John Bryan State Park for learning to set extended top rope systems efficiently and how to keep your risk at a minimum.
John Bryan has 7 climbing areas on the dolomite bluffs along the North Rim trail. These were developed by John Mueller sometime in the late eighties, which is when the eye-bolts were placed.
Climbing in John Bryan State Park / Clifton Gorge has been happening since the 1960’s. By the 1970’s climbing in the parks had increased with numerous notable climbers getting their start at Clifton Gorge (John Bryan’s State Park’s next door neighbor) However, with increased usage, the park became concerned about the environmental impact climbing was having in the park. (notably soil compaction and the concern of endangered plant species being trampled.)
Sometime in the 1970’s the Clifton Gorge State Park was redesignated as a nature preserve, with a state led nature preserve commision, and pressure started building from the state to outlaw climbing in Clifton Gorge.
A local climber and Dayton area attorney pushed back against this by threatening to sue the state citing that the endangered species were only found on the south side of Clifton Gorge and not in the climbing areas. Only invasive species and secondary growth were found on the north side of the gorge where most of the climbing was being pursued.
In the 1980’s climbing was still happening in Clifton Gorge. It was frequented by the Ohio State University’s Mountaineers club and many local climbers. Caver’s and rappellers even used Clifton for practicing their vertical rope techniques.
However, in January 1990, a decision was made by the Ohio DNR and state led nature preserve commission to close the climbing at Clifton Gorge, citing overuse and soil compaction. With this closure Ohio climbers lost some of the tallest routes and one of the most beautifully aesthetic climbing areas in the state. This decision came from a lack of understanding on how climbers can be great stewards of public land, serious advocates for Leave No Trace principles, the preservation of native plants and species, as well as the maintaining of trails and creation of durable park infrastructure.
After the closure of Clifton Gorge, the Ohio Climbers Coalition (then known as the Ohio Climbers Association) was formed with the ultimate goal of reopening the climbing are Clifton Gorge. The effort still continues to this day.
In 1992 the climbing areas in John Bryan State Park were officially opened. Collaboration between the Ohio Department of Natural Resources and The Ohio Climbers Association led to the creation of permanent top rope anchors in 7 different areas. These are now maintained by the Ohio Climbers Coalition.
Recently, all the bolts for the routes were checked, reglued, and repainted. The Ohio Climbers Association is actively working with the park on setting up trail days to clear away deadfall, shore up trails to resist erosion removing invasive honeysuckle, increase the amount of signage for downclimb areas, replace missing signs and perform graffiti removal. They are also working on installing an anchor building teaching and instruction area.
From West to East, the seven climbing areas are: Red, Blue, Green, Pink, Black, Orange, and Yellow. They are marked by signs posted on trees or on signposts driven into the ground by the park service. The cliffs are south facing and range between 25 to 35 feet tall.
JOHN BRYAN STATE PARK MOUNTAIN PROJECT
Development of new routes, leading, and bouldering are currently prohibited at the park. Do not attempt to lead climb or develop any potential route or boulder problem in any area. My hope for the future is to work with the Ohio Climbers Coalition, the Ohio Department of Natural Resources, and the Park management to re-open sustainable development of all types of climbing and more walls at John Bryan State Park, as well as the reopening of climbing in Clifton Gorge. It is my belief that these two conjoined parks hold some of the best climbing potential and most aesthetically pleasing lines in the state of Ohio. However, this goal can only be accomplished by being great stewards of the existing climbing areas and following the existing policies in place at both parks.

Some of the routes have been extremely polished due to having been climbed extensively and the soft nature of limestone.
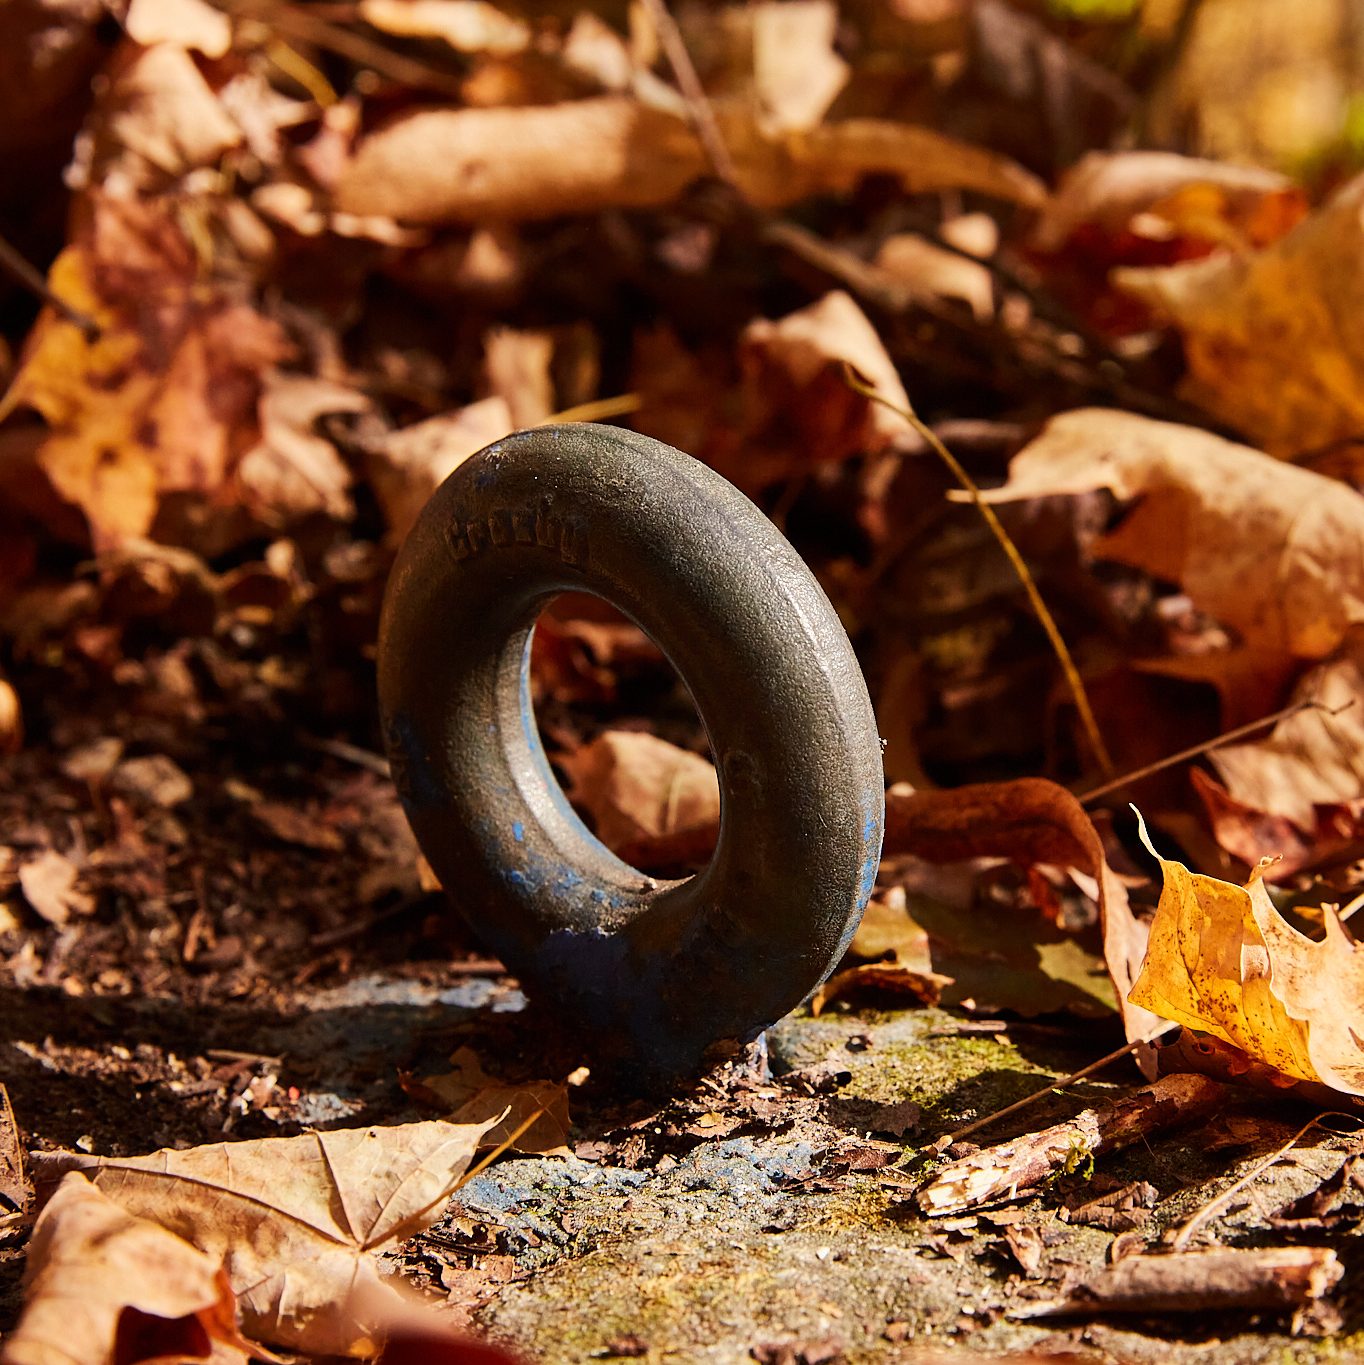
Climbers should bring a shoe mat. They can use it to wipe their feet just before getting onto a climb. This helps to remove most of that abrasive debris. I recommend a carpet scrap or a commercially made product like the Shortstop by Metolius.
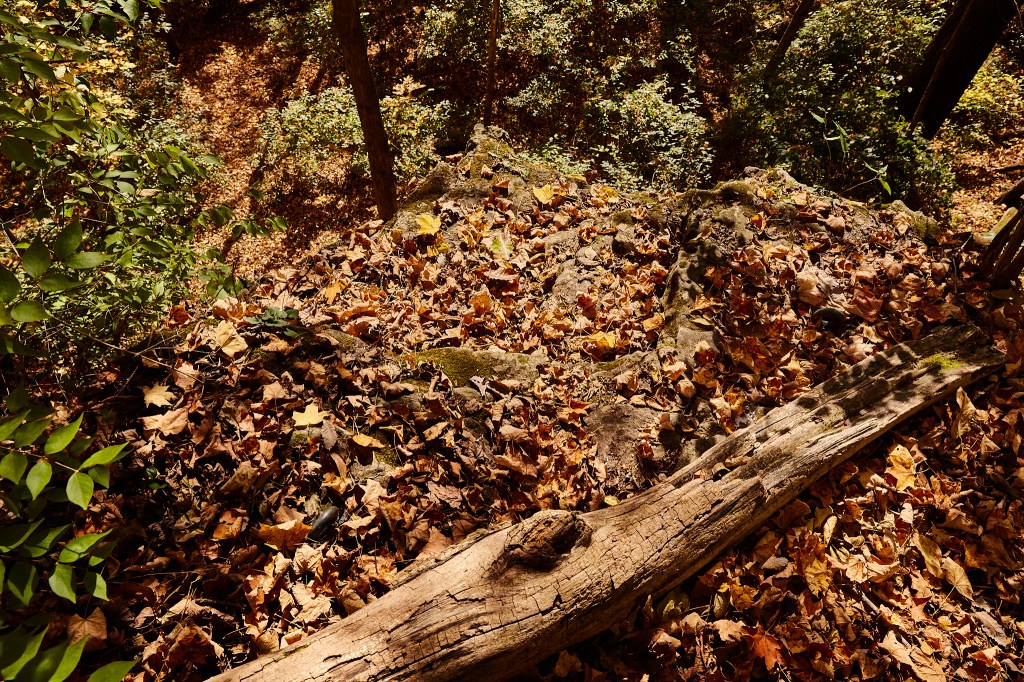
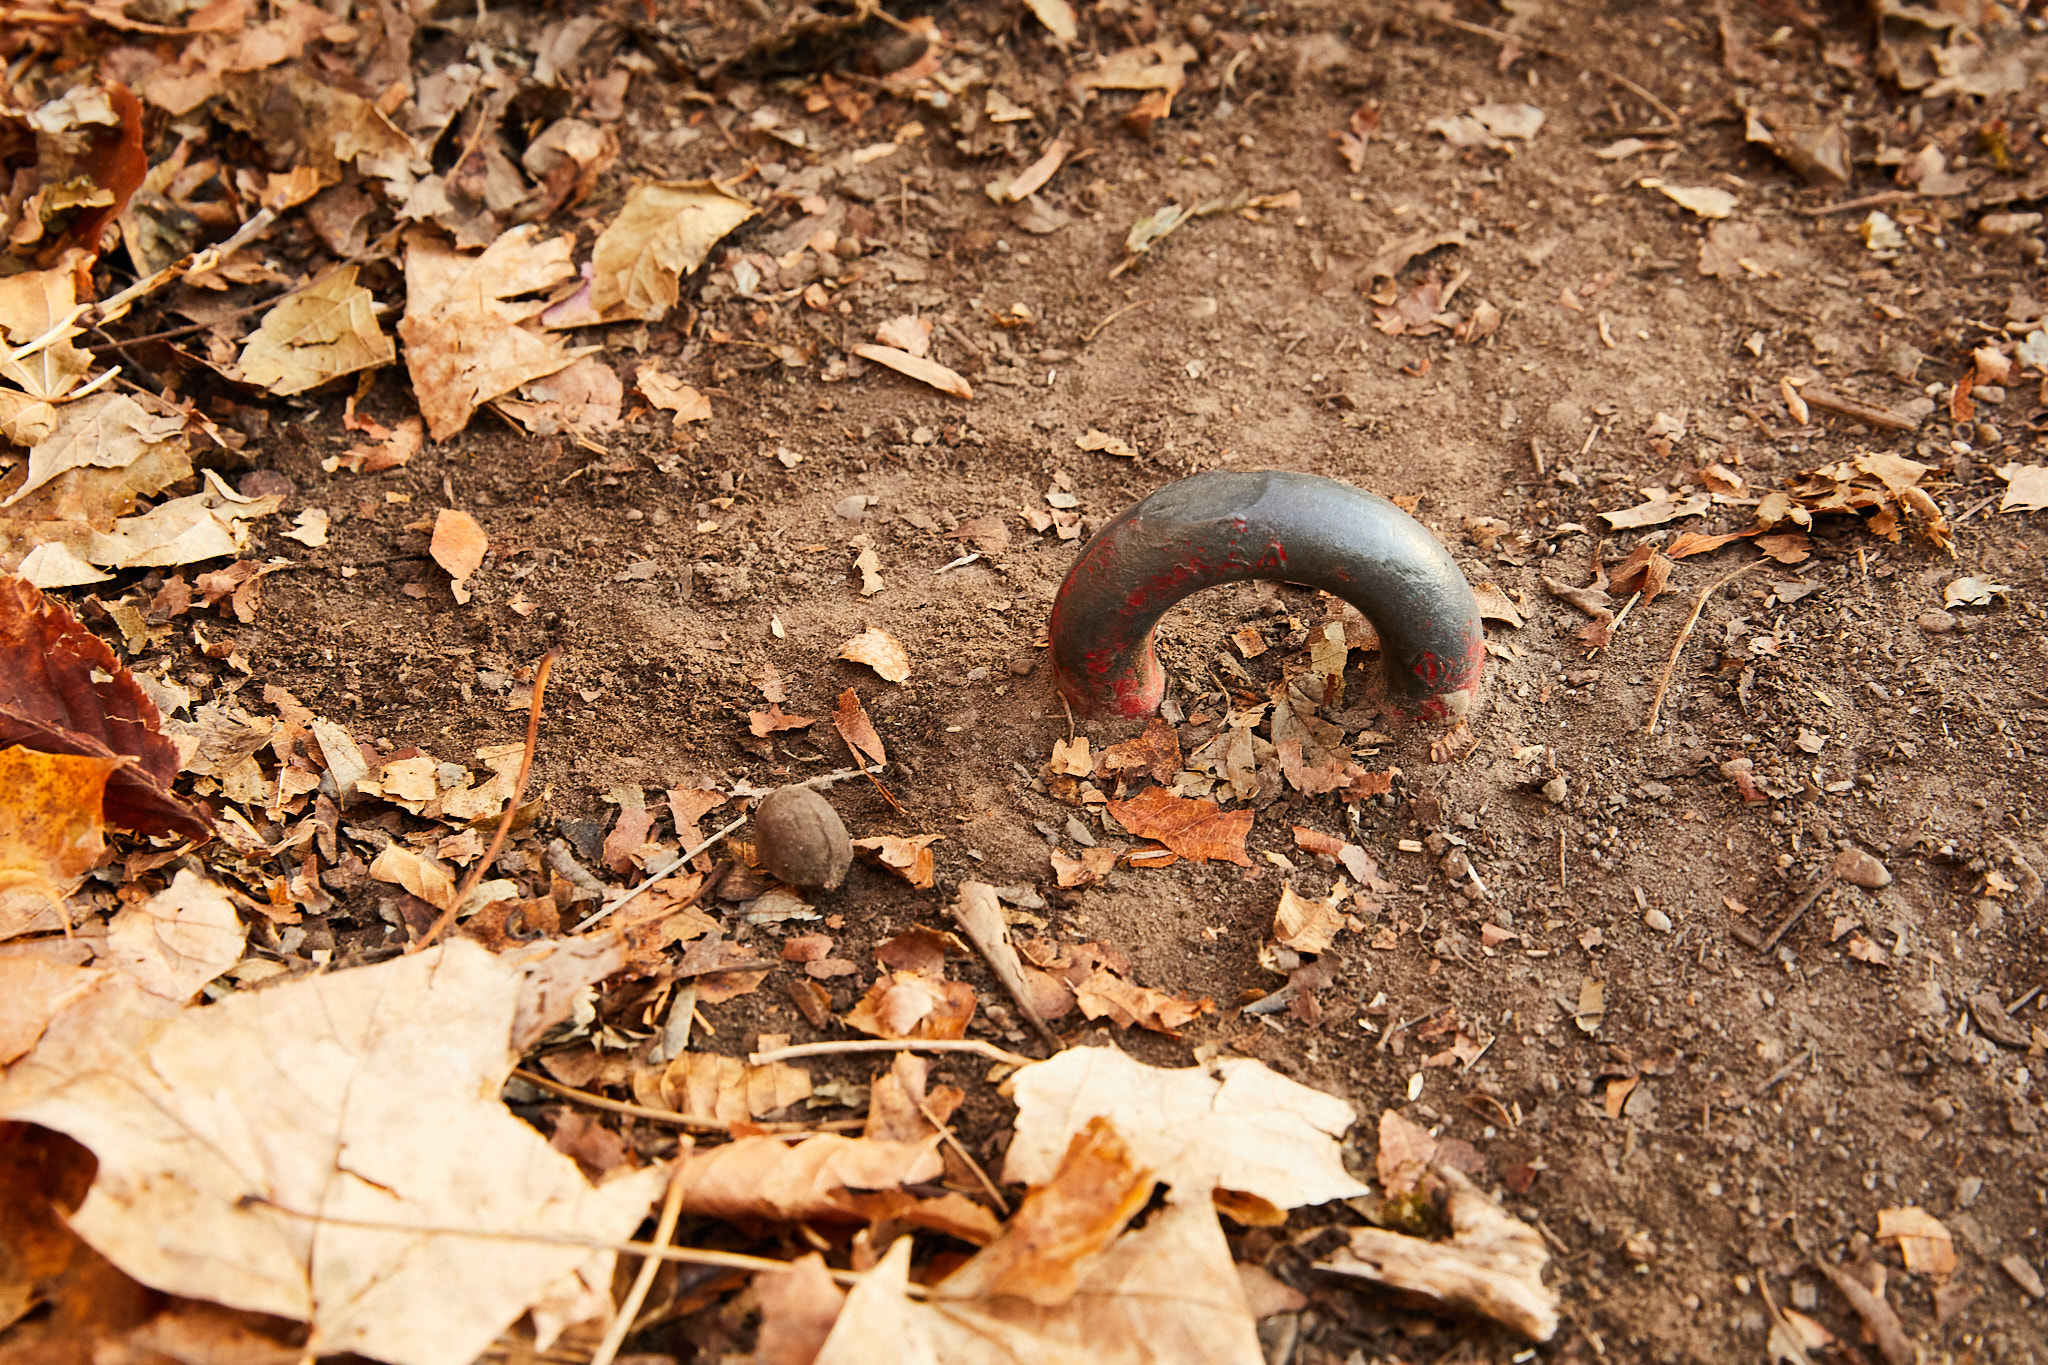
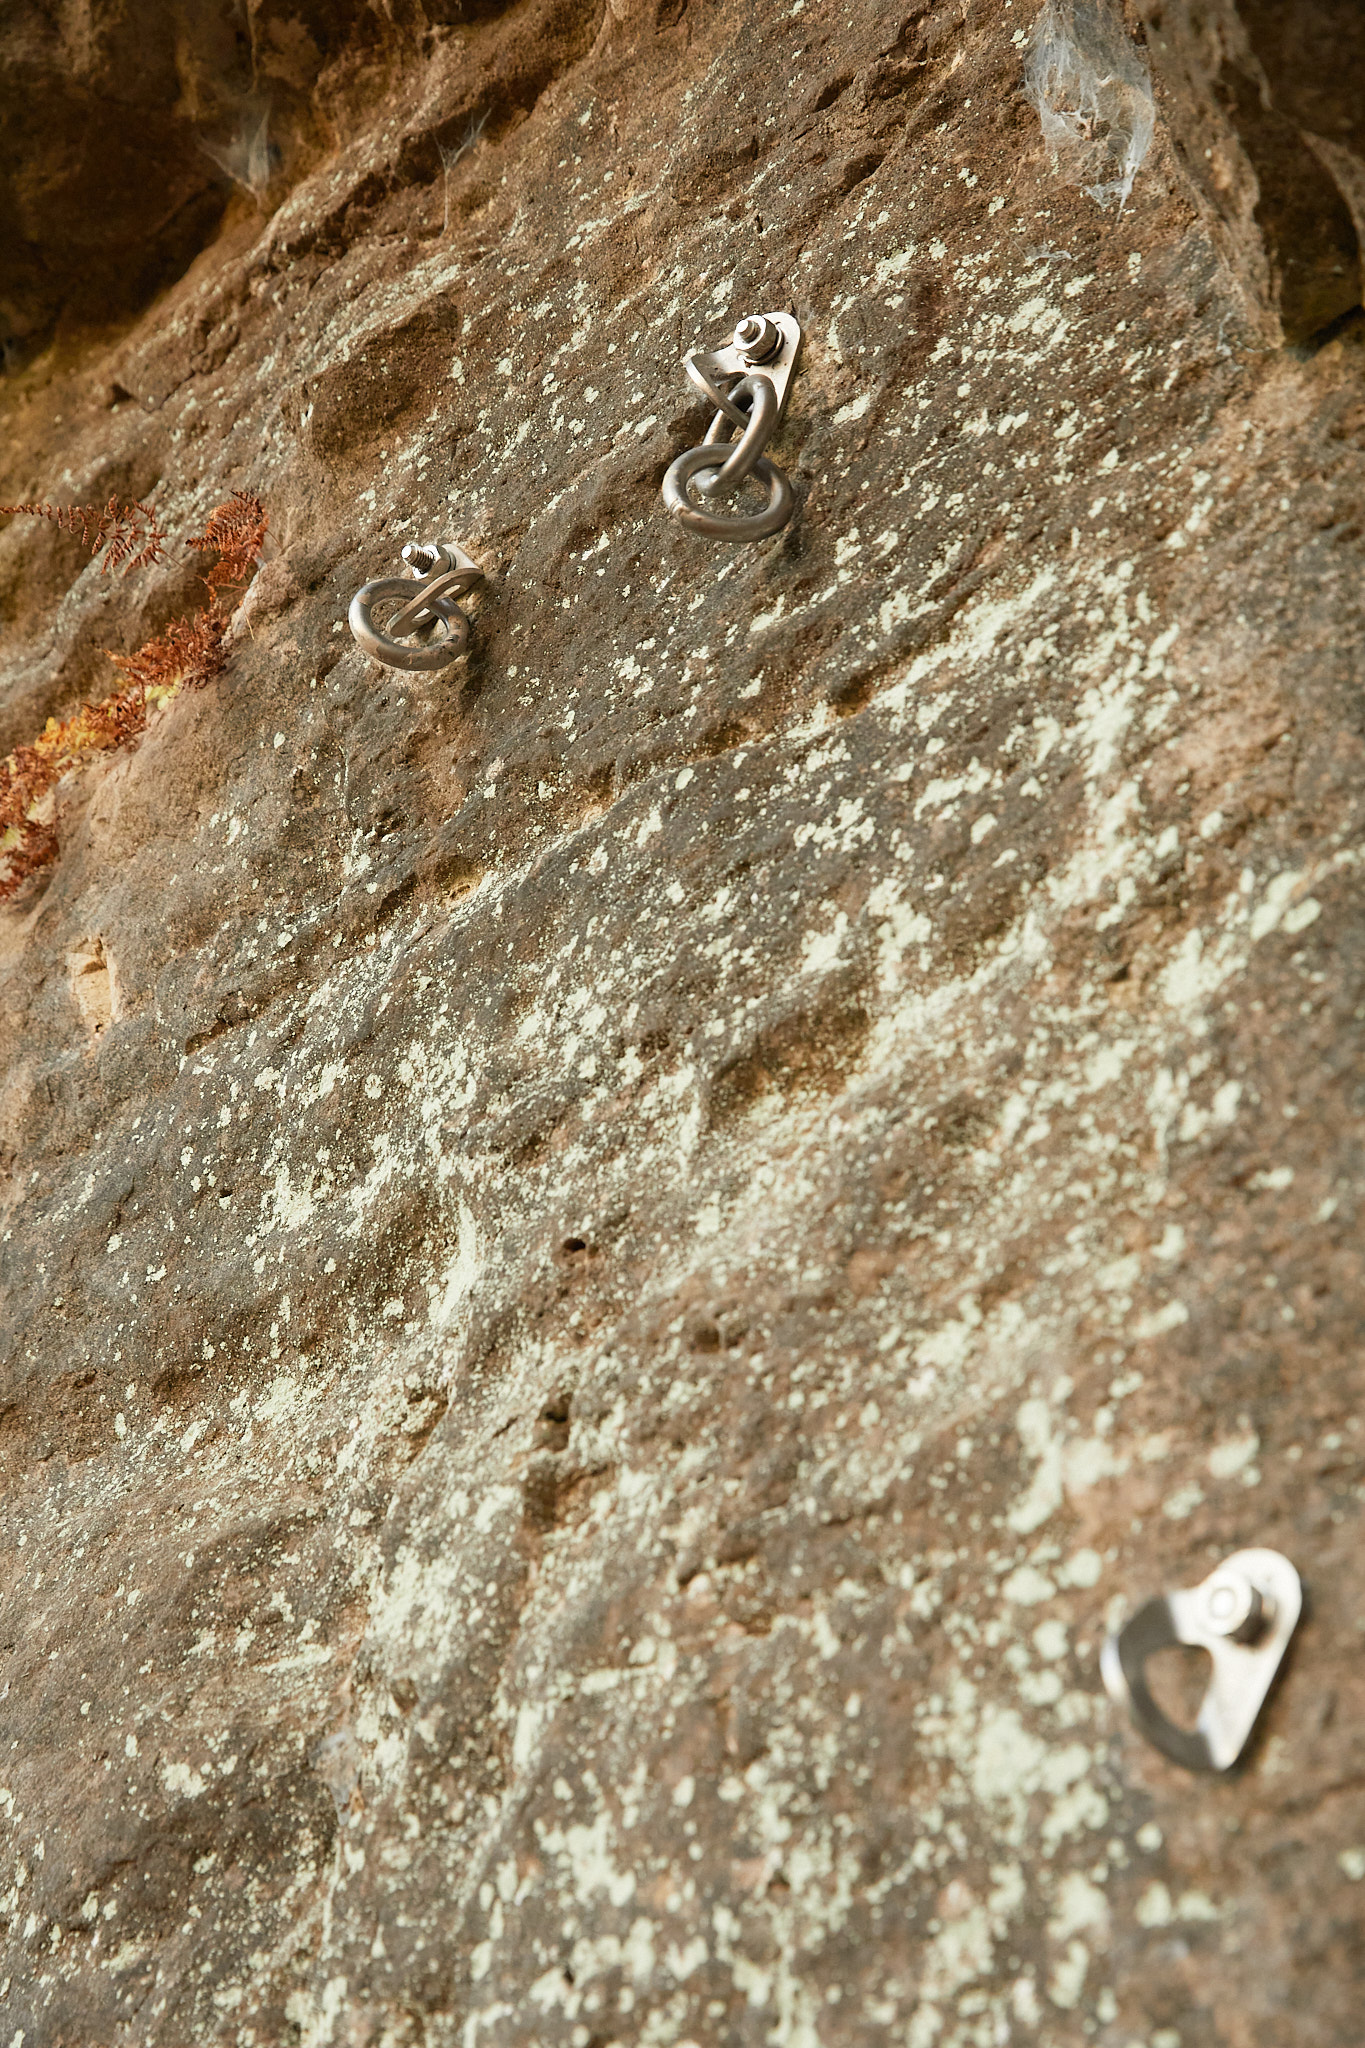
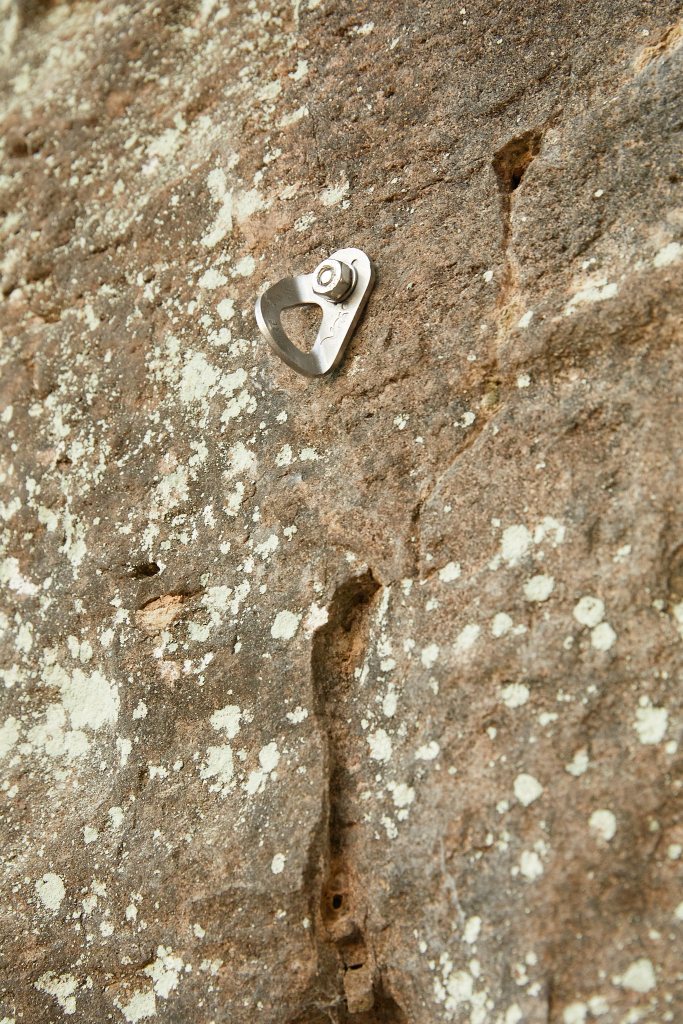
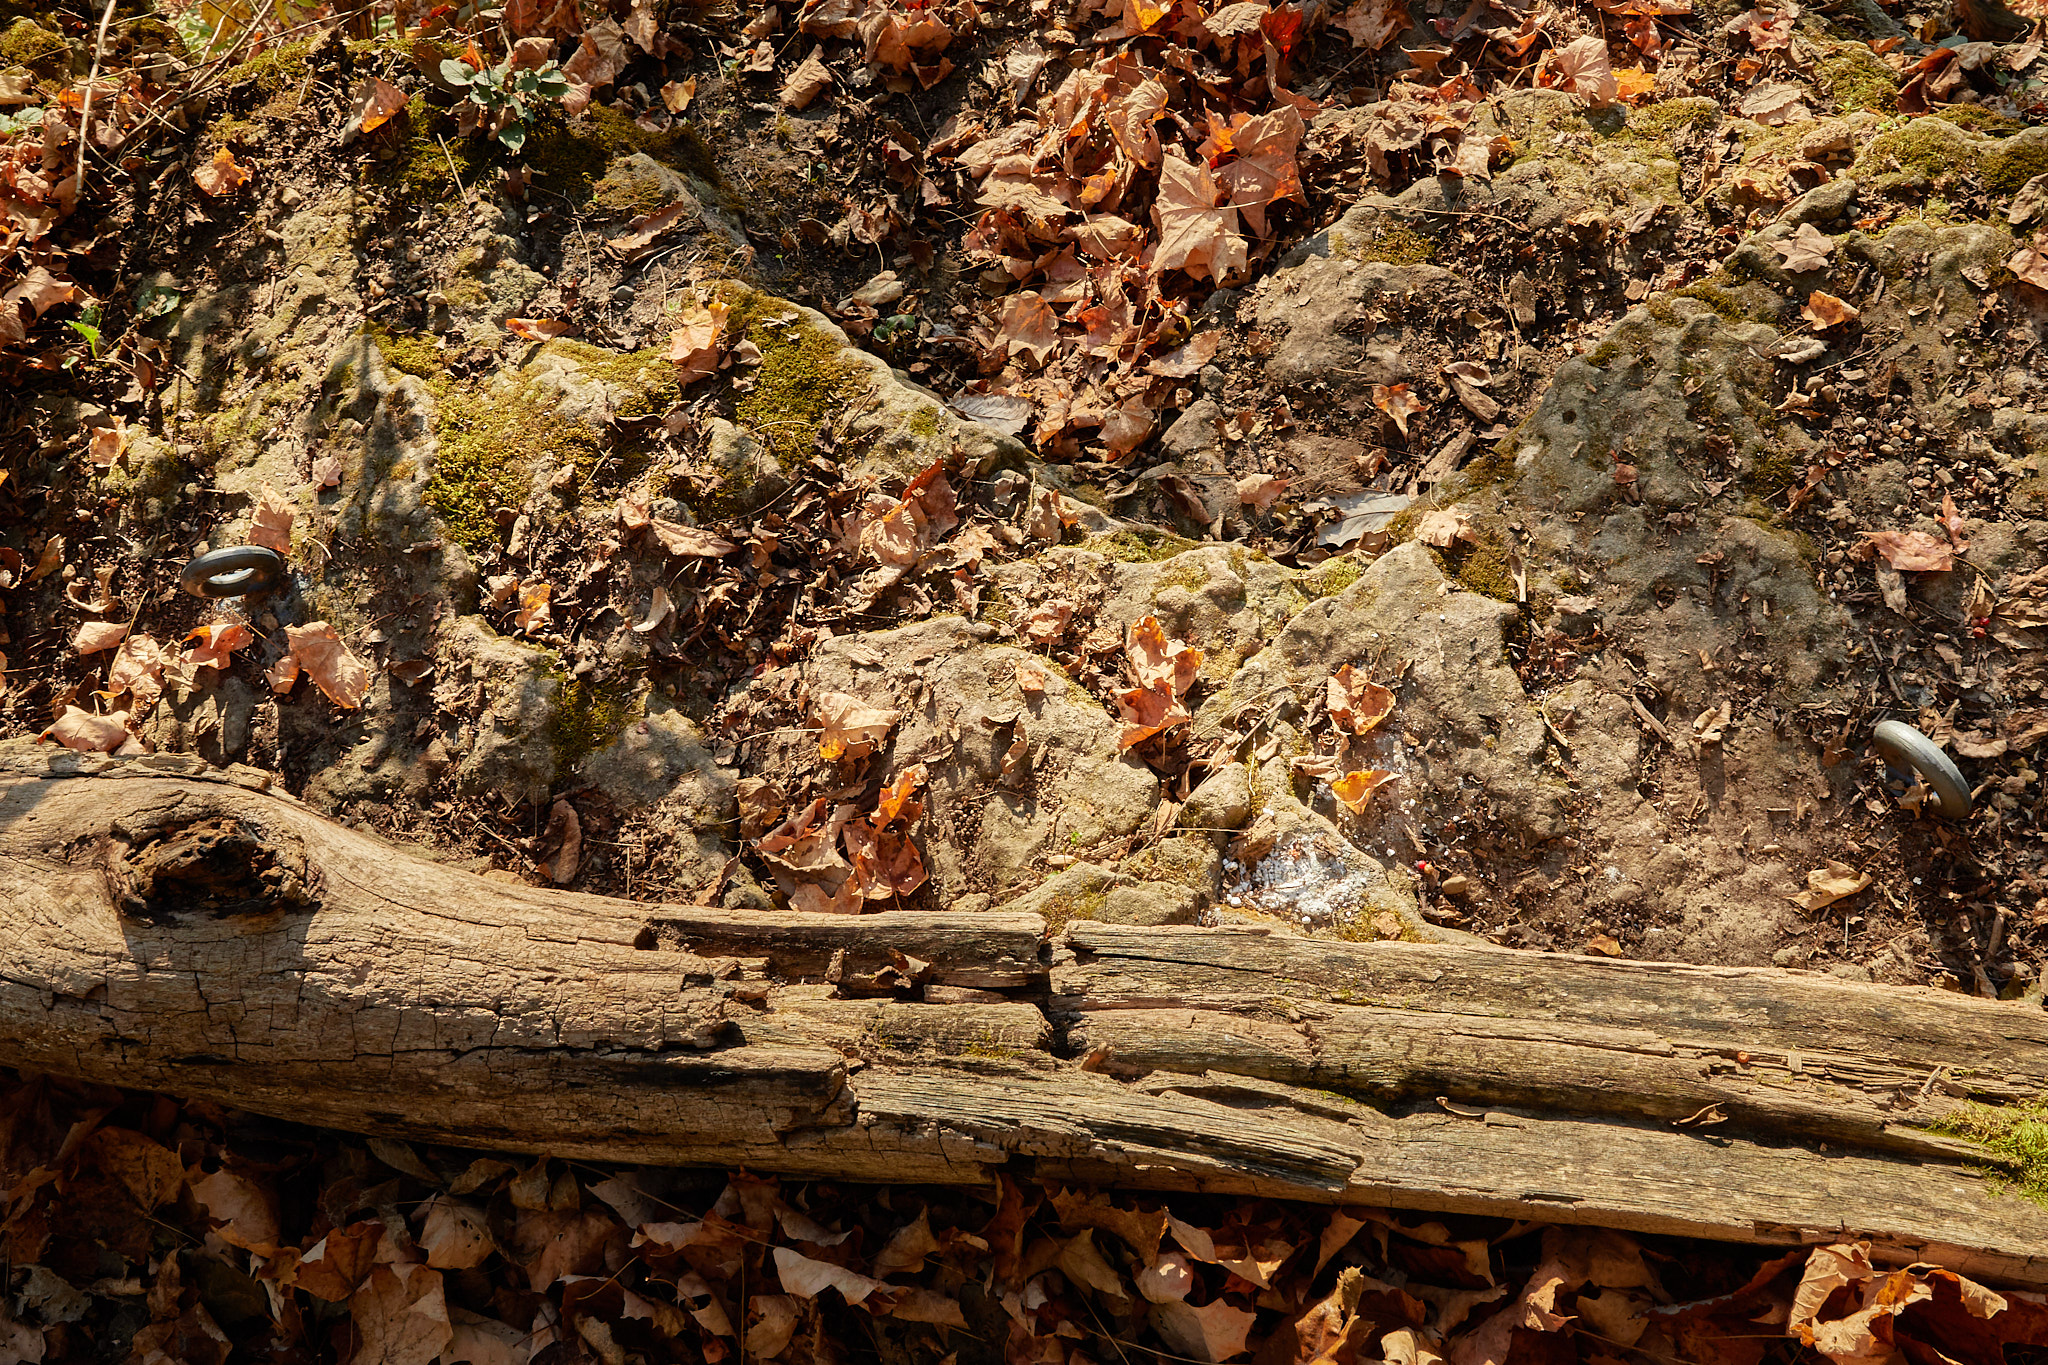
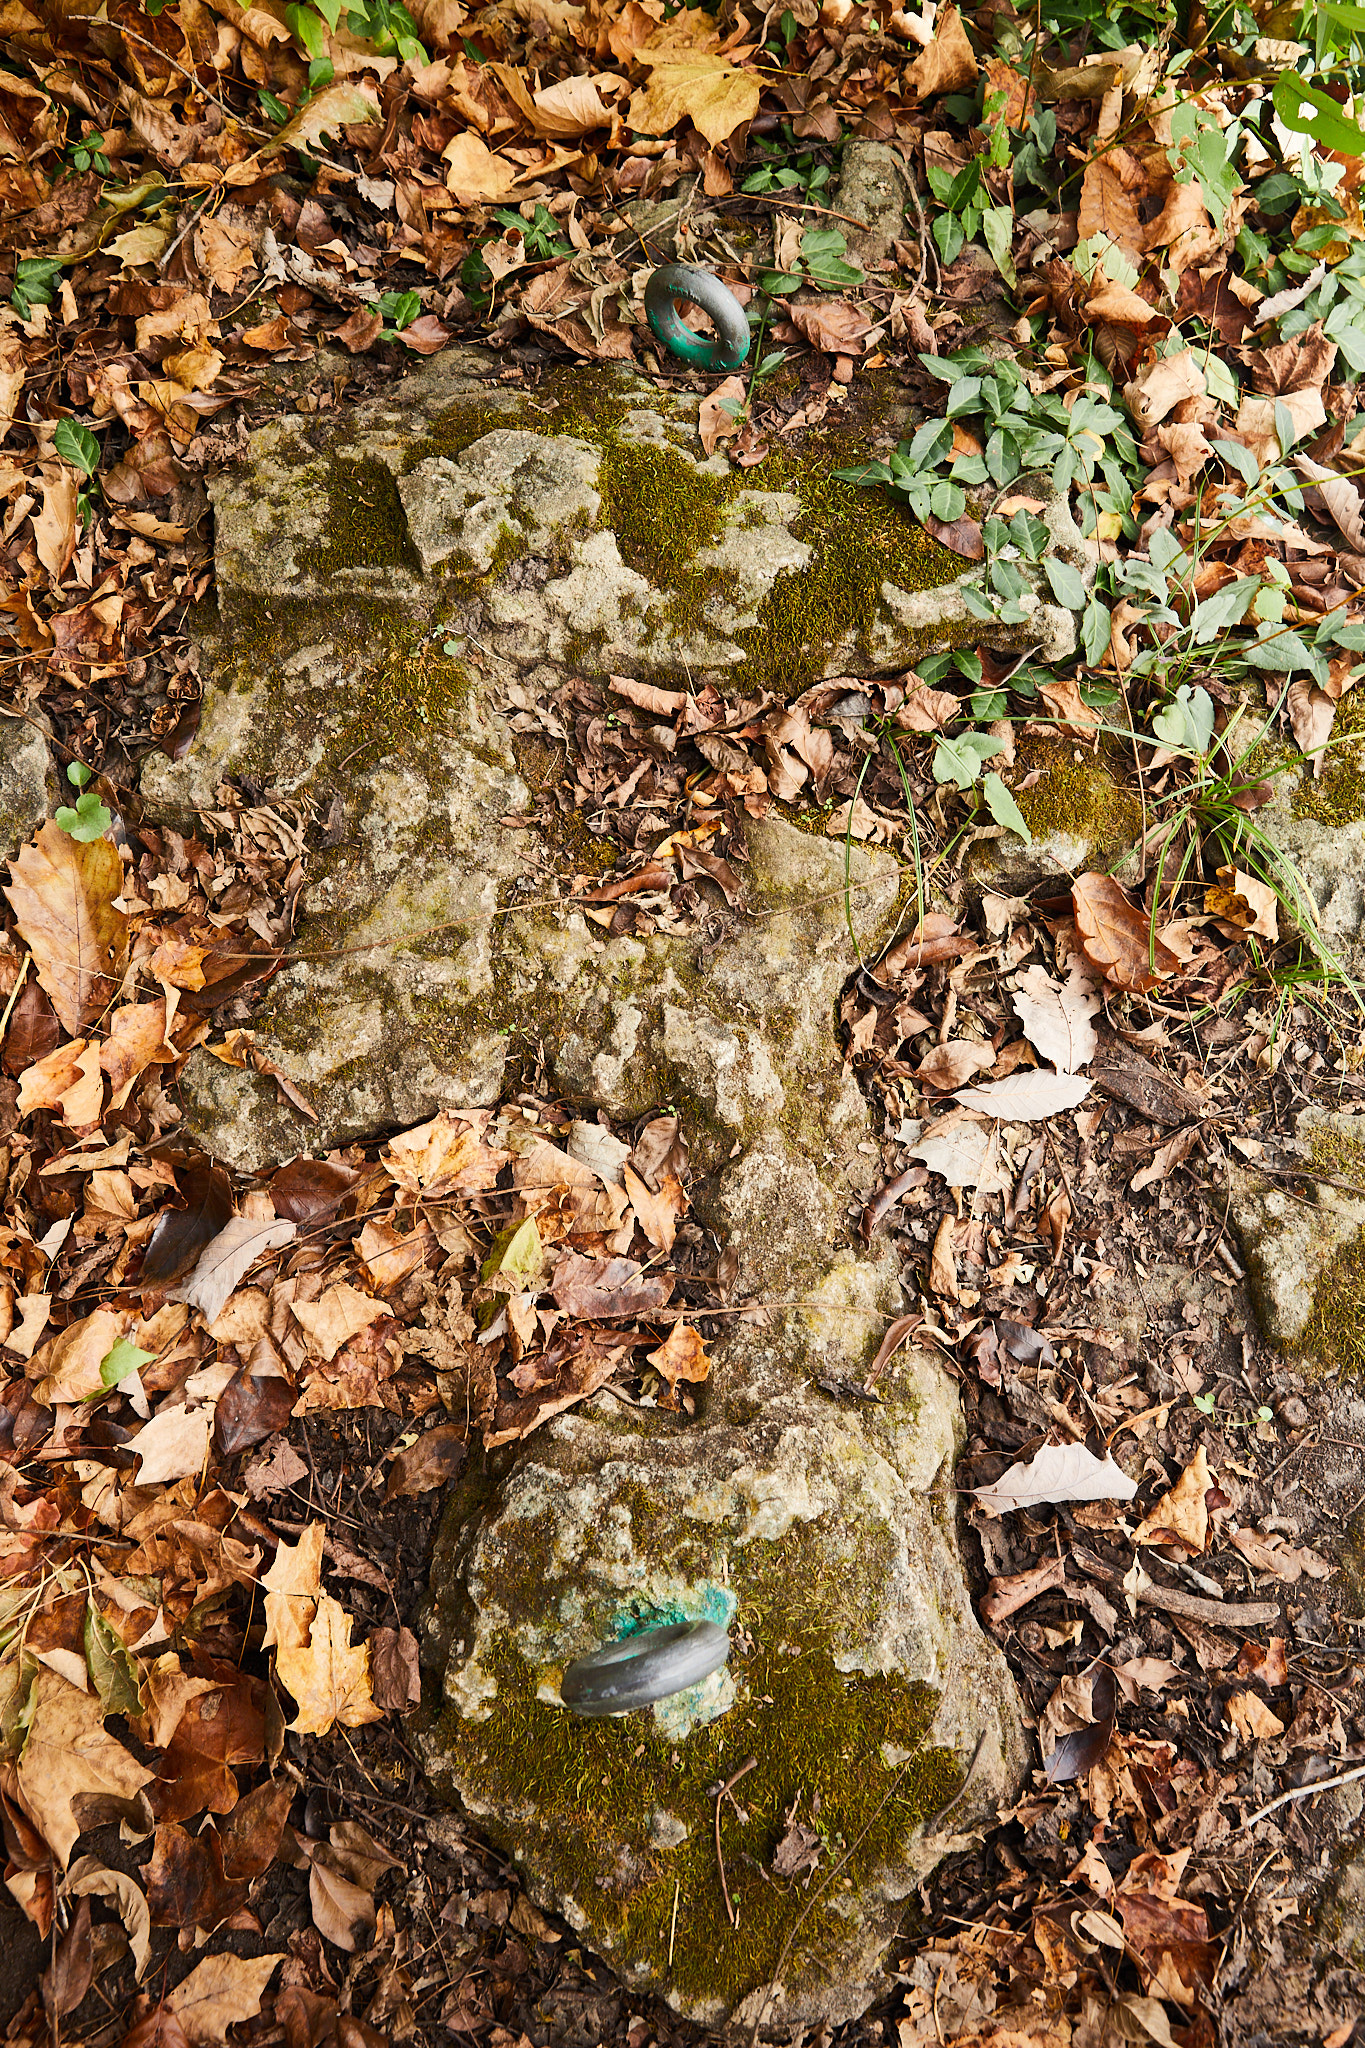
Every climbing route in each of the different areas at John Bryan have two, huge, steel eye-bolts located on the top of the cliffs, not on the cliff face. At one point they were painted but most of it has worn off due to time. Recently, the Ohio Climbers Coalition (the OCC) repainted all the bolts!
Though they are large in size, the bolts at John Bryan can be difficult to find among the leaf litter. Can you spot them?
Anchors at John Bryan
- There are always two bolts per route.
- This area was developed in the late 1980’s. Vegetation, the build up of soil, and leaf litter have made some of them hard to spot but there are always two.
- The bolts are painted
- Most are extremely close to the edge.
- Use of a natural anchor with a tree pad as a personal tether is recommended.
- All routes must be set up with an extended anchor system
- Two quick-draws opposite and opposed will not work at John Bryan.
6 feet (about 2 meters) is the AMGA’s least recommended distance to be near an edge without a tether. This distance is also the standard for guides.

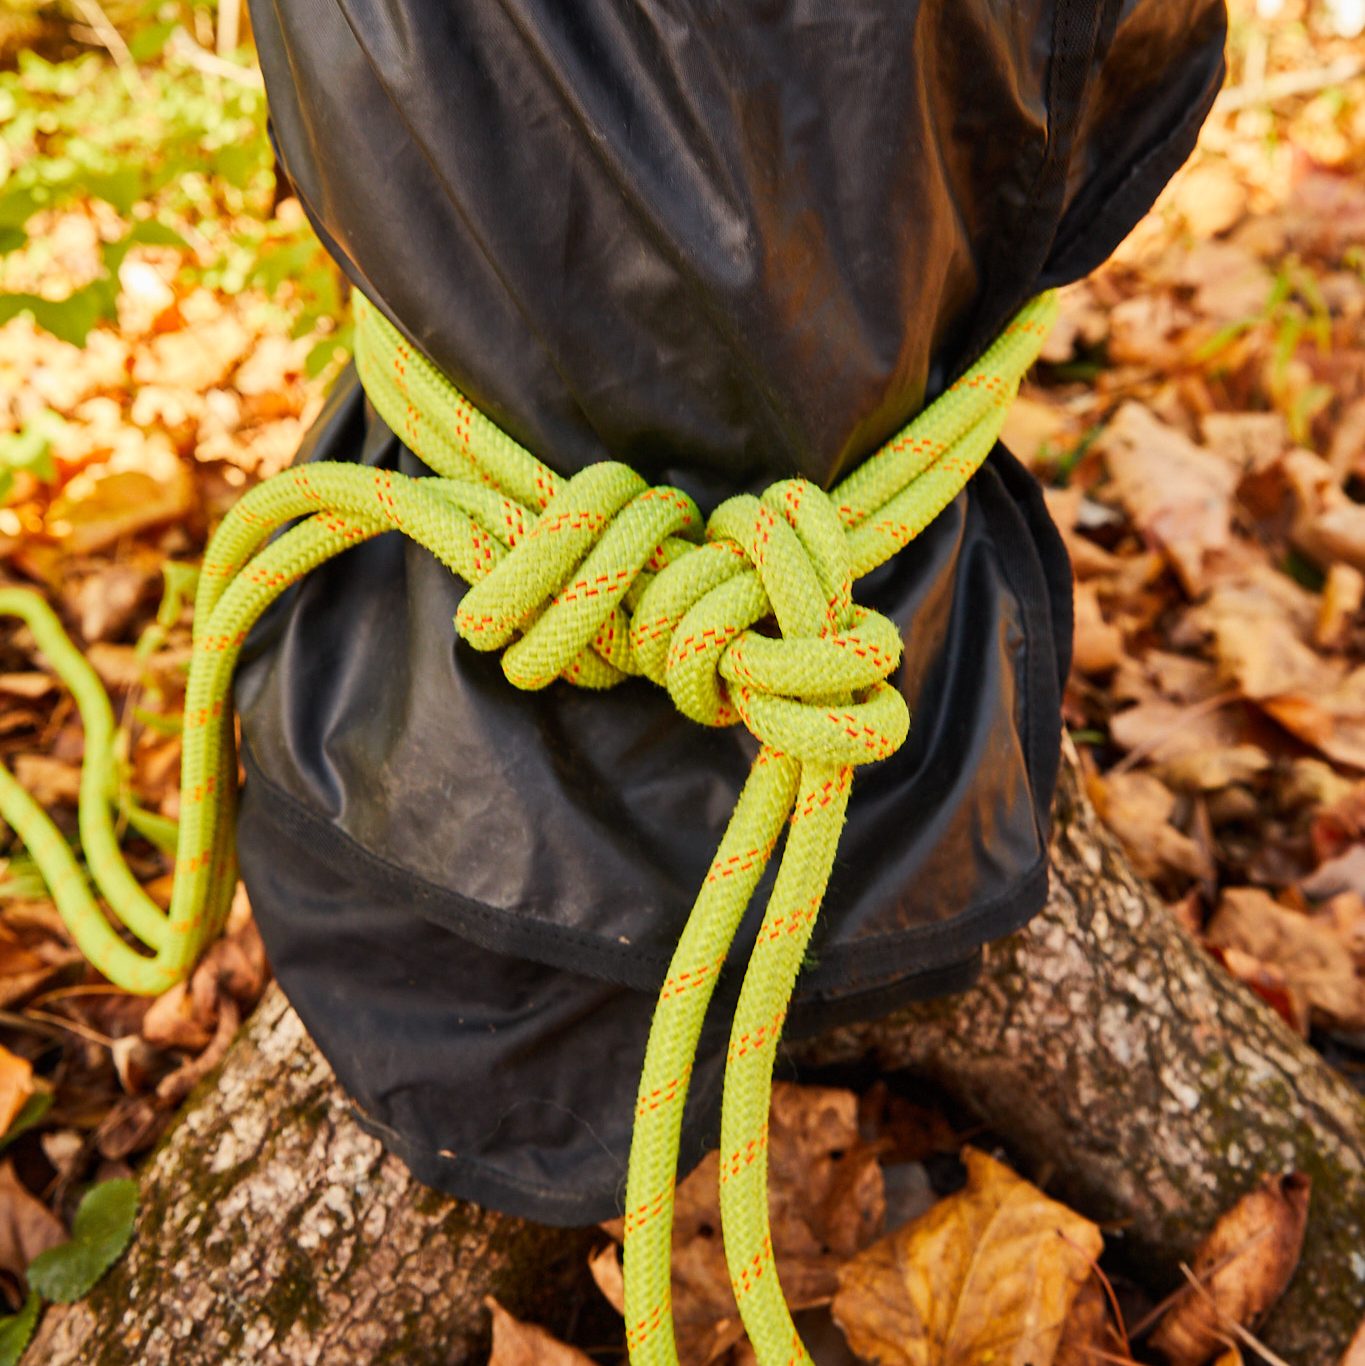
A properly rigged extended anchor set up.
- Masterpoint over the edge
- Edge protector
- Climbing rope through two locking carabiners (or three non locking carabiners) with their gates opposite and opposed.
- Climbing rope running free of the edge of the cliff preventing erosion and abrasion of the climbing rope.
Our private instruction, beginner, or advanced climbing courses all cover the use of personal tethers and the building of extended anchor systems for use at John Bryan. Book here today.
ETHICS
-Use webbing, cordelette, or static line and locking carabiners to create extended anchor systems for top roping.
This protects your rope and the edge of the cliff from unnecessary friction wear. It also protects the fixed anchors from unnecessary wear and tear.
Aluminum, locking, pear shaped (also known as HMS) carabiners, (gates opposite and opposed) will work well for this. I enjoy these standard aluminum HMS lockers from Mammut.

However, if you are doing a ton of top roping aluminum carabiners will wear down quickly and become deeply grooved. Probably, within a season, experiencing enough wear to warrant replacement.
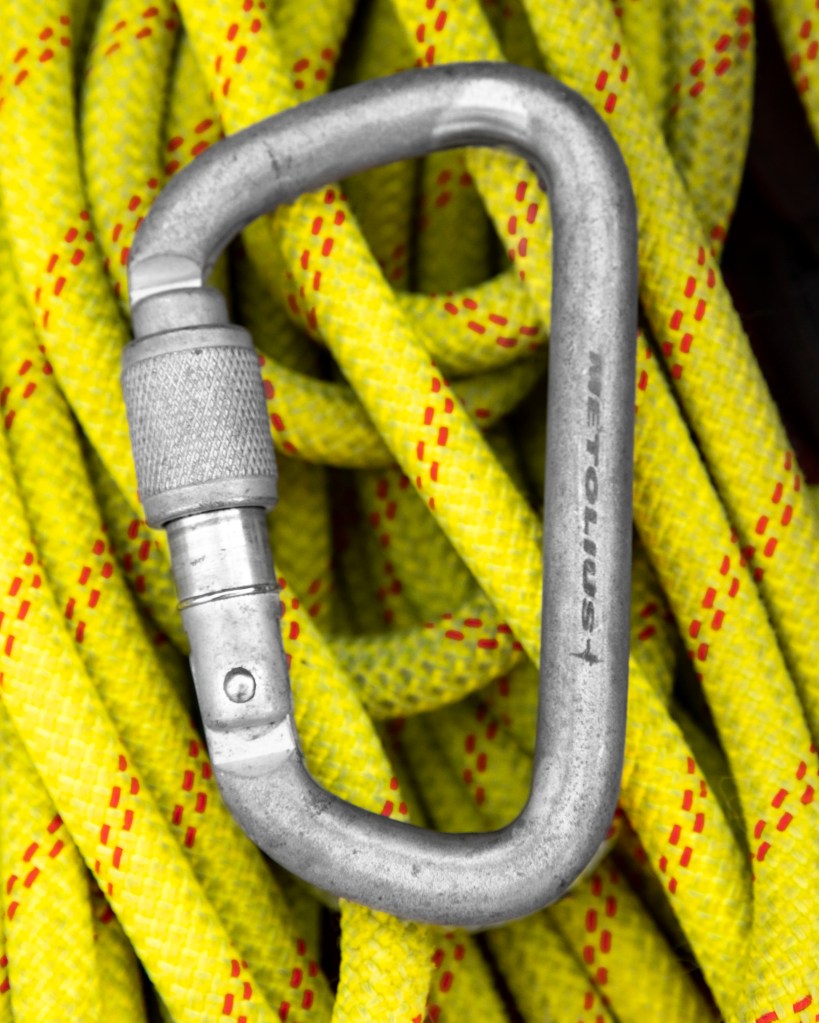
Two steel locking carabiners with gates opposite and opposed on the masterpoint of your anchor will last much longer if you do a high volume of top roping.
Three non locking oval carabiners (gates opposite and opposed and UIAA rated) on your master point will also work and last quite a long time. They are however hard to find at climbing shops. I frequently have to find mine through an arborist or rigging supply company which also supply UIAA rated carabiners and other hardware.
There is a third option. Edelrid Bulletproof Locking Carabiners. These are my personal favorite as a guide. They combine the low weight of aluminum with the durability of steel.

These aluminum carabiners offer a stainless steel insert, over the aluminum where the rope runs, reducing the wear the carabiner experiences over its usable life as part of a top roping anchor system and in other applications. They are however, rather pricey.
-Do not use trees or natural vegetation as climbing or rappelling anchors.
Climbing puts a ton of force on anchors, those forces can damage a tree’s bark leaving it open to infection, but most importantly, repeatedly walking around the same tree to use as an anchor time after time, can compact the soil around the tree making it harder for the tree to obtain nutrients and moisture, ultimately killing the tree.
At John Bryan State Park, it is fine to use an *appropriately selected tree* (with a rope pad to protect the tree) as a personal anchor to approach the edge of the cliff and set up your climbing anchor on the fixed hardware but never use a tree as a climbing or rappelling anchor as outlined by the local climbing ethics for John Bryan State Park.
*Our beginner, advanced climbing, and anchor building courses all cover appropriate natural anchor selection for personal tethers*
Again, 6 feet (about 2 meters) is the AMGA’s least recommended distance to be near an edge without a tether. This distance is also the standard for guides.
-Do not run your climbing rope directly through the bolts for top roping or rappelling
This creates unnecessary wear on the fixed gear. When you use the fixed gear for top roping, the rope is being pulled through the eye-bolts continually throughout the day. Over multiple climbing seasons and with enough climbing traffic, friction from the rope after picking up debris and dirt from the outdoors, will cause deep grooves to be worn into the steel of the fixed gear. This will weaken the hardware and shorten its life. Meaning, it will have to be replaced more often. This is both expensive and bad for the rock as it can eventually cause more holes to be drilled further weakening the rock. In worst case scenarios weakening it to the point of making unreliable for fixed protection.
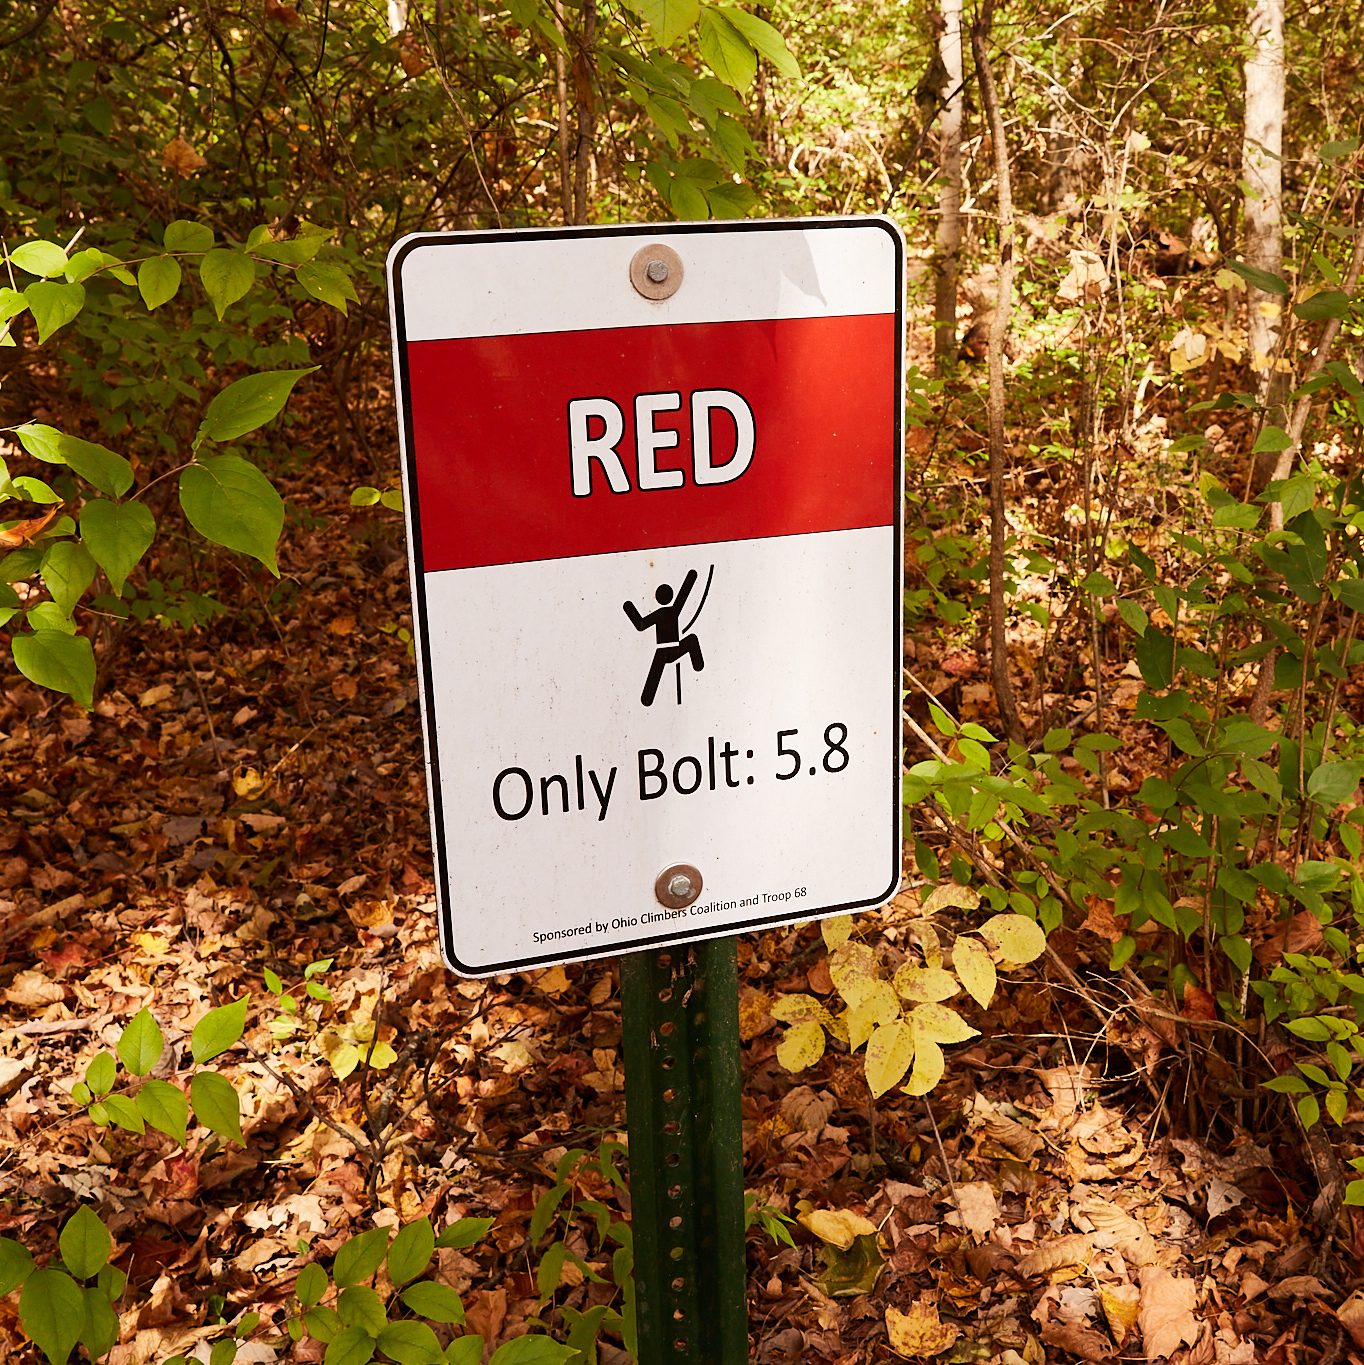
RED CLIMBING AREA
The red climbing area has only one official 5.8 route listed on the sign. Although there are 3 routes listed on Mountain Project. (John Bryan Mountain Project)
There are two other pairs of bolts that aren’t listed on the sign. One pair is to the west of the official 5.8 route, the other pair is to the east of the official 5.8 route. They were buried under quite a covering of dirt. They were recently dug out and should be easier to find now.
It is about a half mile from the Western Parking lot by the playground.
Follow the Storybook trail south until it intersects with the North Rim Trail
Head East on the North Rim Trail crossing a small footbridge.
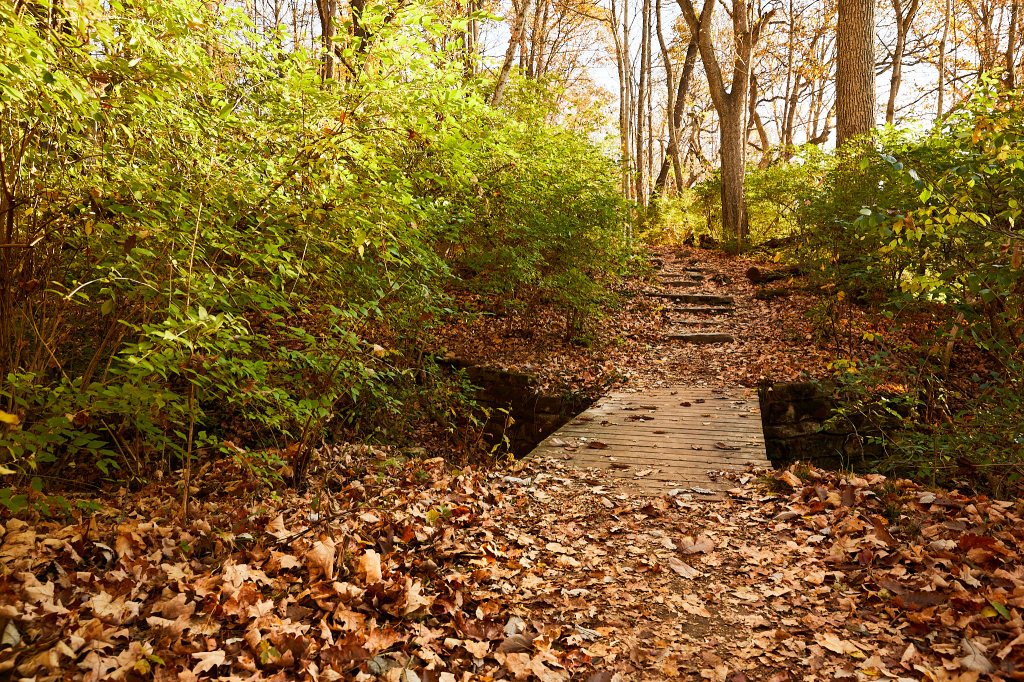
Just past the footbridge to the south, near the tree pictured closest to the edge of the frame are some stone stairs heavily blanketed by leaves. This is the scramble up and down trail.

The trail down to the bottom of the red site.
Continue past this, staying on the North Rim Trail and you will see the sign for the Red area on the North side of the trail.
The official 5.8 route area has only one solid tree for a personal tether. It is located back in the woods on the north side of the trail. You’ll have to initially run your personal tether rope across the trail while setting up your anchor.
There are two bolts (pictured below) close to the edge. They are 10 feet or so apart. This means your anchor should be set and equalized directionally to either the left or right of the bolts, not in the middle between the two. Setting it up to between the middle of the bolts will cause the individual legs of your anchor to be greater than 90 degrees and actually multiple the force on the bolts to an undesired amount.

The climbing is pretty straightforward face climbing with plenty of edges and pockets. Most of the climbs at John Bryan, have an official route per set of bolts but can also be climbed as a “choose your own adventure” climb. Red is no different. There is a short crack system that could also be climbed.
The Red Route
The shortest established area at John Bryan
It would also offer a good spot to teach the basics of gear anchors. As there are a few cracks close to the ground.

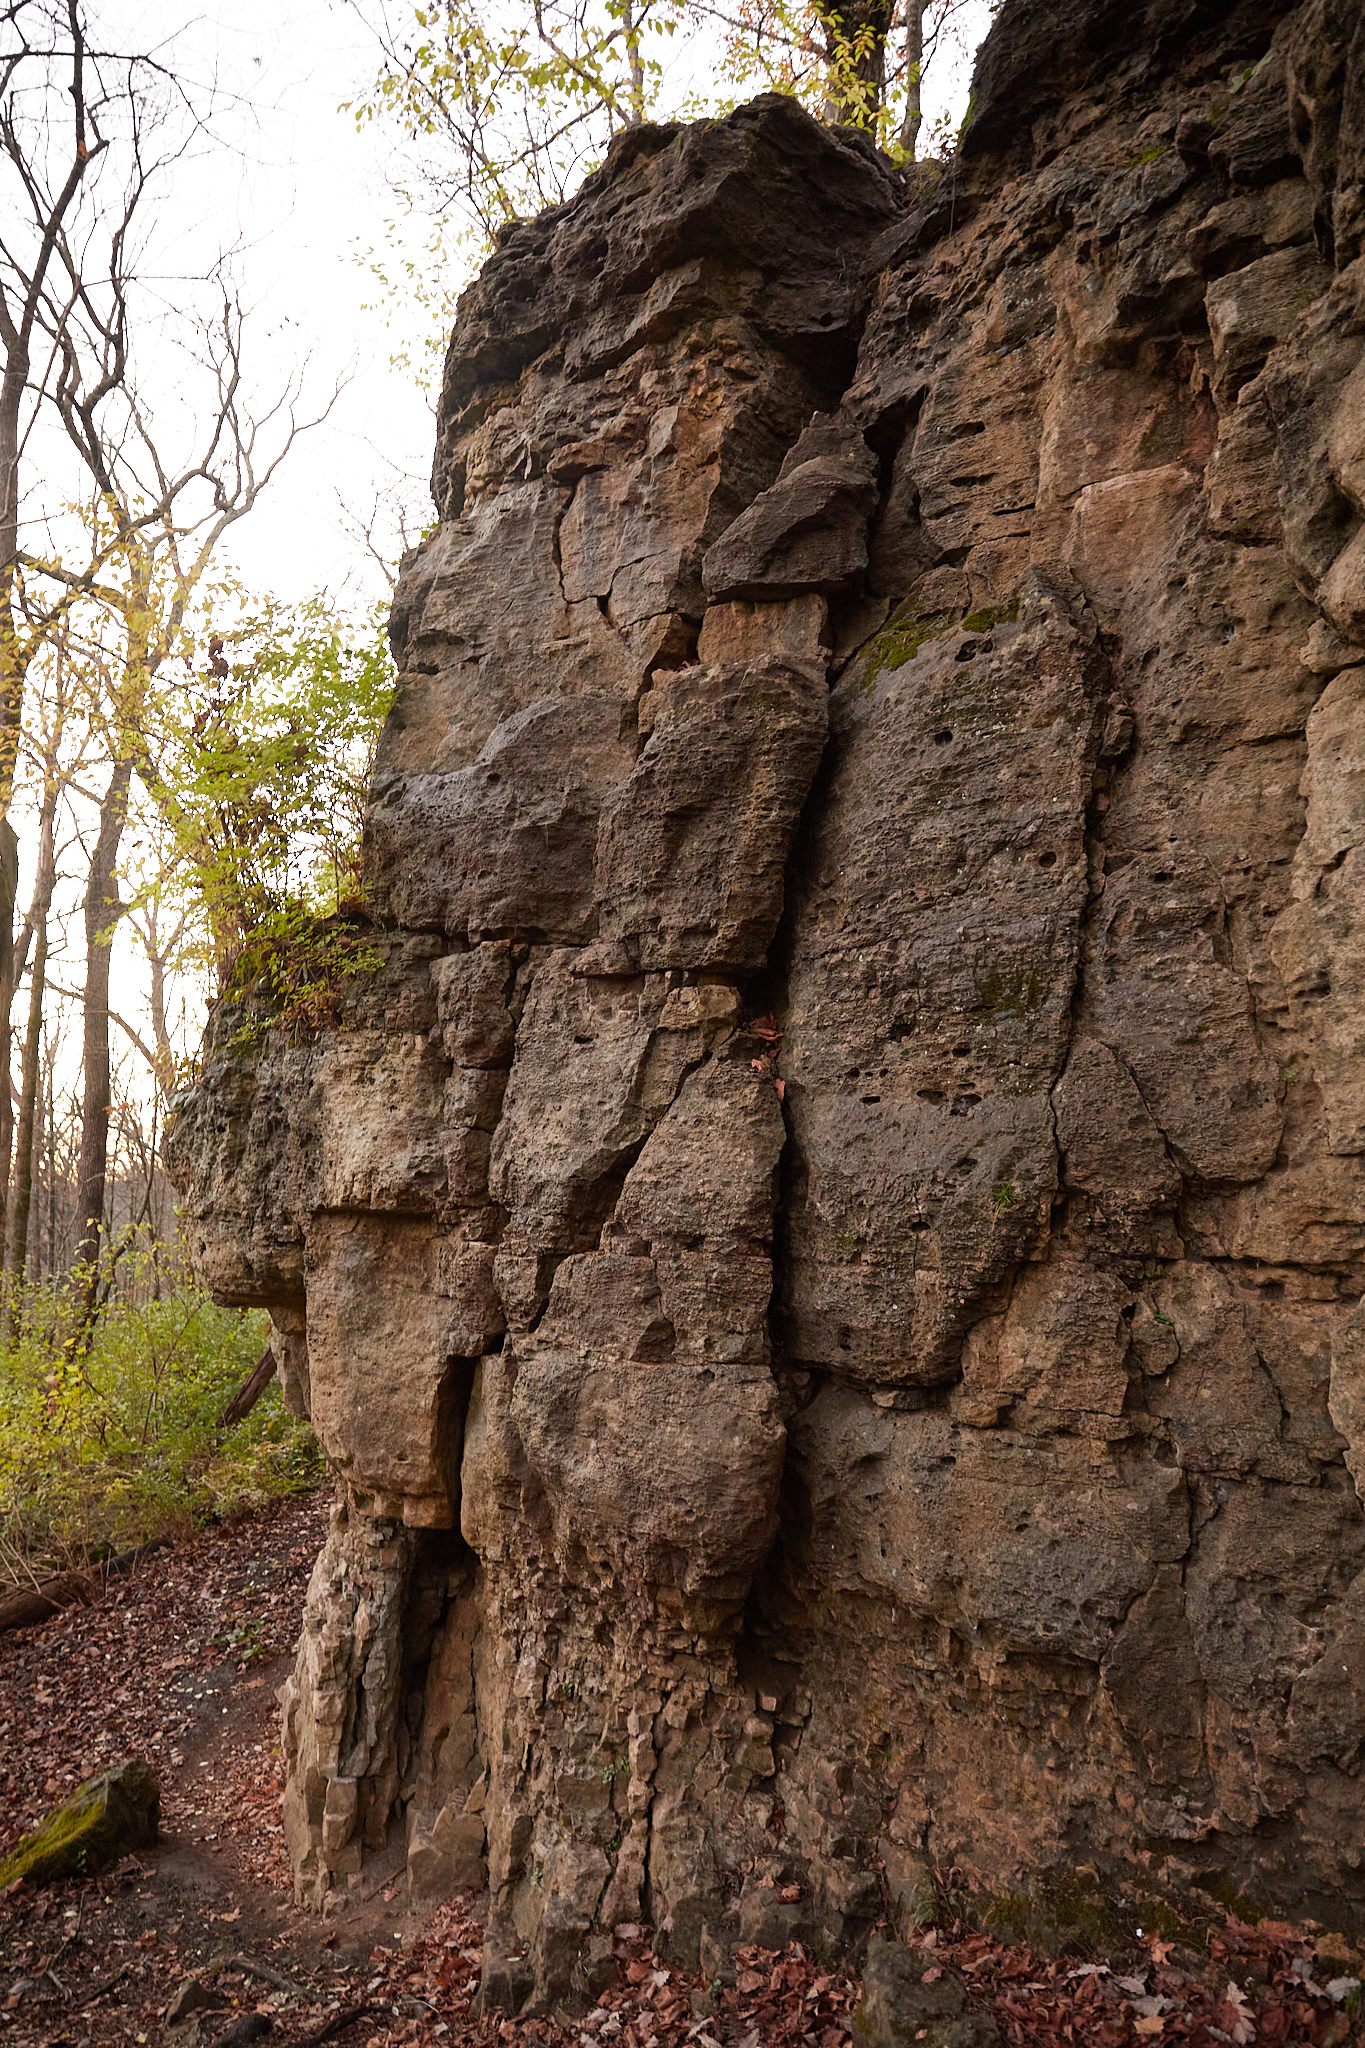
Recently, a long lost pair of bolts in the red area were re-discovered. These bolts were covered under quite a bit of dirt and debris, and have since been dug out. The presence of these bolts seem to indicate there is an undocumented original climb on the overhang pictured below. These bolts are widely spaced as well and should also be set directionally to the left or right of the bolts.

The last thing to note about the red climbing area is someone has installed what appears to be 3 bolts, hangers and welded rings about 10 feet off the ground up on a ledge. These are under a small overhang, They have been there quite sometime but appear to be in good shape.
They are to the west of the climbing route. While not entirely without consequence should you fall, the ledge is about 5 feet up with the bolts 5 feet above that.
I am assuming these were installed by a climber looking to teach others how to build anchor systems, clean a route, and properly set up a rappels. It is not a terrible spot to do your first real anchor clean, or set up your first real rappel, but in my opinion, it is a little high off the ground with some fall consequence for teaching first timers.
My recommendation is they would be better served first by learning in ground school on some bolts at a gym, or on something like a Remsboard. Then moving onto some belayed rappels with a guide, before finally, doing their first, guided solo rappel, which, the black climbing area is perfect for.
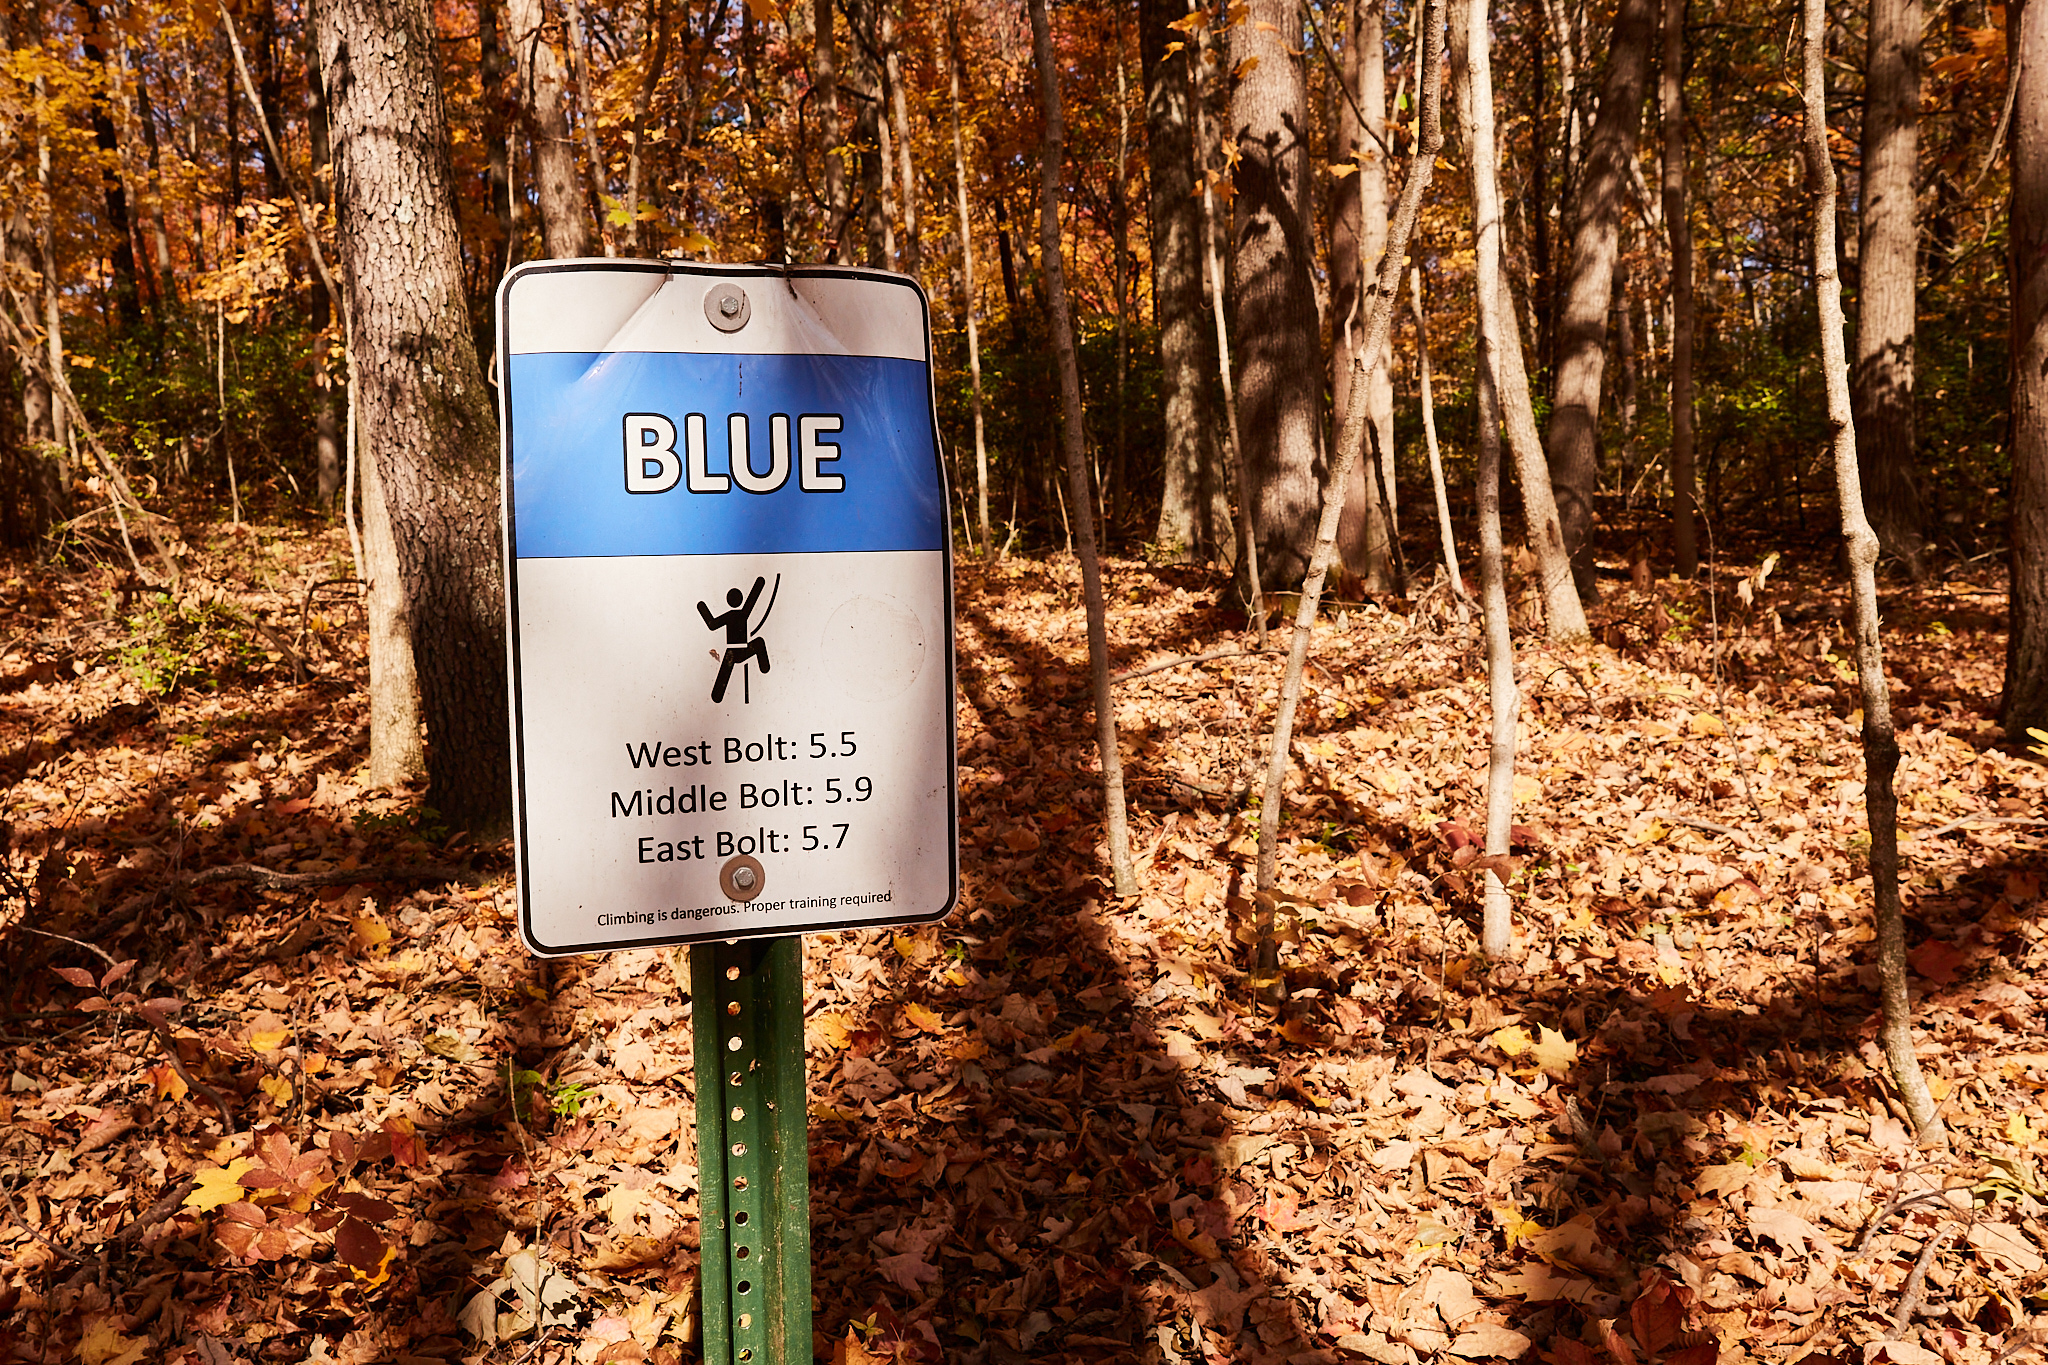
BLUE CLIMBING AREA
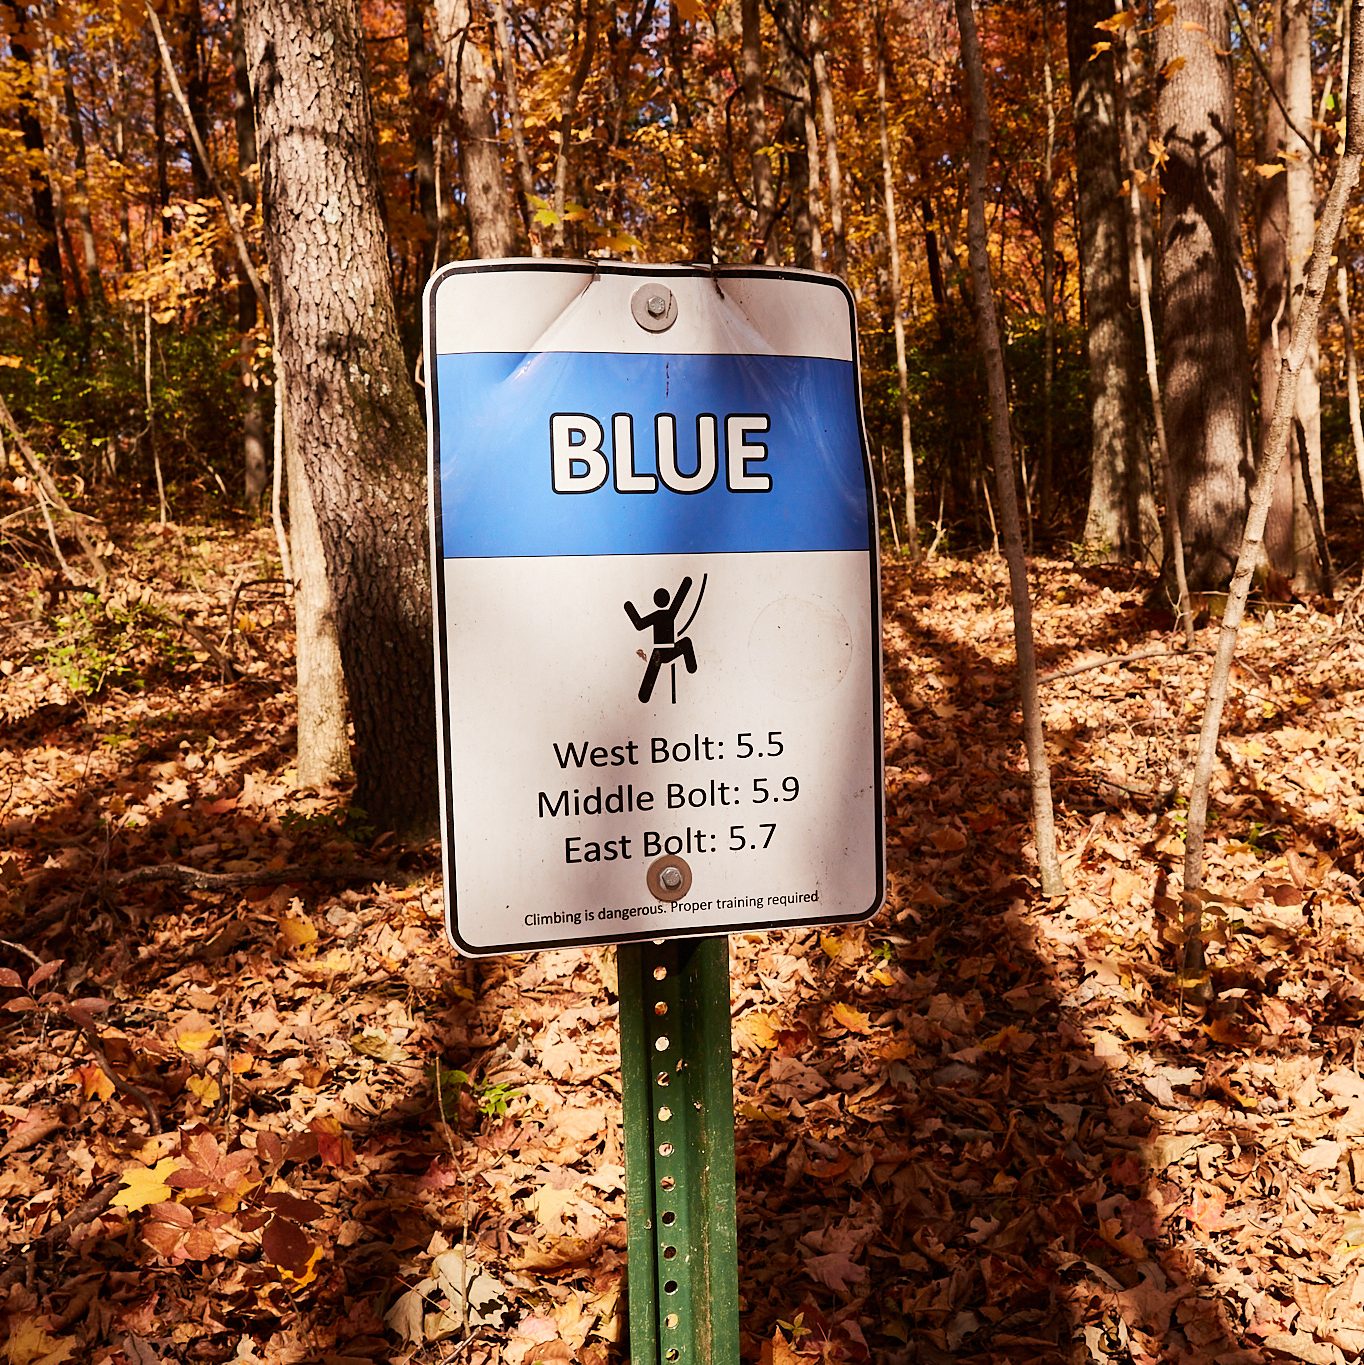
The blue climbing area is easily accessed by the middle parking area.
Follow the trail departing from the parking lot and picnic area for about 1/8 of a mile. It will intersect with the North Rim trail. Turn West (right) at the junction and follow the trail for about 400 feet. It will bring you to some stone stairs that lead to a bridge that spans a small stream.

Crossing this bridge and ascending the stone steps beyond it, will bring you to what looks to be a deer trail to the south. This is the bottom site access trail for the blue area. The first bolt line should be 50 feet beyond this to the west.
The blue climbing area has 3 bolted lines. The three areas are each about 30 feet apart.
The eastern line is marked by some unfortunate graffiti that should be removed. The bolts are each about a foot from the cliff edge. There are multiple monolithic trees close by that are suitable for your personal tether.
This bolt set offers a few different lines of climbing. It is a well featured face offering some crimps at the start and moves into pocketed face climbing towards the top.

The middle bolt line of blue offers at least two different lines of classic limestone face climbing. Up top, the bolts are each about 2-3 feet from the edge. However, there are plenty of suitable natural anchors you can use to approach them. Assessing the routes would lead you to believe, they ease towards the middle, however I found this to be the crux. The left line of the face offers a stiffer route more in the 5.9 range than the right line but both are enjoyable climbs.

The west line of blue offers the easiest lines of the area. The movement off the ground is fun. The feet are well polished, although there are plenty of less polished options. Once off the ground it is pretty straight forward jug filled face climbing.
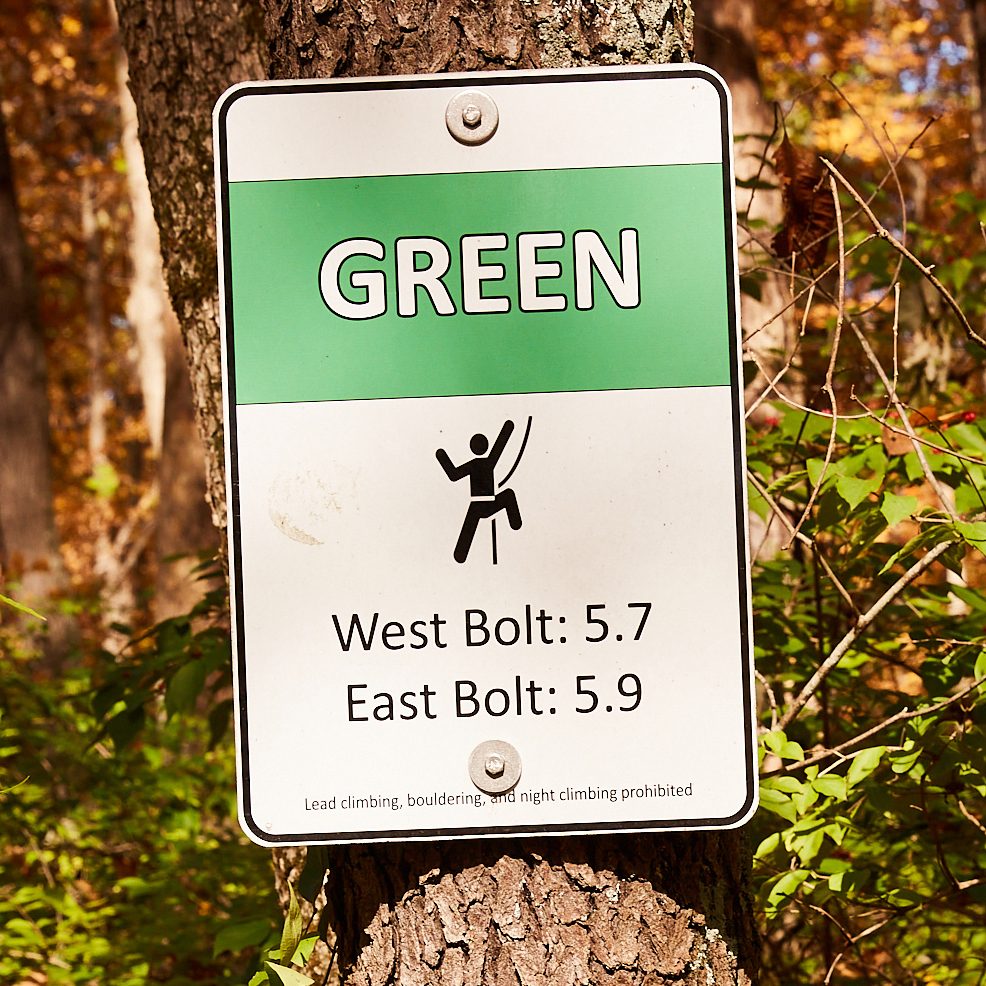
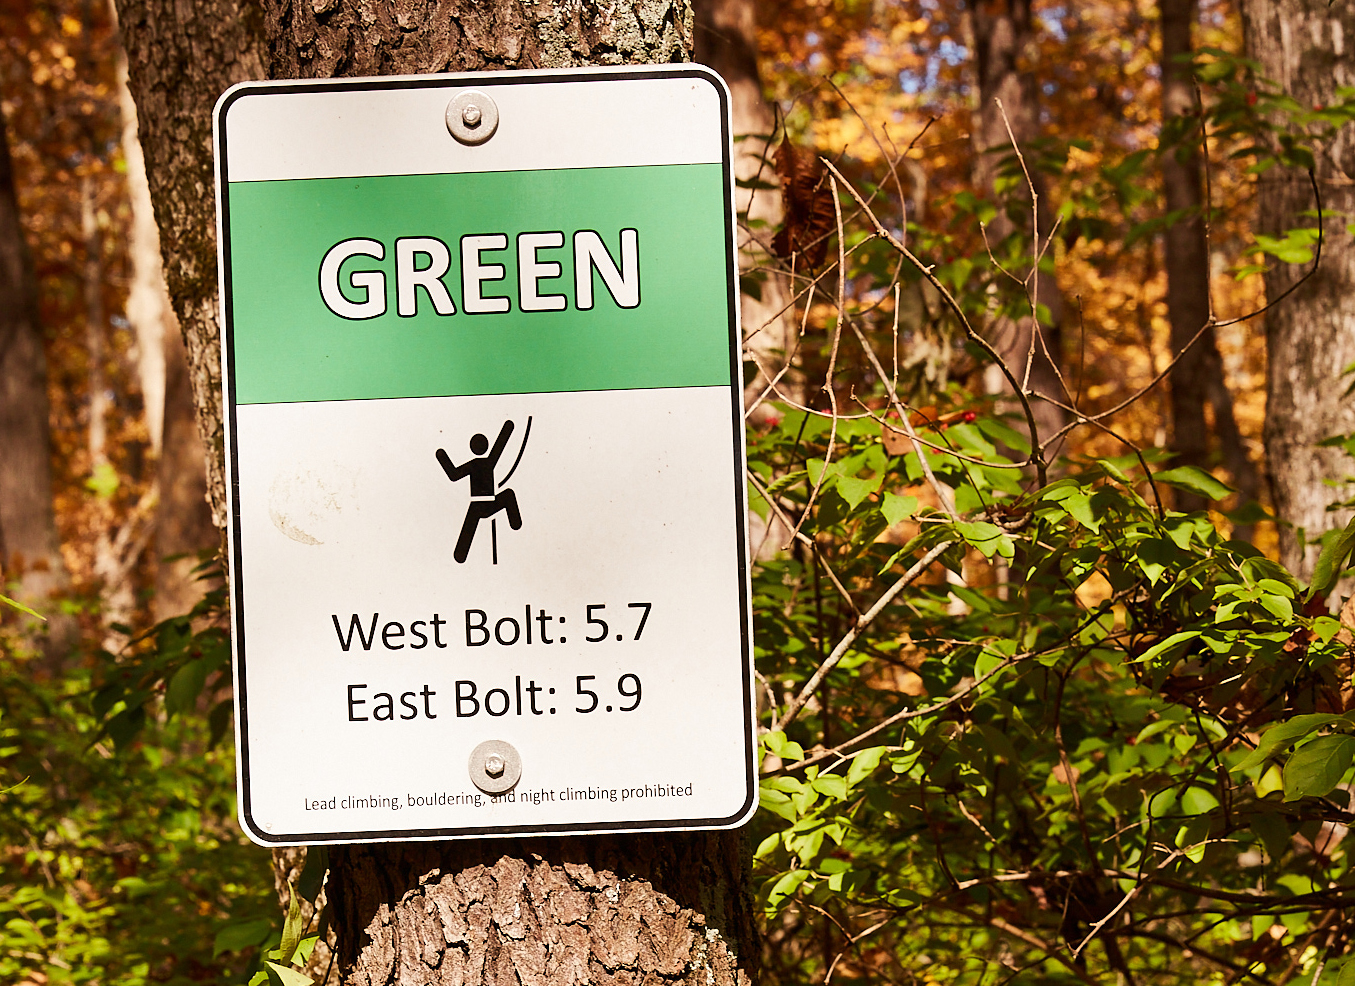
GREEN CLIMBING AREA
The green area is most easily accessed from the middle parking lot as well. Approach the North Rim trail on the path from the parking lot and picnic area like blue, but instead of turning West, turn East (left). Continue hiking down this trail for about a quarter of a mile (400m) and you will see the green area sign on your right.
The green bottom site access is a short class two or three scramble down. Facing the cliff from the trail it will be to the east. The bolts are about four feet from the edge. There is a solid tree about fifteen feet from the edge that could be used to set up a personal tether. There is a second smaller tree at the cliff edge that could be used to elevate a master point should you wish to belay from above.

The scramble down passes under the downed tree.
The bolts are up on a ledge making this a spot for a more adventurous rappel should you have novice rappellers in your group. It allows one to practice navigating an edge with a slight roof, which as always a challenge for rappellers that may have some experience but are still pretty green.
As far as climbing goes, green has two of my favorite lines at John Bryan. The are the two cracks both on the east bolt line and both a solid 5.9.

The East bolt routes

The start of each route is a series of burly, boulder style moves that turn into a mix of fun lay-back crack climbing, stemming and finish with technical face climbing. Although the original foot holds are well polished, the rock is featured enough to offer plenty of new more solid footing. The only negative thing I can say about the two climbs on the east bold is I wish they were each about 40 feet longer.
The west bolt offers two decent lines as well. I use the same tree for my personal tether for setting up both lines.
The right most being classic limestone face climbing during the first two thirds of the climb with plenty of pockets and side pull crimps to pull on. It finishes with a large ledge and small roof on features that range from sloping dishes, large pockets, to pinches and blocky ledges.
The left line offers up more straightforward climbing starting on a large flake and well featured rock mostly in the style of blocky pinches, ledges and jugs.
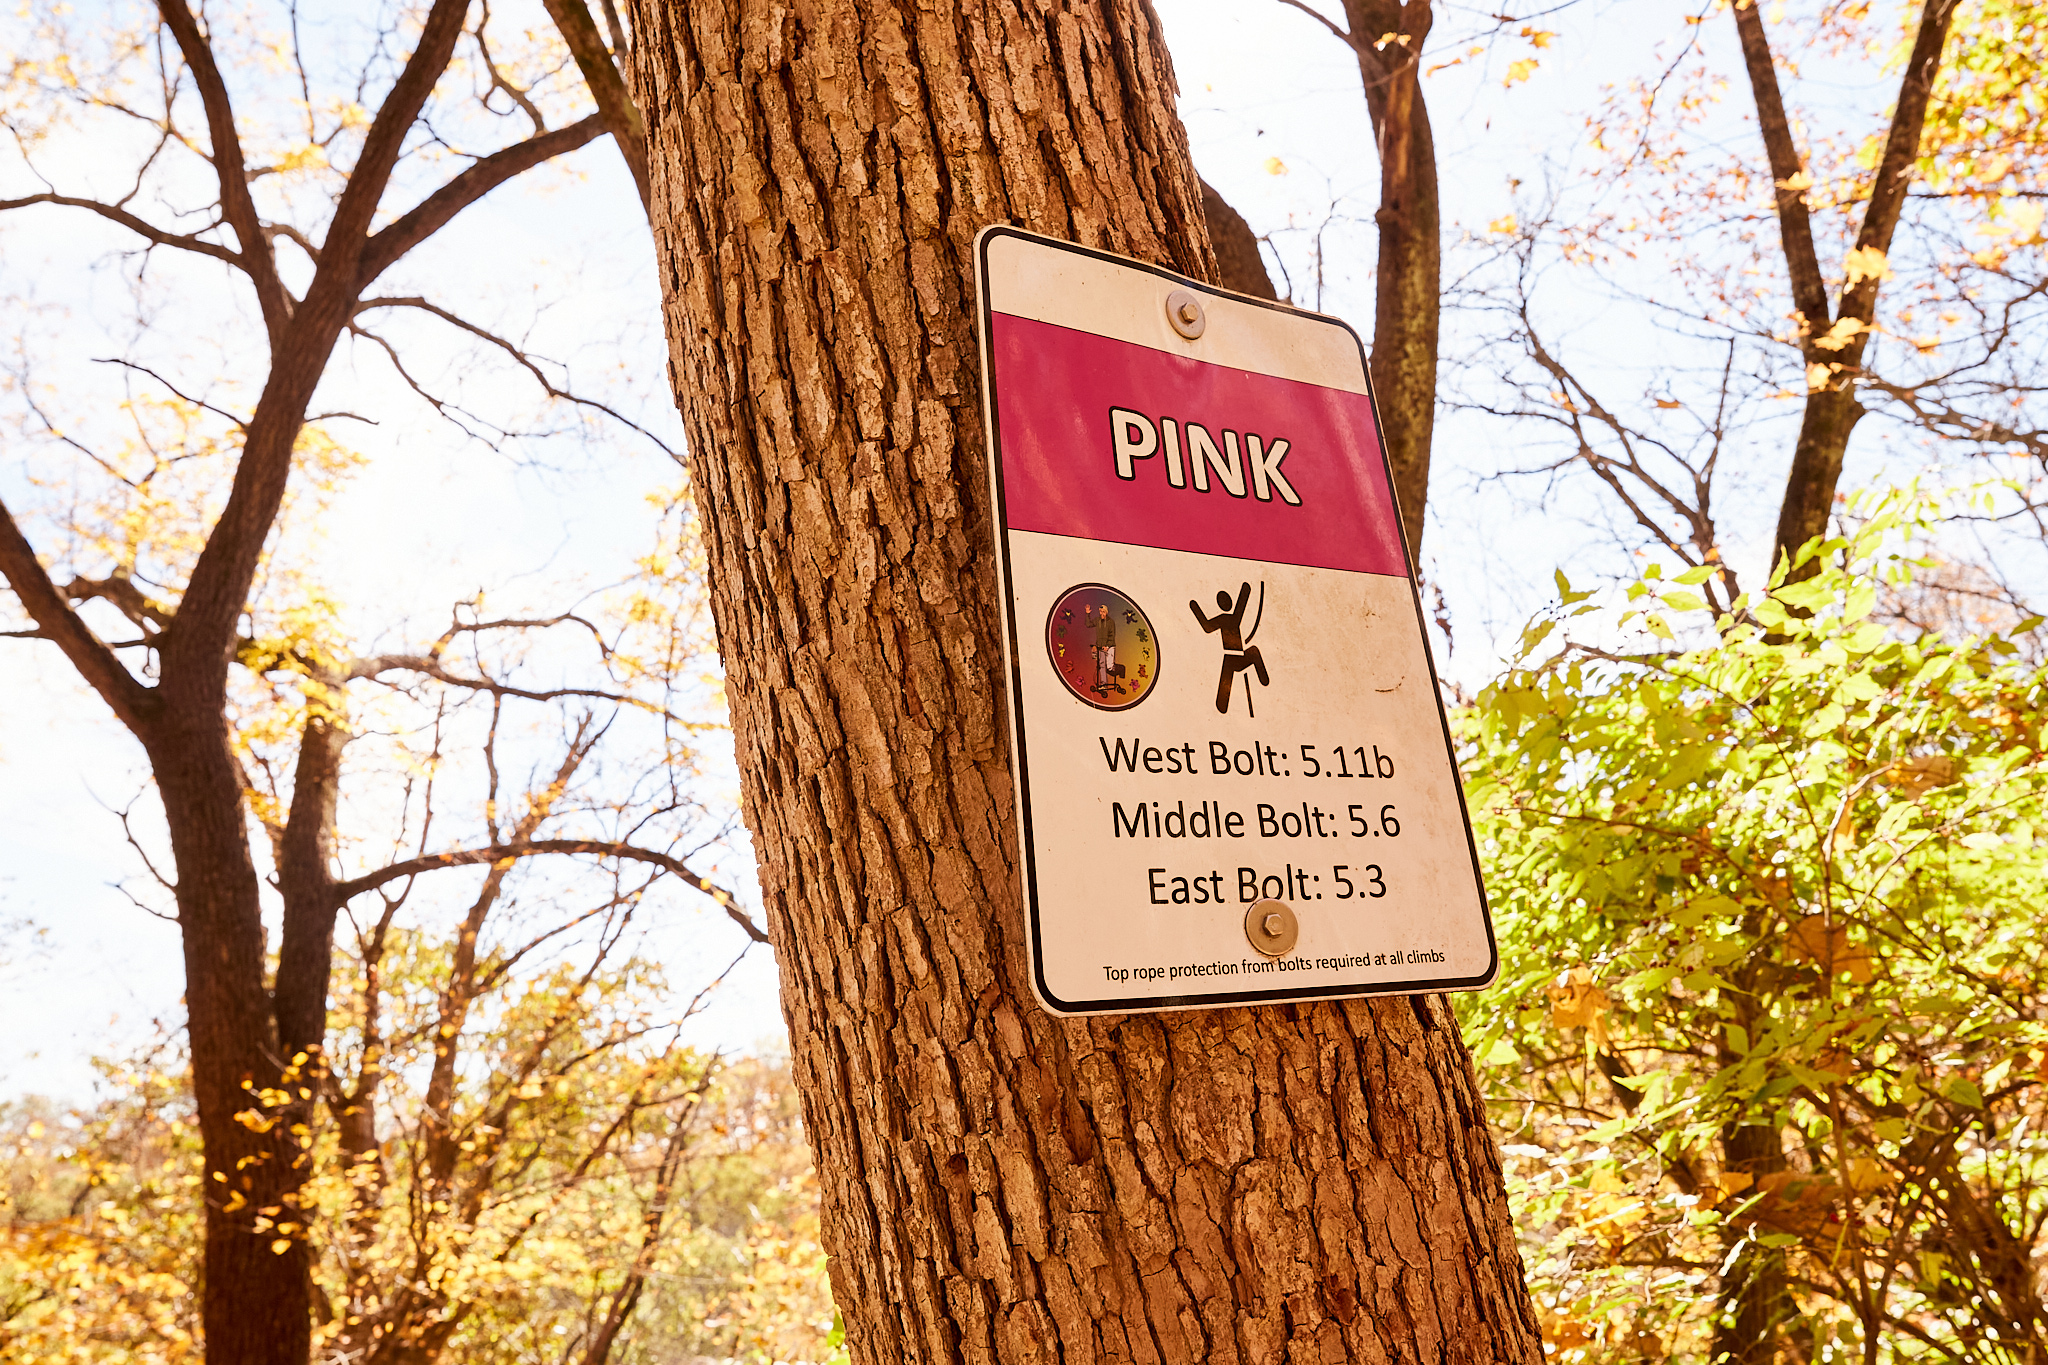
PINK CLIMBING AREA

Pink offers 3 bolt lines with a variety of route potential as well. Mountain project lists 5 climbs in this area depending on how your rope is set. The middle and east bolts are on top of the same cliff edge about 10 feet apart. The west bolt is off on its own about 30 feet west of the middle and east bolt.
The west bolt of pink offers a short but stiff 5.11b. The crux is a toss up between getting off the ground and the middle of the face climbing on small edges, side pulls, slopers, and pockets. It eases as you approach the roof offering more ledges and jugs to pull on just before the anchors.

The middle line in the pink area offers potentially two lines of crack climbing. Both crack routes can be escaped and a climber can transition into face climbing if they desire. The western crack (left in the photo) offers a stiff start on well polished feet. The most obvious feet are so polished that the rock seems oiled even in the stickiest rubber. I chose less obvious feet to get off the ground. The first 3 moves seemed to be the hardest on the route and it eases as you get hire. With the polished feet and sticking to the crack, I would say 5.6 is a bit of a sandbag when viewed through the lens of today’s grades. Transition to face climbing at the top of the crack.
The east most crack of the middle line offers significantly easier climbing. I would put it in the 5.4-5.5 range. The movement is really straight forward and somewhat repetitive. I would consider it a good climb for warming up.

The eastern most bolt line in the pink area offers multiple lines. One of them being the most accessible and straight forward climbs in the park. From the ground, the crux seems to be the transition between the lower face flake to the ledge just below a prominent horn. It is a really fun climb and a great warm up.
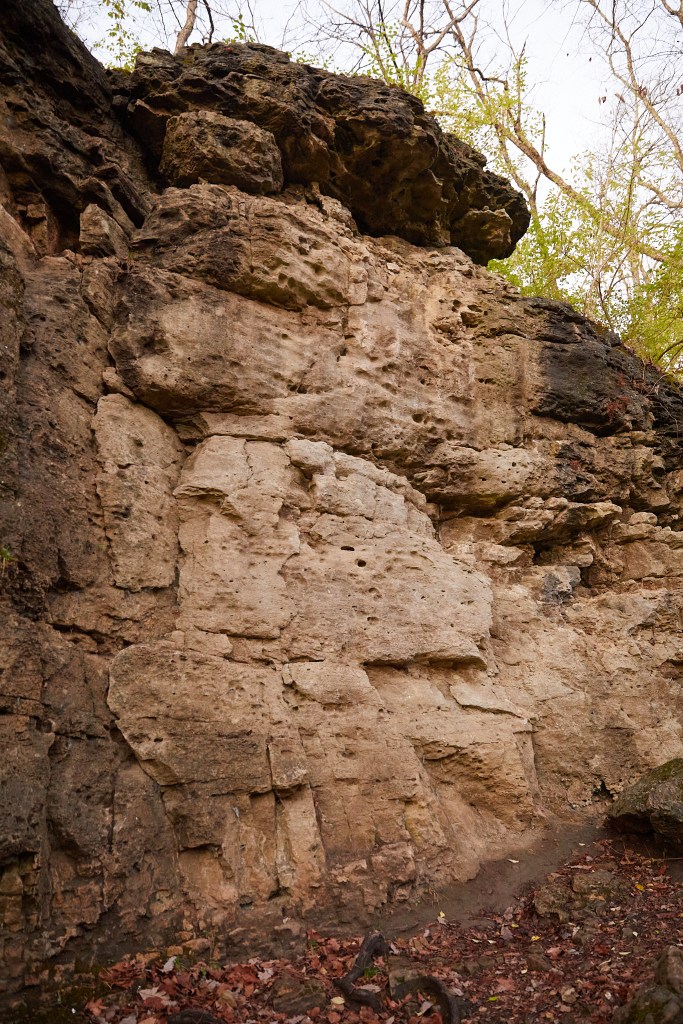
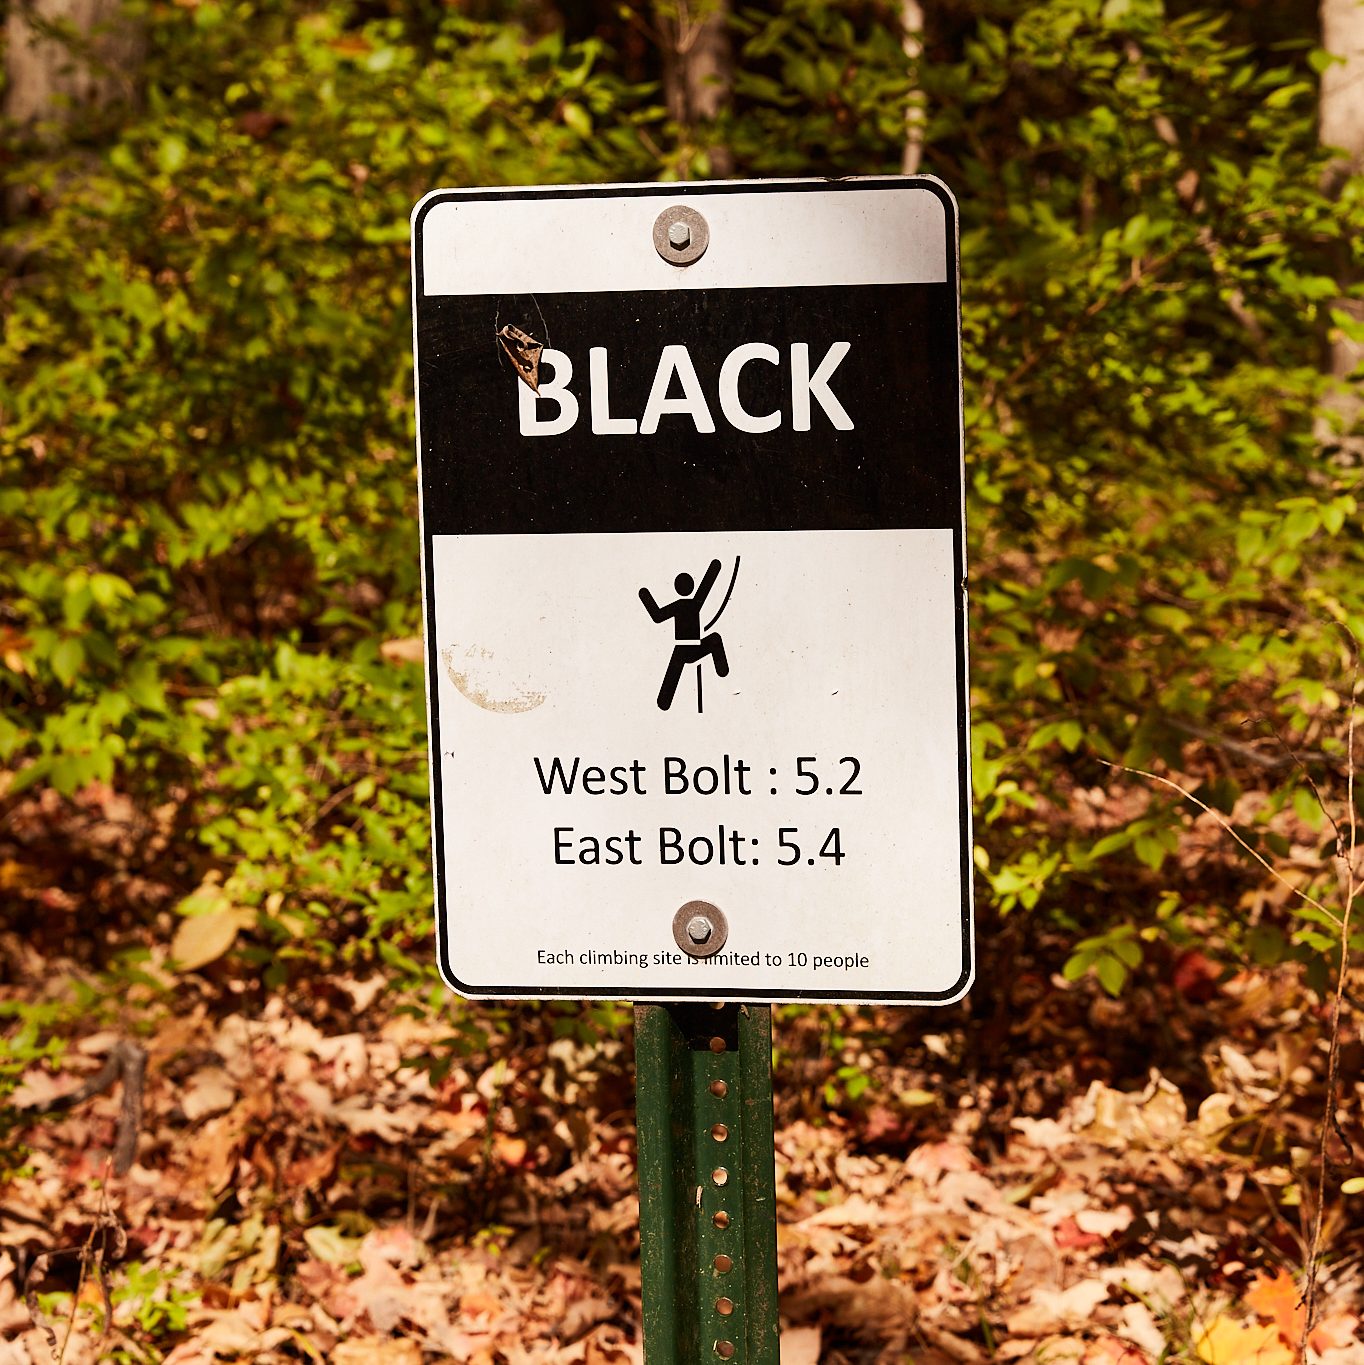
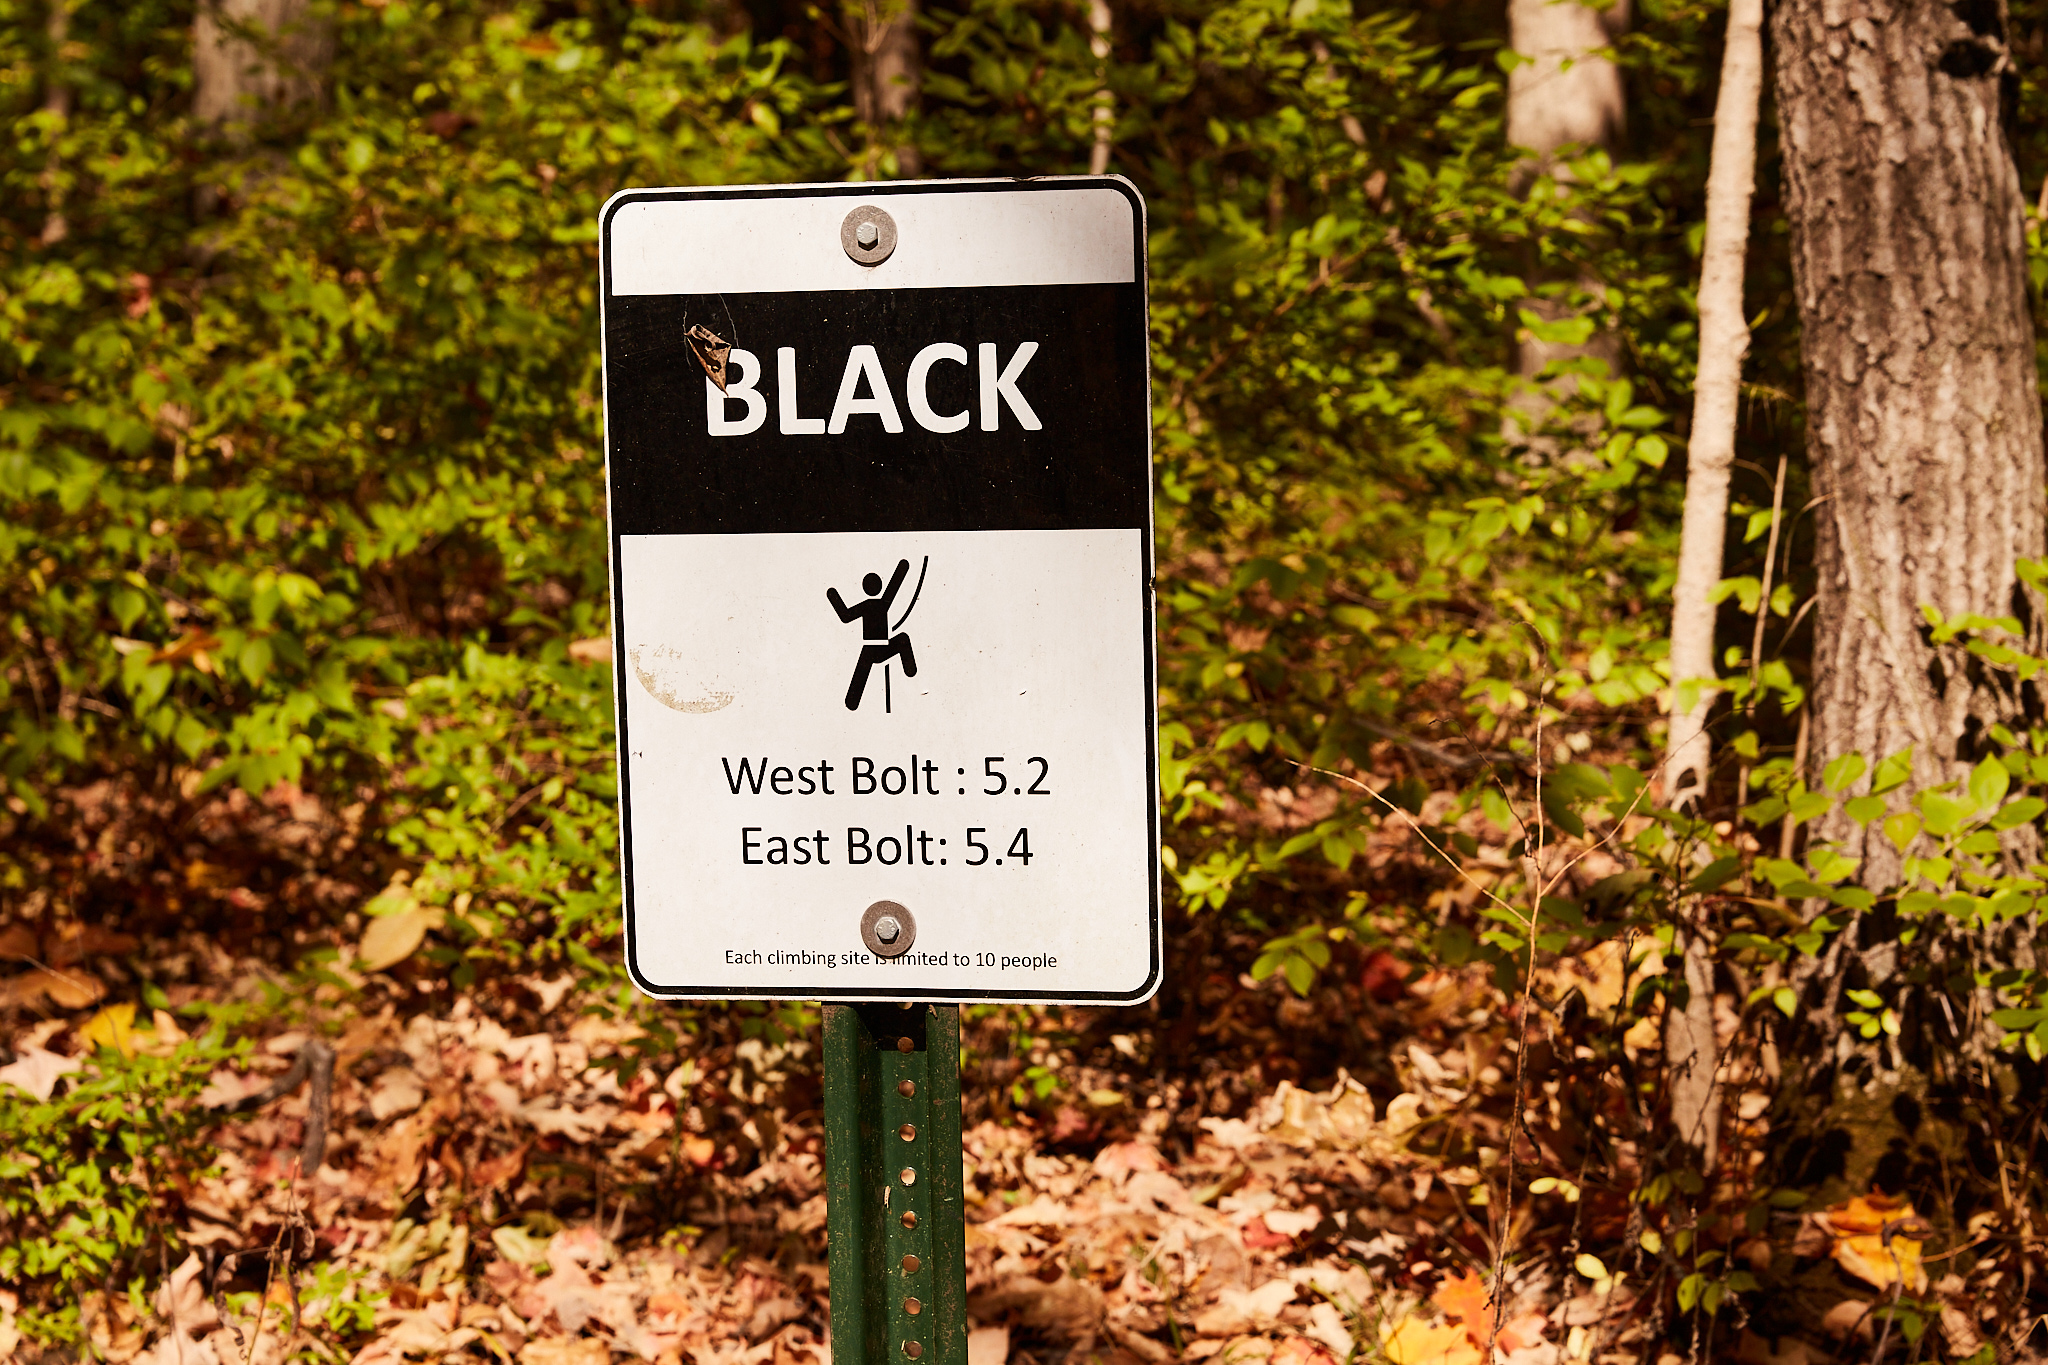
BLACK CLIMBING & RAPPELLING AREA
Black is considered the one official rappelling site the park has to offer.
Black is the best choice for both first time climbers and first time, inexperienced, or infrequent rappellers. It is also the best rope systems training site , after extensive practice in ground school.
It is a perfect spot for teaching extended anchors, belayed rappels, haul systems, pick offs, belay take-over, top site management, and bottom site management.
The bolts at this site are set about 6 feet from the edge of the cliff. They are located on an upper shelf about four feet south of the trail.
One last time, 6 feet (about 2 meters) is the AMGA’s least recommended distance to be near an edge without a tether. This distance is also the standard for guides.
This ledge is large enough to give you a wide, clean, uncluttered working space where you can set up your static anchors and personal tether prior to approaching the edge. Additionally, the space between the bolts and the trail is a large ledge. It is back from the edge, providing ample space to stage your inexperienced climbers. You can keep visual contact while positioning yourself between them and the drop, keeping your climbers in a zone of least risk.
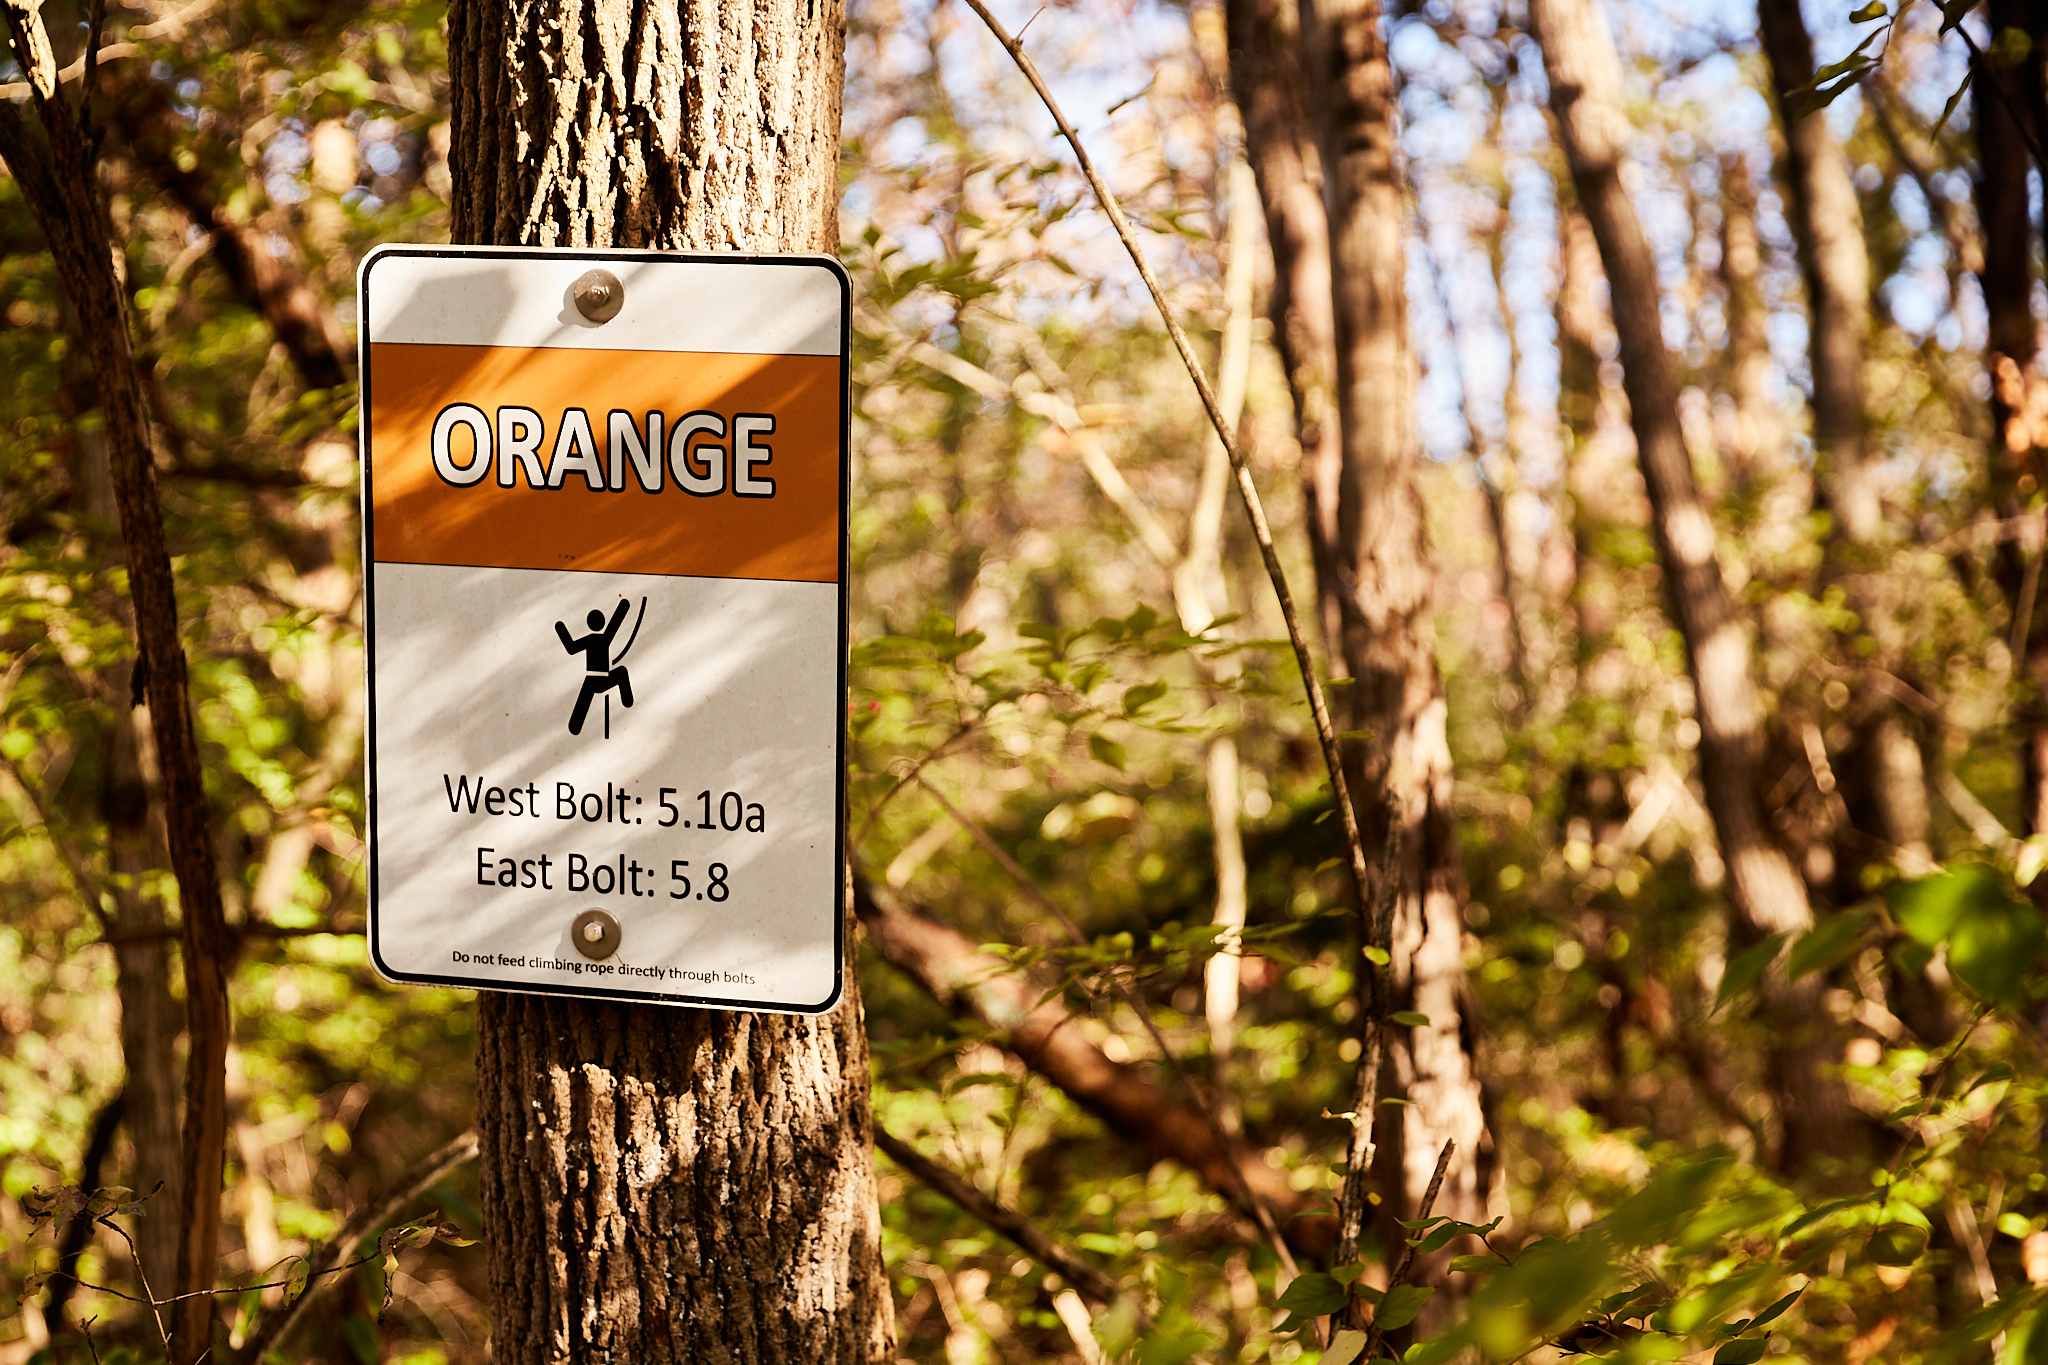
ORANGE CLIMBING AREA

The orange climbing area has two bolt lines. It did have a sign on the top along with north rim trail but this sign has since been removed. There is quite a bit of deadfall in the Orange climbing area along the base of the cliff and quite a bit of overgrowth at some of the cliff edges. Unfortunately, even though the Eastern bolt line offers a 5.8. It has a bad bolt and should not currently be climbed.
The western bolt is a 5.10a and is pictured below. The start of the climb is a hard bouldering move due to the sizeable overhang with few feet to choose from. From there you are climbing on sloping side pulls and small pockets and crimps.
The easternmost line in the Orange climbing area, recently had a bad bolt replaced. It is a great crack climb to top rope and to practice placing traditional climbing gear in. It does have some blocks at the top out left that could loosen over the next freeze thaw cycles so please be cautious!

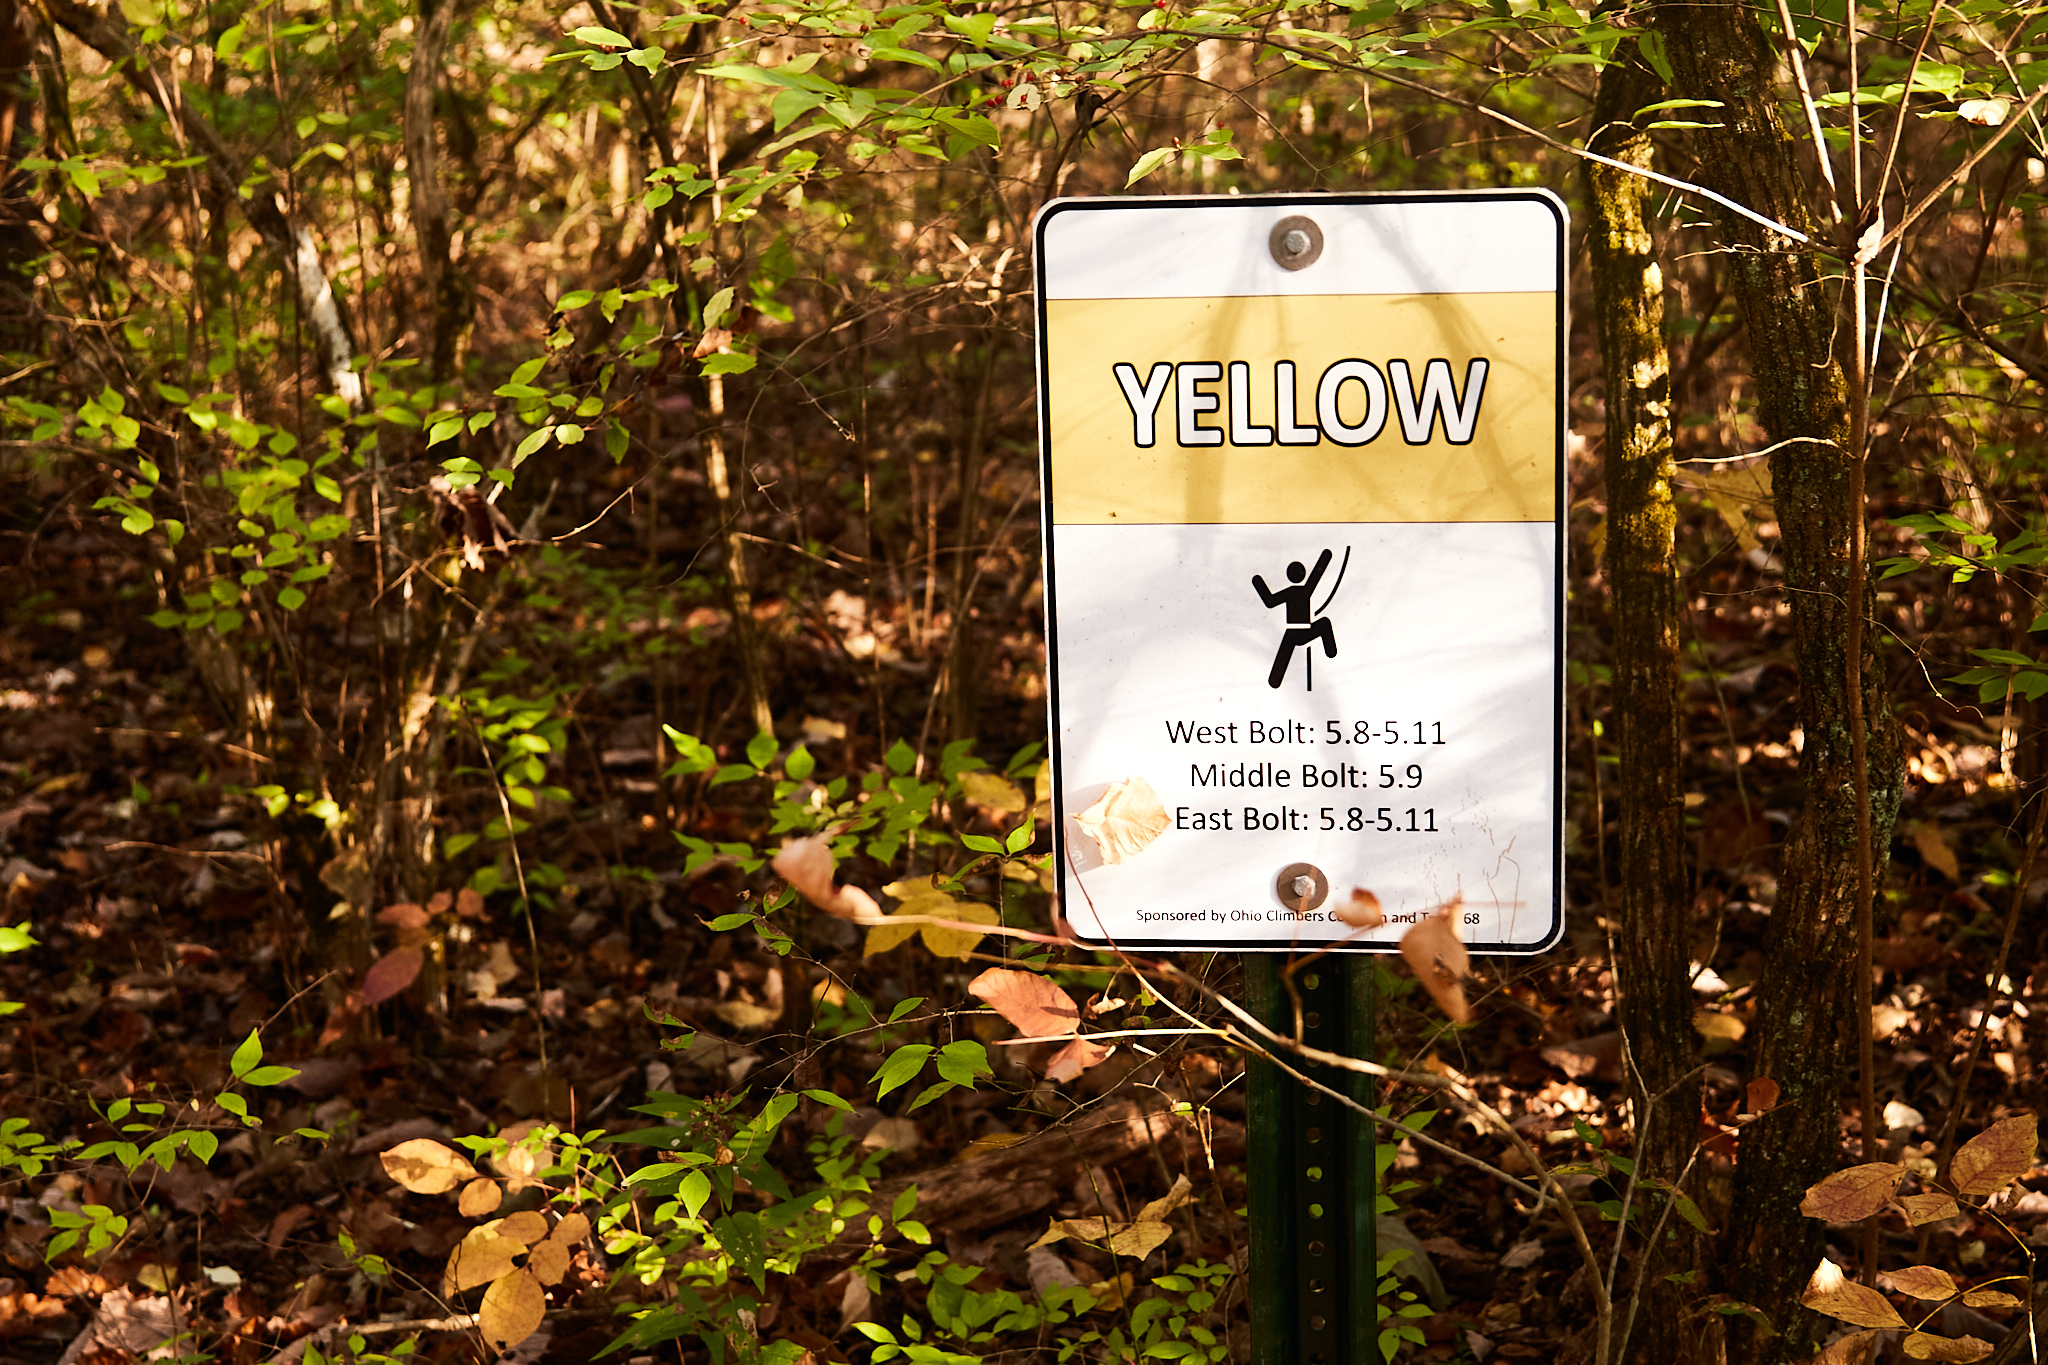
YELLOW CLIMBING AREA
The yellow climbing area has 3 bolt lines with a variety of climbs.
To get to the western line you have to pass through a small tunnel cave that was created when a large block broke off sometime in the distant past and came to rest at the bottom of the current cliff. It is listed as being 5.8-5.11 as there are a variety of short climbs available on this section of the wall. The 5.8 does tend to be height dependant with a few difficult opening moves, then becomes much easier.
The middle line is near the tree with the sign pictured above. It offers a fun variety of climbs as well. The 5.9 is can be climbed using the fallen boulder as stemming chimney style start and then turns into fun face climbing. It can also be climbed without using the boulder, but becomes a more challenging climb.
The wall pictured below, offers what seem to be two taller lines with the hardest part being the start. While I have not climbed them they do seem to be rather difficult.
Getting to John Bryan State Park.
From Dayton
Take I-35 East towards Xenia
Merge onto I-675 North towards Columbus
Take exit 20 for Dayton-Yellow Springs Rd.
Turn Right off the exit (heading east) towards Yellow Springs.
Continue on Dayton-Yellow Springs road into The village of Yellow Springs.
Turn Left onto Ohio State route 68 / Xenia Avenue crossing Yellow Springs Creek
Turn Right onto Ohio State route 343 passing the entrance to Glen Helen Nature Center on your right
Turn Right onto Bryan Park Road follow it for a half mile passing the John Bryan Park sign on your right.
The main park entrance will be a half mile from the sign on your left.
From Columbus
Take I-70 West towards Dayton
Take exit 54 for Ohio State Highway 72 towards Cedarville/ Springfield
Turn Left off the exit on Ohio State Highway 72 / Springfield Jamestown Road (heading south) towards Clifton
Continue on Ohio State Highway 72 / Springfield Jamestown Road (heading south) into Clifton
Turn right onto OH-343 W/North St.
Continue onto OH-343
Turn Left onto Bryan Park Road follow it for a half mile passing the John Bryan Park sign on your right.
The main park entrance will be a half mile from the sign on your left.
JOHN BRYAN BULLET POINTS
ETHICS
- Do not use trees or vegetation as climbing or rappelling anchors
- Use of trees with a rope mat for a personal tether while setting up anchors is acceptable
- Do not run rope directly through eye-bolts
- Causes unneccesary wear on the fixed gear
- Use static line, webbing, or cordellette for extended anchor systems
- Use edge protectors to protect rope and rock
- Wipe climbing shoes off before getting on a route
- Practice LNT principles
TOP ROPE ONLY. NO LEAD CLIMBING OR BOULDERING.
No climbing outside the currently designated areas.
- Cliffs are Dolomite limestone.
- Seven Climbing Areas
- Located on the North Rim Trail
- Red, Blue, Green, Pink, Black, Yellow, Orange
- Black doubles as Rappelling area. Best site for beginners.
- Bolted Anchors (LARGE PAINTED EYE-BOLTS) on top of cliffs (not on faces)
- 2 Large eye-bolts per route.
- Bottom site access via climber trails
-(some class 2 scrambling required)
Extended Anchor systems required.
-No climbing anchors or rappelling anchors off trees.
- Edge protectors recommended.
- Tree pads for personal tethers recommended.
- Shoe mats recommended (to minimize polishing of routes)
3 Parking lots.
- West- Closest to Red
- Middle- Closest to Blue, Green, and Pink
- East-Closest to Orange, Yellow, and Black
- Cell reception is usually good enough for phone calls. Texts are intermittent.
RECOMMENDED GEAR LIST
- 40m Static Rope
- 40m Dynamic Rope
- 4-5 locking carabiners (for anchor system)
- Harness
- Helmet
- Climbing Shoes
- First Aid Kit
- Belay / Rappel Device + Locking carabiners
- Friction Hitch + locking carabiner
- Accessory cordage
- Double length sling or PAS
- Edge protector
- Rope Mat (for trees)
- Rope tarp / Shoe mat
- Belay / Rappel Gloves.
- Backpack (28L-35L volume)
- Water Bottle(s)
- The 10 Essentials are always recommended for any outdoor excursion.
- (extra water/food, 2 sources of fire, dry clothing, shelter, first aid, sun protection (sunscreen, hat, sunglasses) knife, fire, headlamp w/extra batteries, navigation (phone, map/compass)
AS ALWAYS PRACTICE LEAVE NO TRACE PRINCIPLES

“Don’t be an asshole.”-Unknown
Pack it in, Pack it out. Take only pictures, leave only footprints.
EMERGENCY CONTACT
Call 911
Call Park Office 937-767-1274
You are at John Bryan State Park
You are along the NORTH RIM TRAIL
Designate which parking lot East, Middle, or West
Designate which climbing Area : Red, Blue, Green, Pink, Black, Yellow, Orange
***Rock climbing is an inherently dangerous activity. It can result in severe injury and/or death. Climbing should never be done without the proper experience or equipment. No climbs exist without dangers. Any suggestion of a level of safety, equipment required, or technique is a matter of pure opinion. Fixed protection may be unreliable or non-existent. This article is to serve as a guide to the climbing options at John Bryan State Park and does not serve in the place of actual climbing experience or education. If you are unsure, new, unfamiliar, or out of practice, we recommend taking our courses that provide a formal and professionally guided climbing education or seeking instruction from another local reputable guide service.
As always, climb on.
Photographs in this article were provided by Michael Ryan Bretz Photography.

Leave a comment